Home Blog Page 13

Activate.amazon-corp.com – How to Enter the Code for Amazon Device

0

Activate.amazon-corp.com is a secure internal web address used by Amazon employees, contractors, or corporate partners to activate work-related devices. It’s a welcome gate for any corporate tech Amazon hands out be it laptops, mobile devices, or smart tools.

Activate.amazon-corp.com

This portal is locked behind Amazon’s corporate infrastructure, so if you’re not affiliated with the company or part of an approved vendor or partnership, it’s a no-go zone. The entire goal of activate.amazon-corp.com is to get work devices up and running securely without any risk of tampering or unauthorized use.

The process is mostly automated, but secure. Once you visit the page (usually after getting a device from Amazon IT), it walks you through authentication, identity confirmation, and then connects the device to Amazon’s internal systems.

Who Uses It and Why It Matters

I’ll tell you who’s using activate.amazon-corp.com, not customers, not the average internet user, but employees of one of the biggest tech giants in the world. From full-time engineers in Seattle to remote contractors or warehouse management staff across the globe, this portal is a key part of device onboarding.

Why does this matter? For one, security. When you’re handling sensitive corporate data like proprietary code, customer information, or internal documentation, you can’t just trust a device out of the box. Amazon needs to know exactly who is using that device and what it’s being used for. And that’s where activate.amazon-corp.com steps in.

Why You Might Need to Visit activate.amazon-corp.com

Setting Up an Amazon Corporate Device

Let’s say you just got a shiny new laptop from Amazon’s IT department. What’s the first thing you should do? Power it on, of course. But then, instead of heading straight to your email or Slack, you’re asked to visit activate.amazon-corp.com.

This isn’t just a formality. Before the device can be used for actual work, it needs to be authenticated and registered on Amazon’s systems. This ensures that everything about that machine, from its software version to its user credentials, is aligned with Amazon’s internal security standards.

So, if you’re sitting there staring at a screen telling you to “activate your device,” don’t panic. Just connect to the internet, head over to activate.amazon-corp.com, and start the process.

Initial Activation for Employees and Contractors

Let me be honest, this part can feel a little intimidating if it’s your first time. You’re likely staring at a login screen, wondering why you need to jump through hoops just to use a laptop. But trust me, it’s worth it.

If you’re a full-time employee, you’ll probably have a username and temporary password given by HR or IT. If you’re a contractor, you might need to authenticate through a different secure method, like an external provider linked with Amazon’s identity system. Either way, the goal is the same: prove that you are who you say you are.

Once you’re in, the site takes over. It usually verifies your device’s serial number, links it to your employee record, and installs necessary corporate profiles and software packages. In some cases, your email and access permissions get configured automatically. That’s the beauty of centralized activation it does all the boring admin stuff for you.

Common Scenarios in Corporate Environments

Here’s a few real-life examples of when someone might hit up activate.amazon-corp.com:

  • A remote employee receiving their device through courier.
  • A warehouse manager activating a tablet to track inventory.
  • A software engineer setting up their machine after a hardware refresh.
  • A consultant being onboarded for a short-term project.

All these scenarios rely on this one platform to get devices business-ready without jumping through unnecessary hoops.

Prevent Unauthorized Use

One of the main reasons Amazon keeps the activate.amazon-corp.com process behind lock and key is to prevent people from hijacking or misusing corporate tools. Think about it, if someone could just grab an Amazon-issued laptop off eBay and jump into Amazon’s internal systems, that’d be a nightmare.

That’s why you’ll never see activate.amazon-corp.com function outside of specific networks. Sometimes, you even need to be on an internal VPN or physical corporate network to access the site. That way, only devices handled through proper channels make it through the activation process.

How to Access activate.amazon-corp.com Securely

Access Requirements (VPN, Corporate Network)

If you’re trying to access activate.amazon-corp.com from your home Wi-Fi without a VPN, you’ll likely hit a brick wall. I’ve been there. It doesn’t just open up like Google or Netflix. To access the site, you often need to:

  • Be on Amazon’s corporate Wi-Fi (if you’re on-site).
  • Use a secure Amazon-issued VPN if you’re remote.
  • Sometimes, have access to a specific internal domain or firewall setting.

And if you don’t meet those requirements? The page might not even load. Or worse, you’ll get an error message saying “site can’t be reached.” That’s how tightly they control access.

Login Credentials and Authentication Factors

Logging in is where things get serious. You’ll need:

  • Your Amazon employee or contractor ID.
  • A password (often temporary on first use).
  • Possibly a security token or app-based confirmation like Duo Mobile.

And here’s a tip from experience: make sure your login details are entered exactly as instructed. Even a small mistake like an uppercase letter or a forgotten domain can trip you up. Follow the prompts carefully, and don’t rush it.

Multi-Factor Authentication (MFA)

Have you ever had to approve a login from your phone while logging in on your laptop? Yep, that’s MFA. Amazon is all about layered security, so most logins to activate.amazon-corp.com will include MFA.

That means, after entering your username and password, you’ll need to:

  • Approve the login on a registered mobile app.
  • Enter a one-time passcode from your authenticator app.
  • Respond to a text or phone prompt, depending on your setup.

It’s a small extra step, but it’s crucial for keeping company data safe. Plus, you’ll probably use the same MFA method for other Amazon tools, so it’s worth getting familiar with.

Troubleshooting Access Issues

Alright, what if something goes wrong? Maybe the site won’t load, your credentials don’t work, or MFA keeps timing out. Don’t worry, it happens more than you’d think.

Here’s what you can do:

  1. Double-check your network – Are you on the correct Wi-Fi or VPN?
  2. Verify your login – Confirm that you’re using the correct format (e.g., firstname.lastname@amazon.com).
  3. Try a different browser – Sometimes browser extensions or security settings interfere.
  4. Clear cookies/cache – An old session might be causing issues.
  5. Call or message IT – Amazon’s internal helpdesk can often reset credentials or guide you through the setup process.

Honestly, I’ve been locked out more than once during onboarding. The key is staying calm and methodical.

Step-by-Step Guide to Activating Your Device

Step 1: Connect to Network

Before doing anything else, make sure you’re online. If you’re on-site, that’s likely a secure Wi-Fi called something like “AMZN-CORP.” Also, if you’re remote, make sure the Amazon VPN client is running.

If the device is brand new, it might already have VPN pre-installed. You’ll usually get a quick-start sheet from IT with the login process, follow it carefully.

Step 2: Navigate to activate.amazon-corp.com

Once you’re connected, open your browser and head to the activation page. Type in activate.amazon-corp.com exactly, or use the link provided in your IT documentation. If it doesn’t load, double-check that you’re on the correct network or VPN.

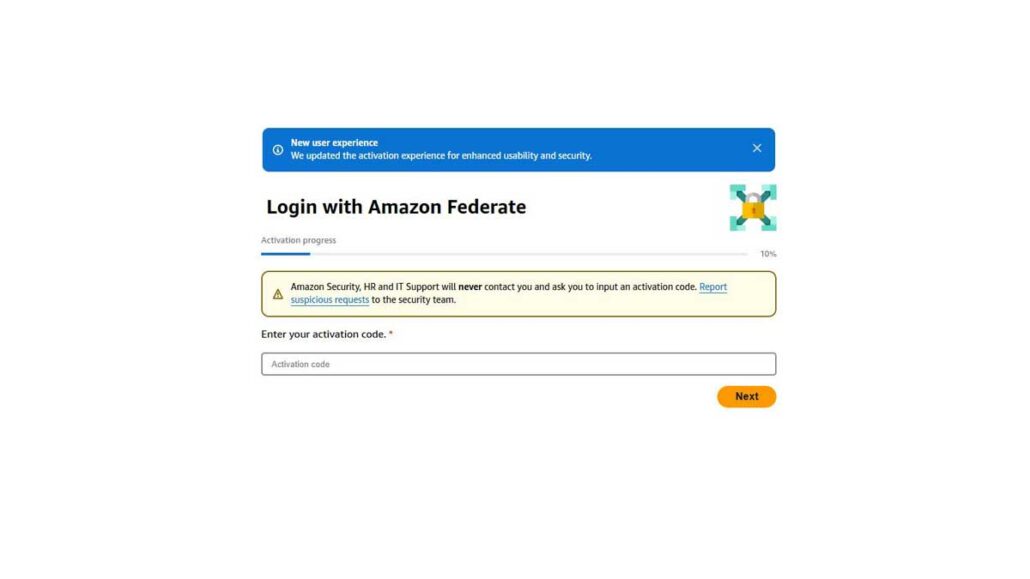
You should see a secure login portal, usually branded with Amazon’s logo and some internal branding.

Step 3: Enter Credentials and Follow Prompts

Now comes the login part. Enter your user ID and temporary password, then proceed through MFA if required. After successful login, the page should begin verifying your device.

You might see messages like:

  • “Verifying Device Serial Number”
  • “Installing Configuration Profiles”
  • “Activating Work Environment”

This process usually takes 5–15 minutes. If the site asks for extra permissions, say yes. It’s just the system making sure everything’s synced up.

Step 4: Complete Activation and Confirmation

Once all steps are completed, you’ll see a message like:

  • “Device successfully activated. You may now begin using Amazon internal tools.”

And that’s it. You’re now officially connected and ready to work.

Common Activation Errors and Fixes

Invalid Credentials

One of the most frustrating moments I’ve had during activation was being told my credentials were invalid. You know that gut-dropping moment when you enter your username and password, and instead of a welcome screen, you get slapped with an “Invalid Login” message? Yeah, it sucks.

But don’t panic, there’s usually a simple fix. First, double-check your spelling. Are you using the correct domain in your email? Are there any typos? Sometimes Amazon uses variations like @amazon.com, @amazon-corp.com, or even contractor-specific logins.

Next, if it’s your first time logging in, there’s a good chance your password has expired or you never set it up properly. Reach out to IT support, they can reset your credentials in minutes. And if you’re a contractor, your login might be tied to a third-party system, so make sure you’re accessing the correct portal version.

SSL or Certificate Errors

You might run into weird browser messages like “Your connection is not private” or “SSL certificate not trusted.” I’ve had these pop up, and they can be pretty intimidating if you’re not tech-savvy.

This typically happens when:

  • You’re using a personal device without corporate certificates.
  • Your browser is outdated.
  • You’re accessing the portal from the wrong network.

Here’s how to fix it:

  • Update your browser to the latest version.
  • Make sure you’re on a corporate-issued device with all the security certificates installed.
  • Switch to a different network or connect to the Amazon VPN.

And whatever you do, don’t bypass the warning by clicking “Proceed anyway.” It’s not just a bad idea; it can compromise your device.

Network Connectivity Problems

This one’s a classic. You’re all set to activate your device, but the page won’t load or gets stuck halfway. Nine times out of ten, it’s a network issue.

If you’re on Amazon’s VPN, check the connection status. Maybe it dropped or didn’t establish properly. Try reconnecting or switching to a wired network if possible.

Another tip: reboot the device. I know, it sounds cliché, but a simple restart can solve all kinds of connectivity problems. If that doesn’t work, escalate it to your IT department, they can remotely diagnose network settings and proxy configurations.

Contacting IT Support

When all else fails, don’t be afraid to call in backup. Amazon’s IT support is surprisingly fast and friendly (at least in my experience). Keep the following info ready before you contact them:

  • Your employee ID or contractor number
  • The exact error message or screenshot
  • What step you were on when the issue occurred
  • Your device’s serial number (usually on a sticker)

They might ask to remote into your system or walk you through terminal commands, so be ready to follow instructions closely.

Best Practices for Corporate Device Activation

Use of Managed Devices Only

I can’t stress this enough, only use Amazon-approved or managed devices when accessing activate.amazon-corp.com. Trying to activate a personal laptop or an old hand-me-down from a coworker isn’t just against policy, it could get your access revoked.

Managed devices are pre-configured with Amazon’s security protocols, VPN clients, and encryption settings. That means fewer errors, smoother activation, and better protection for sensitive data.

And let’s be honest, why risk it? If Amazon’s providing you with hardware, trust their ecosystem. It’s built to work seamlessly with internal systems.

Regular Updates and Patching

Once your device is activated, you’re not off the hook. Keeping it updated is part of the deal. Updates often include patches that keep security threats at bay. Amazon’s internal IT tools usually automate this, but you still have a role to play.

Every time you get a notification for:

  • OS updates
  • VPN client updates
  • Security patches

Don’t snooze it. Just do it. And if you’re unsure, ping IT for clarity. Staying updated is part of being a responsible employee or contractor.

Keeping Credentials Secure

This one’s huge. Your login info is like the keys to Amazon’s digital kingdom. Here’s how I keep mine safe:

  • Never write down passwords or leave sticky notes on your monitor.
  • Use a password manager approved by Amazon IT.
  • Don’t share your credentials with anyone not even colleagues.
  • Change your password regularly and follow password guidelines.

Also, don’t fall for phishing emails or strange login requests. If something feels off, it probably is. When in doubt, report it.

FAQs About activate.amazon-corp.com

Is activate.amazon-corp.com used by non-Amazon employees?

Generally, no. It’s designed specifically for Amazon employees, contractors, and vetted third-party partners. If you’re not on the list, you likely won’t be able to access it even if you have the link.

Can I bypass activation on personal devices?

Nope. It’s not recommended and usually not even possible. The system checks device identifiers and security certificates. If it’s not a recognized corporate machine, the portal will block or ignore your request.

What if MFA isn’t working?

Check your phone’s internet connection, make sure the Authenticator app is updated, and verify your clock settings are synced correctly. Still stuck? Contact IT support—they can reset your MFA settings or issue a temporary bypass.

What role does IT support play in activation?

They’re your lifeline. From setting up your credentials to troubleshooting errors, Amazon’s IT team is trained to assist with every step of the activate.amazon-corp.com journey. Don’t hesitate to reach out.

Conclusion

If you’ve made it this far, you now have a full, hands-on understanding of what activate.amazon-corp.com is all about. From secure device setup to troubleshooting and best practices, this guide should help you navigate every step of the way confidently and safely. Whether you’re a first-day Amazon employee or a seasoned contractor, this tool is your starting point for getting down to business the right way.

Data Engineer Jobs in USA with Visa Sponsorship

0

Data Engineer Jobs in USA with Visa Sponsorship: Where Can I Apply? A lot of data engineer jobs come with visa sponsorship and also a salary starting from around $90,000 USD per year and can go all to $160,000 USD or even to $180,000 USD depending certain aspects like cities and experiences. That’s something huge if you were to ask me, especially when you factor in things like relocation help and benefits. If you have been considering taking your data engineering skills to the USA, you have the opportunity to apply for Data Engineer Jobs in USA with Visa Sponsorship.

There are lots of high-tech companies in the United States, such as Google, Amazon, Facebook, and Netflix in high demand for data engineers than ever before. But currently, mid-sized firms and startups companies are jumping on the data bandwagon. And this means more opportunities for you, especially if you’re well-skilled and looking to relocate to the USA.

How Visa Sponsorship Works in the Tech Industry

There are various types of visas, and these depend on the type of job. The way visa sponsorship works is that it’s a legal arrangement where the company tell the US government that they want to hire someone from another country to come work in the United States.

H-1B visas are most widely used for non-immigrant workers, which allows US employers to temporarily employ foreign workers in specialty occupations like data engineering. There are other types of visas like OPT (meaning Optional Practical Training), L1 transfer for people already working in a multinational, and also O1 visas made for talented individuals.

Companies that offer visa sponsorship know the procedures; therefore, we a large number of applicants, you need to bring you’re A-game. Plus, a strong resume, showcasing relevant experience and also proving that you’re worth the candidate they need.

What Does a Data Engineer Actually Do?

If you are applying for data engineer jobs in USA with visa sponsorship, you need to be fully aware of what that job entails. Data engineering is far beyond coding or handling databases. The role includes building and maintaining the architecture like databased and large-scale processing systems that data scientists and analysts use to interpret data.

Here are some of what data engineer does:

  • Design and develop scalable data pipelines
  • Create data tools for analytics and data science teams
  • Integrate raw data from different sources into a clean, consistent format.
  • Optimize database performance and storage.

Most of the tools you might be working with include Python, SQL, Spark, Hadoop, AWS, GCP, Airflow, and Docker. To earn the big spot and put yourself on the radar of big employers, you need to be more proficient.

Salary Expectations for Data Engineers in the USA

You might be wondering how much can I earn as a data engineer in the United States since the money is quite important. Here is a table that allows the average annual salaries by states for data engineers.

StateAverage Salary
California$135,000 USD – $165,000 USD
New York$125,000 USD – $155,000 USD
Texas$115,000 USD – $140,000 USD
Washington$130,000 USD – $160,000 USD
Illinois$110,000 USD – $135,000 USD
Florida$100,000 USD – $125,000 USD
North Carolina$105,000 USD – $130,000 USD
Massachusetts$120,000 USD – $145,000 USD

From the table, California and Washington offer the highest salaries, perhaps because they host tech giants such as Google, Meta, Amazon, and Microsoft. But keep in mind that if you are looking to work in this state, the cost of living are high in those states.

Salary Based on Experience Level

Your level of experience is also another factor to look at  in terms of how much you can earn. Here is a rough guide of the salary based on experience:

  • Entry-Level (0–2 years): $85,000 USD – $110,000 USD
  • Mid-Level (3–5 years): $115,000 USD – $135,000 USD
  • Senior-Level (6–9 years): $140,000 USD – $165,000 USD
  • Lead/Principal Engineer (10+ years): $165,000 USD – $200,000+ USD

Also, companies tend to offer equity, bonuses, and relocation packages—especially if they’re bringing you in from abroad. Some even cover your H-1B application and legal fees. So don’t just look at the base salary. Ask about the whole compensation package.

Types of Data Engineer Jobs Available in the USA

Entry-Level Data Engineering Jobs

Currently, there are lots of entry-level data engineer jobs in USA with visa sponsorship from startups and consulting firms. The role of an entry-level data engineering job requires knowing the basics and also having a strong willingness to learn on the job.

Some of the role entails:

  • Assisting in building data pipelines.
  • Writing basic SQL queries.
  • Monitoring data quality and helping maintain data lakes.

The most important thing is your hunger to learn. Internship, GitHub project, and personal portfolios give you the advantage that you need if you don’t have much level of working experience.

Mid-Level to Senior Roles

If the level of experience is from 3-6 years, you’re in a more advantageous spot. Mid-level role comes with greater responsibility and a great level of skills, plus it pays better. Some of the role include leading small teams of engineers, managing data platforms, or owning entire data infrastructure pipelines.

For senior-level positions (7+ years), companies look for people who can:

  • Architect complex systems.
  • Drive data governance.
  • Mentor junior engineers.

These roles are prime for visa sponsorship because companies are often desperate for leadership talent that can hit the ground running.

Specialized Roles Like Big Data Engineer or ML Data Engineer

The space world of data engineering is vast. Therefore, some companies tend to hire engineers with high level of skills rather than generalists.

  • Big Data Engineer: They focuses on processing high-volume datasets using tools like Hadoop, Spark, and Kafka.
  • ML Data Engineer: Works closely with data scientists to build pipelines that support machine learning models.

If you’ve got experience in one of these niches, you’re in luck. These roles are high-demand and low-supply, making them a hot spot for visa sponsorship opportunities.

Where to Find Data Engineer Jobs with Visa Sponsorship

Top Job Portals for International Applicants

In terms of finding data engineer jobs in USA with visa sponsorship, not only do you need luck, but you also need God on your side. Here are some of the USA job platforms that offer you an opportunity:

  • LinkedIn: use the search word “visa sponsorship available”
  • Indeed: use the search word “data engineer H-1B” or “data engineer visa sponsorship”
  • Glassdoor: highly recommended for salary insights and company reviews
  • H1Bdata.info: this shows which companies recently filed H-1B petitions.
  • Stack Overflow Jobs & AngelList: Especially good for startup jobs

These are reliable platforms where you can find data engineer jobs in USA with visa sponsorship. You can dig deeper in search of companies open to hiring international talent.

How to Filter for Visa Sponsorship Opportunities

To get the best result, there are certain trick you need to use on your search for job. Don’t just use plain keyword like “data engineer”. This are some the tricks to use in your search:

  • “Data engineer H-1B”
  • “Data engineer OPT”
  • “Data engineer sponsorship visa”

Also, always look at the job descriptions. If the company posts on their job description “must be authorized to work in the US” without offering sponsorship, you can skip that. What you need to what out for are explicitly companies that offer sponsorship or are posted by companies known to sponsor.

Top Companies Offering Visa Sponsorship for Data Engineers

FAANG and Beyond

 When looking for companies that offer data engineer job in USA with visa sponsorship, there are lots of big names on the list, like FAANG (Facebook, Apple, Amazon, Netflix, and Google) are well-known for hiring international talent and offering the visa from start to finish.

The benefits of working in the companies include:

  • High salary of about $150,000+ for mid-level roles
  • Amazing benefits such as stock options, health insurance and relocation assistance.
  • Dedicated immigration lawyer and internal HR teams that help in handling all the needed paperwork for your visa process seamlessly.

But don’t just stop at FAANG, other tech giants offers visa sponsorship such as”

  • Microsoft
  • Salesforce
  • Oracle
  • Intel and Nvidia
  • LinkedIn and Twitter.

Startups That Welcome International Talent

A lot of people underestimate startups, and my advice is don’t. Many of the startups are VC-funded and the demand for skilled data engineers are in great demand. They may not offer huge salary like other tech giant, but they compensate well with the following:

  • Equity (stock ownership).
  • Flexible remote options.
  • Fast growth and career development.

You can look out for platforms such as AngelList, Y Combinator Jobs, and TechStars Talent.

Visa Types Suitable for Data Engineer Jobs

H-1B Visa – The Most Common Route

H1-B visa is the most popular type of visa offered by companies looking to hire foreign workers. Here’s something to know about the H1-B visa

  • It’s a non-immigrant visa valid for up to 6 years.
  • You need a bachelor’s degree or higher in a related field.
  • It requires employer sponsorship (you can’t apply on your own).
  • Applications open once a year in March and go through a lottery system.

Optional Practical Training (OPT) and STEM OPT

If you graduated from a university in the United States, you can make use of the opportunity of OPT and STEM OPT extensions. Here’s something to know about the OPT:

  • OPT allows you to work for 12 months after graduation.
  • If your degree is STEM-qualified (like CS or Data Science), you can get a 24-month extension—that’s 3 full years of work authorization.

A lot of international students make use of OPT as a means of advancing their career and landing their first U.S. job.

L1, O1, and Green Card Pathways

Other types of visas you can watch out for include the following:

  • L1 visa: This is good for people who are already working for a multinational company.
  • O1 visa: This is good for someone with extraordinary abilities.
  • Green Card (EB2/EB3): Few companies offer sponsorship directly for permanent residency, but it’s a long process.

How to Apply for Data Engineering Jobs from Abroad

Resume and Portfolio Tips

Now, let’s move to the important part. If you are looking to land a data engineer job in the United States with visa sponsorship, one thing you need to tackle is your resume. Your resume must present the information “I can solve problems”.

Here are the following things you need to add to your resume:

  • Customise your resume for each job. Use keywords from the job description.
  • Showcase metrics. “Reduced ETL time by 45%” is better than “Built ETL pipelines.”
  • List relevant tools. SQL, Python, Airflow, AWS, Spark whatever applies to the role.
  • Use GitHub. Share your code. Build a few data pipeline projects that anyone can see.

Also, you need a very strong LinkedIn profile. Therefore, ensure that you build your LinkedIn profile very well.

Interview Process and Preparation

Next up  is to prepare for interview

  • Phone screening: you interviewer or the HR might ask question like your availability, salary expectation, and also visa status
  • Technical screening: you might be asked to code live in Python or SQL
  • Take-home assignment or system design task
  • Final interviews with engineering managers and team leads.

Copypaste and Form Filling Jobs USA No Fee

0

Have you ever heard of copypaste and form filling jobs USA with no fee? I’m just learning about it, and I have decided to share my knowledge about it. Also, you know that you can earn about $300 USD to $800 USD per week and $1,200 USD to $3,200 USD per month by simply doing online work without paying any upfront fees. In this article, we will provide you with everything you need to know about copypaste and form filling jobs in the USA with no fee.

What are Copypaste and Form Filling Jobs USA No Fee?

First of all, before we dive into the requirements and application, we need to understand what a copypaste and form filling job is all about. However, copypaste jobs are considered online gigs where you are provided content, such as text or links, and then you have the responsibility of pasting it somewhere else. You might be required to paste it on platforms like websites, social media, or emails.

Form filling jobs are actually what it sound like, this is a type of job where you are provided with an online form, mostly for surveys or data collection, and you fill them out following instructions provided by the employer.

Copypaste and form filling jobs in USA are jobs offered by companies that don’t ask employees for upfront payment to work. For some, the amount of money paid or earned is about $0.05 to $0.50 per form, all depending on what that form is all about. If you are serious and consistent with the job, you can earn a figure of about $400 USD to $800 per month.

How Much Can You Actually Earn?

Wondering how much I can earn working in copypaste and form filling job in the USA? Here is a total breakdown of how much you can earn:

  • Per form filled: $0.05 USD – $0.50 USD
  • Simple copy-paste task: $0.02 USD – $0.15 USD per post
  • Daily earning (beginner): $10 USD – $25 USD per day
  • Monthly earnings (consistent): $300 USD – $800 USD per month
  • Pro level (if you find reliable platforms): Up to $1,000 USD per month.

Certain factors do influence how much you can earn. if you put your mind to it, you can earn more than $400 USD to $600 USD earn month.

Salary Range in Different U.S. Cities

Just like I mentioned earlier, certain factors can influence your salary working as a copypaste and form filling job, and one of them is the cities. Here’s an estimate of what others are earning in cities such as New Your City, Los Angeles and others:

CityMonthly Earning (USD)
New Your City$400 USD – $800 USD
Los Angeles$350 USD – $750 USD
Chicago$400 USD – $800 USD
Houston$350 USD – $750 USD
Miami$350 USD – $700 USD

Note that this is just a remote job, therefore, you don’t need to be in any of these cities to apply. The rates are mostly the same in all the cities in the country.

Skills You Need for Copypaste and Form Filling Jobs

The interesting thing about this job is that you don’t need a high level degree to apply and you don’t need much skills. Here are what’s recommended before applying for the job in USA:

  • Basic computer skills (such as copy, paste, and type)
  • Strong internet connection to ensure continuous work.
  • Need to be very attentive to every detail (forms have to be filled properly, otherwise, you don’t get paid)
  • Time management.

There are some of the most important skills you need, and you don’t need any educational qualification for the application.  Even if you’re new to online work, this is an opportunity to start building some steady income while working on your professional work.

Pros and Cons of Copypaste and Form Filling Jobs USA No Fee

Not every jobs are 100% good or best, there are always ups and downs in every job you do. Here are some of the benefit and the disadvantage of doing this kind of work:

Pros

  • No upfront fee required
  • Flexible job (you can work anywhere in the world)
  • No degree or advanced skills needed
  • Good for side hustle
  • Decent side income potential

Cons

  • Some platforms fail to make payments to their employees
  • It can get repetitive (copy, paste, copy, paste… you get the idea)
  • Scams do exist you’ve got to be sharp

How to Find Legit Copypaste and Form Filling Jobs USA No Fee

This is the most important aspect that you need to consider when looking for copypaste and form filling jobs in the United States with no fee. There are lots of scams out there; therefore, you need to be careful when choosing a job. Here is what you need to do before applying for copypaste and form filling jobs USA with no fee:

  1. Use Trusted Platforms: There are reliable USA jobs platforms like Upwork, Fiverr, Clickworker, and Microworkers where you can find trusted jobs. These platforms list thousands of jobs, including copypaste and form filling jobs and other jobs as well. Plus, they don’t require upfront fees to join.
  2. Avoid “Registration Fees”: if you access any platform and you are asked to pay an upfront fee of about $10 USD or $25 USD, all you need to do is close the tab. It’s the company that pays, and not you paying them.
  3. Join Online Communities: You can join online communities or groups like Facebook and Reddit, where you can find legitimate jobs. There you’ll see honest feedback on job postings.
  4. Start Small: on your first trial, don’t be fully committed, because most of the jobs don’t pay even after doing all the tasks. Therefore, on your first job, don’t show full commitment until you have been paid on time.

FAQs

Are these jobs available for international applicants?

Yes, many platforms accept freelancers worldwide. Just make sure you follow local tax and banking guidelines.

How can I avoid scams in this industry?

Never pay upfront, always check for verified reviews, and stick to platforms with buyer protection (like Upwork or Fiverr).

Can I do this as a full-time job?

Yes, but you’ll need to stack multiple clients and manage your time well. Most people start part-time and scale up.

Do I need a college degree?

Not at all. What matters more is attention to detail, typing skills, and being reliable.

How much can a beginner really make?

Most beginners earn between $100–$500 per month. With experience and consistency, it can grow to $1,000–$2,000+.

Conclusions

Copypaste and form filling jobs USA no fee are legitimate, and it’s a good side hustle to make $300 USD to $800 USD per month with no special skills required or paying anyone upfront. For someone looking for a job, all that’s required is that you be patient, consistent and smart about where you find these jobs.

What Lawyer Wasn’t Able to Find Documents Because of Technology

0

What lawyer wasn’t able to find documents because of technology? That was me at least once in my career. You’d think with all the advances we’ve made, losing a file would be nearly impossible. But let me tell you, technology isn’t always the friend we expect it to be, especially in the high-pressure world of law.

It was a cold Monday morning, and I was in court with a major case on the line. Everything seemed ready my briefcase, my suit, my confidence. Then, bam! The judge asked for one specific document, and I couldn’t find it. I swore I saved it. I swore I labeled it. But technology had another plan. In that moment, I realized how one tiny digital hiccup could jeopardize not just a case, but someone’s trust, livelihood, and even freedom.

If you’re a lawyer or anyone working in a profession where digital files rule your day, this might hit a little too close to home. But don’t worry, we’re in this together. Let’s talk about why this happens, how to avoid it, and what lessons I learned so you don’t end up sweating in front of a judge like I did.

How Much is Homeowners Insurance on a $150000 House
How Much Would a $1000 Payday Loan Cost
Mortgage Lenders have the Lowest Rates
Get a Loan- Find a Loan Lender
Housing Assistance Payments
Mortgage 30 Year Fixed Rate – Find the Best Rates & Info
Mortgage 0 Down – Buy a Home with No Down Payment
Loan Discharge – Understand Your Options & Eligibility
Loan Xpress Pay – Fast Online Personal Loans
Loan 3000 – Get a $3000 Loan Instantly
Loan to Pay Off Credit Cards – Consolidate Debt & Save Money
Mortgage 150k House – How Much House Can I Afford

The Digital Shift in Legal Work

Let’s rewind a bit. There was a time when lawyers dealt only with paper. You’d walk into a law office and find walls lined with manila folders, cabinets stuffed with evidence, contracts, case notes all physically filed and tagged. It was chaotic, sure, but at least it was tangible. You could feel your case in your hands.

Then came the big shift technology. Suddenly, everything started going digital. Courts began accepting e-filings. Law firms started using cloud storage, and “paperless office” became the buzzword. It sounded exciting, like the future was finally here. But nobody warned us about the growing pains.

In the beginning, many of us weren’t trained properly. We weren’t IT experts we were legal minds. We knew how to interpret the law, not troubleshoot missing files. But the pressure to adapt was huge. Partners didn’t want to hear about tech issues. Clients didn’t either. You were just supposed to know.

With the shift, came a new kind of disorganization. Files were saved on desktops, shared drives, emails even USB sticks (yikes). And without a solid system, things started slipping through the cracks. One misplaced file name or wrong folder, and boom it was gone.

I still remember the confusion when a junior associate sent a discovery document saved under “random.final.realfinal.useTHIS.docx.” Try finding that under pressure.

So yes, technology made us faster, but it also made our mistakes faster. If you’re nodding along, you’re probably remembering your own tech horror story too.

Early Struggles with Legal Tech

I wasn’t the only one struggling. Many lawyers around me faced similar challenges. Legal tech tools were introduced with good intentions, but often, they were either too complicated or poorly implemented.

For example, the firm I worked with invested in an expensive document management system (DMS). The idea was brilliant it would tag, categorize, and archive every document. But nobody showed us how to use it properly. The interface was clunky. Searches returned irrelevant results. And when we needed something quickly, the system was more of a barrier than a bridge.

This lack of proper onboarding was a big issue. People were scared to admit they didn’t get it. So, they created workarounds. Some saved files to their desktop. Others bypassed the system altogether. It created a fragmented digital ecosystem where critical documents could vanish into thin air.

One time, a colleague of mine spent two hours looking for a contract that had been mislabeled under a completely unrelated client’s folder. The kicker? The contract’s title had a typo, so even the search function couldn’t find it.

It’s not that lawyers are bad with technology it’s that the systems weren’t built with us in mind. We need simplicity. We need clarity. And most importantly, we need training.

If you’re stepping into law now, I beg you don’t skip the tech basics. It’ll save you hours of frustration and maybe your career one day.

The Lawyer Who Couldn’t Find the File

Here’s where it gets personal. Let me walk you through that day the one that still haunts me. I had prepared for this court date for weeks. Witnesses lined up, strategy tight, paperwork triple-checked or so I thought.

During the hearing, the judge asked to review a specific exhibit. I knew it was important, so I had made sure to scan and upload it. But when I searched the folder, it wasn’t there. My stomach dropped.

I tried searching keywords, file types, everything. Nothing worked. I even excused myself to check on another computer. Still nothing. It felt like the earth opened up under my feet.

Turns out, the file had been accidentally saved in a subfolder buried under three layers of unrelated case materials. The file name? “ClientNotes_Draft2_REDO”. Not exactly helpful under pressure.

Because I couldn’t produce the document on time, the hearing was postponed. The client was furious. I was embarrassed. And the judge well, let’s just say I lost a few credibility points that day.

That moment taught me that digital organization isn’t just admin work it’s essential to practicing law in the modern world. You can be the smartest lawyer in the room, but if you can’t find your files, none of that matters.

The Role of Legal Document Management Systems

Now let’s talk systems. Document management systems (DMS) are supposed to be the holy grail for legal work. They’re designed to store, tag, and retrieve documents with ease. But in reality? They’re only as good as the people using them.

I’ve seen firms invest tens of thousands in systems like iManage, NetDocuments, or even custom-built platforms. But then they skip the training. That’s like buying a Ferrari and never learning to drive stick.

Most DMS failures happen because of user error. Someone uploads a document to the wrong folder. Another person renames it without updating references. Before you know it, the system becomes a digital maze.

And let’s not even get started on metadata. If it’s not tagged correctly date, client name, case type it may as well not exist. When deadlines loom and you’re searching for a needle in a haystack, a poorly maintained DMS becomes your worst nightmare.

I’ve since learned to set up naming conventions, organize folders clearly, and educate my team on best practices. It’s not glamorous, but it’s powerful. Because the next time the judge asks for that one document, I’ll have it ready in seconds not hours.

Search Errors and Metadata Mismanagement

You’d be surprised how many times documents go missing not because they were never created, but because they were buried under bad metadata or search issues. I’ve personally seen this happen more times than I can count. Even with the most advanced document systems, if your metadata’s a mess, your documents are as good as gone.

Let me break it down. Metadata is the information that describes your file like the date it was created, who authored it, what case it belongs to, and keywords. Sounds helpful, right? It is if done right. But in most law offices, people are in a rush. They upload files with missing or incorrect tags. Sometimes it’s just labeled “Client Notes” or “Draft Final.” Helpful? Not at all.

There was a time I needed to retrieve a contract that was supposed to be linked to a high-profile M&A case. We had every document under the sun in the system except the one the senior partner wanted. Turns out it had been saved under a totally different client’s name. No tags. No case ID. And because it didn’t have the right metadata, our search software couldn’t locate it.

You might think, “Just Google it in the system!” but legal DMS isn’t that simple. These platforms rely heavily on structured data. If you’re not consistent with naming conventions or tagging fields, you’re basically throwing files into a black hole.

So what’s the solution? Consistency. Train your team on how to input metadata correctly. Create checklists. Use templates. Make sure everyone knows the importance of tags and labels not just the IT guy, but every associate, intern, and partner.

And for the love of everything legal, don’t ignore version control. I once had three people working on a deposition draft each saved it as “Final,” “Revised Final,” and “Actual Final.” Guess which one got sent to the client? The wrong one. That kind of mix-up can damage your credibility faster than you can say “objection.”

When Technology Fails, Justice Suffers

This might sound dramatic, but it’s true: when legal technology fails or more accurately, when we fail to use it properly justice can take a serious hit. I’m not just talking about delays or inconvenience. I’m talking about real consequences. Cases dismissed. Rights violated. Clients losing everything.

One of the most painful cases I remember involved a wrongful termination suit. The client had been fired without notice and claimed retaliation. We had strong evidence email chains, policy violations, everything. But during discovery, a few of the most damning documents weren’t submitted. Why? Because they were misfiled in a folder labeled with an outdated project name.

By the time we found the missing emails, the court had already ruled on a critical motion. The damage was done. We tried to argue for reconsideration, but the judge wasn’t having it. That client didn’t just lose their job. They lost their shot at justice all because we couldn’t manage our files.

Imagine being in that position. Imagine having to look a client in the eye and tell them, “We had the proof, but we couldn’t find it in time.” That’s a conversation I’ll never forget and one I hope you never have to have.

Legal technology is supposed to make us better, faster, and more efficient. But when we misuse it or worse, ignore it we become the bottleneck in the justice system. And in our field, that’s unacceptable.

So if you’re reading this thinking, “It won’t happen to me,” think again. It happened to me. It’s happened to some of the best lawyers I know. Don’t let it happen to you.

Missed Deadlines and Lost Opportunities

You can’t talk about technology fails in the legal world without talking about deadlines. Court deadlines aren’t suggestions they’re mandates. And when you miss one, it’s not just embarrassing. It’s career-threatening.

One of the worst tech slip-ups I witnessed was during an appellate case. The firm had everything ready. The brief was solid, the arguments tight. But someone uploaded the final draft to a shared drive and assumed someone else would file it. They didn’t. The calendar system hadn’t been updated with the deadline because a team member didn’t sync it correctly with our DMS.

Guess what? The deadline passed. The appeal was never submitted. Case closed literally.

You might be thinking, “That’s just a process error.” But that’s the thing: legal technology and process go hand in hand. If you’re relying on tech to manage your workflow but don’t double-check it or understand how it functions, you’re setting yourself up for disaster.

I’ve missed opportunities too. There was a real estate deal once where I had a golden window to submit a revised contract. The new version had been saved on a local drive instead of our cloud system. When I logged in remotely, I didn’t see it. I assumed it wasn’t done. So I didn’t send it. By the time I realized what happened, the buyer backed out. The client lost the deal.

What do you think they remembered the fact that we had a beautiful draft ready? Nope. They remembered the mistake.

In law, perception matters. You’re only as good as your last case, your last filing, your last win. Don’t let poor tech habits define your legacy.

The Pressure and Panic of the Courtroom

There’s a special kind of fear that hits when you’re standing in court and realize you’re missing a file. I’ve felt it, and believe me, it’s not something you want to experience.

You feel your heart race, your palms sweat, your brain go blank. Suddenly, all your legal training feels useless. You start to scramble, clicking through folders, refreshing screens, praying for a miracle. Meanwhile, the judge waits. The opposing counsel smirks. And your client—well, they look at you like you’ve just betrayed them.

That one moment of technical failure overshadows all your preparation. All the late nights. All the research. All the strategy. Gone in a blink.

I once watched a senior partner, someone I deeply respected, completely unravel because his tablet froze mid-presentation. The file he needed wasn’t on paper, just on his device. No backup. No printout. And in front of the entire courtroom, he stood there, defeated.

Technology is a double-edged sword. When it works, it’s magic. When it doesn’t, it’s mayhem. But the pressure of the courtroom doesn’t pause for tech issues. It doesn’t care about software glitches or sync problems. It demands results.

That’s why I now carry printed versions of key documents—just in case. That’s why I triple-check my files the night before court. And that’s why I want you to understand: your tech routine can either be your safety net or your downfall.

Tools That Make a Difference

Let me give you a few lifesavers tools that have personally rescued me from document disasters. If you’re not using tech the right way, you’re not just behind you’re at risk.

1. Clio

Clio is a legal practice management tool that includes built-in document management, calendar syncing, and case tracking. What I love most? It automatically logs everything related to a case. You upload a document, tag it, and boom it’s where it should be. I don’t have to worry about losing track.

2. NetDocuments

If your firm’s a bit larger and more complex, NetDocuments is fantastic. It’s like Google Drive on steroids, built specifically for legal teams. It organizes, tracks, and secures every document. Plus, the search functionality actually works even with poor file names (though you should still fix those).

3. Everlaw

Everlaw is a great tool for litigation teams. It handles e-discovery, trial preparation, and collaboration all in one platform. It’s saved me hours during discovery because of how well it manages metadata and file history.

4. Dropbox + Zapier

I know what you’re thinking Dropbox? That’s basic. But when paired with automation tools like Zapier, you can create smart workflows. Upload a document to Dropbox and automatically tag it, copy it to a backup folder, and log the update in a spreadsheet. It’s like having a virtual assistant.

5. Trello or Notion for Task Management

You’d be surprised how often missing documents come from missed tasks. “Upload this later” turns into “Oops, forgot to do it.” Tools like Trello or Notion can help you build a routine. I create a checklist for every client case. If it’s not checked off, it’s not done.

These tools won’t do your job for you but they’ll make your job a whole lot easier. And in the legal world, that’s half the battle.

FAQs

What should I do if I can’t find a document right before a court hearing?

Take a deep breath and don’t panic. Start with a quick keyword search using variations of the document name. Check recent downloads, synced devices, and even email attachments. If possible, delegate someone to help search while you manage the hearing. Always have a backup copy in multiple formats and locations to avoid this scenario.

How can law firms prevent document mismanagement?

Law firms should establish clear document naming conventions, enforce metadata tagging, invest in user-friendly document management systems, and most importantly, provide thorough training to every staff member. Consistency and accountability are key.

What are some common legal tech mistakes that lead to lost files?

  • Using vague or inconsistent file names
  • Saving documents in the wrong folders
  • Relying solely on local storage instead of cloud or shared drives
  • Skipping proper tagging or metadata input
  • Failing to sync files across devices before court or meetings

Are there specific tools to help lawyers stay better organized?

Absolutely. Tools like Clio, NetDocuments, Everlaw, and even general platforms like Notion or Trello can significantly help. What matters most is choosing tools you’ll actually use and then using them consistently and correctly.

How important is tech training for lawyers today?

Tech training is no longer optional it’s essential. Lawyers must be proficient in using document systems, understanding cloud storage, managing digital calendars, and maintaining cybersecurity. Proper training ensures efficiency, protects client data, and safeguards your professional credibility.

Conclusion

What lawyer wasn’t able to find documents because of technology? That was me—and unfortunately, many others like me. It’s not about being careless or unskilled. It’s about not being fully prepared for the digital reality of modern legal work. I’ve lived the stress, the panic, and the professional embarrassment that comes from relying on tech without truly understanding how to manage it.

How Much to Fix a Broken Tooth Without Insurance

0

​It’s one of those moments you never forget I was chewing on something unexpectedly hard, and then crack. My tongue felt a jagged edge where there used to be a smooth surface. Yep, I’d just broken a tooth. And as if the pain wasn’t enough, the real worry hit me right after: how much does it cost to fix a broken tooth without insurance?

How Much to Fix a Broken Tooth Without Insurance

If you’re anything like me, you start Googling in a panic, trying to figure out what you’re in for financially. And the truth is, the cost can vary wildly depending on a bunch of things. But don’t stress, I’m breaking it all down for you in this guide, using simple language, real numbers, and first-hand experience. Whether you chipped your tooth or it’s cracked all the way to the root, I’ll help you figure out what it could cost and what you can actually do about it.

How Much is Homeowners Insurance on a $150000 House
How Much Would a $1000 Payday Loan Cost
Mortgage Lenders have the Lowest Rates
Get a Loan- Find a Loan Lender
Housing Assistance Payments
Mortgage 30 Year Fixed Rate – Find the Best Rates & Info
Mortgage 0 Down – Buy a Home with No Down Payment
Loan Discharge – Understand Your Options & Eligibility
Loan Xpress Pay – Fast Online Personal Loans
Loan 3000 – Get a $3000 Loan Instantly
Loan to Pay Off Credit Cards – Consolidate Debt & Save Money
Mortgage 150k House – How Much House Can I Afford

How Much to Fix a Broken Tooth Without Insurance

Dental Bonding (For Minor Chips

When I chipped my front tooth biting into a crusty baguette, the first thought I had was, “How much is this going to cost me without insurance?” I panicked, especially because I wasn’t in pain just embarrassed by the obvious damage. If you’ve found yourself in a similar situation, dental bonding might be your most affordable fix.

Dental bonding is a quick, minimally invasive procedure. The dentist uses a tooth-colored resin (basically a durable plastic material) to repair the chipped area. It’s shaped and hardened with a special light so that it blends in naturally with your real tooth. No anesthesia is usually needed, and the entire process might take less than an hour.

Now for the cost without dental insurance, bonding typically ranges between $100 to $600 per tooth, depending on how much needs to be fixed and your location. Urban clinics tend to charge more. The price may also go up if the chip is in a spot that’s hard to reach or if cosmetic precision is crucial.

From my experience, bonding is perfect for smaller chips or cracks, especially on teeth that aren’t under a lot of pressure (like the front ones). It’s also worth noting that bonding usually lasts 3 to 10 years, depending on how well you care for your teeth and whether you grind them at night.

Dental Veneers (For Front Teeth)

Now, if the chip or crack is more than cosmetic, or you just want that flawless smile back, veneers might be the answer. I’ve seen friends go this route, especially when they’re dealing with broken front teeth and they care a lot about aesthetics.

Veneers are thin porcelain or resin shells custom-made to cover the front surface of your tooth. They don’t just fix chips; they also hide discoloration, gaps, and misshapen teeth. But here’s the catch—they can be pricey.

Without insurance, a veneer can cost anywhere from $800 to $2,500 per tooth. Yes, that’s a big range, and porcelain veneers are on the higher end because they look more natural and last longer (often 10 to 15 years or more).

The process involves a consultation, prepping the tooth (which might include removing a tiny layer of enamel), and then placing the veneer in a second appointment. While it’s not painful, it is permanent—you can’t “undo” a veneer because of the enamel removal.

So, why would someone pay that much? If you broke a tooth in a visible area and want it to look perfect again, veneers can be a solid long-term solution. They’re also stain-resistant and don’t require any special care beyond regular brushing and flossing.

Dental Crowns (For Larger Breaks)

Let me be real here, when I cracked my molar (chewing on ice, don’t ask), bonding wasn’t going to cut it. The break was too deep. My dentist recommended a crown, and while the word “crown” sounds royal, the price felt anything but noble.

A crown is like a cap that completely covers your damaged tooth, restoring its strength, shape, and function. It’s often made of porcelain, metal, or a combination. Crowns are the go-to treatment when the tooth is too damaged for bonding but not dead or infected.

Here’s the kicker: Crowns cost between $800 and $2,000 per tooth without insurance. Porcelain ones (especially those that look like real teeth) are on the higher end, while metal or porcelain-fused-to-metal crowns might save you a few hundred bucks.

Getting a crown usually takes two appointments one for prepping and taking impressions, and another to place the crown after it’s been custom-made. If your dentist has same-day crown technology (like CEREC), you might be in and out in a single visit, which is pretty convenient.

Crowns last a long time 10 to 15 years or even more with good oral hygiene. If your broken tooth is a molar or a large part is missing, don’t skip this. Trying to chew on a cracked molar without a crown is like walking on a broken ankle you’ll only make it worse.

Root Canal + Crown (When Nerve is Affected)

Okay, this is the one nobody wants to hear but if the crack reaches the pulp (the nerve inside the tooth), you’ll need a root canal. Trust me, I’ve been there, and I know how scary that sounds. But in reality, it’s not as painful as people make it out to be. The real pain comes when you check the bill—especially if you don’t have insurance.

A root canal is necessary when the inner part of the tooth becomes inflamed or infected. It involves removing the nerve, cleaning the inside, and sealing it. Once that’s done, you’ll need a crown to protect the now-dead tooth.

The total cost for a root canal and crown combo ranges from $1,500 to $3,500 without insurance. The root canal itself is usually $700 to $1,500, and the crown adds another $800 to $2,000 on top.

If you’re on a tight budget, this one hurts. But ignoring it means risking a full-blown infection or even losing the tooth altogether, which leads us to the next (and final) option.

Tooth Extraction + Replacement (When Tooth is Beyond Saving)

Sometimes the tooth is just too far gone. Maybe it’s shattered below the gum line, or maybe you waited a little too long and now there’s an infection that can’t be fixed. In that case, your only option may be extraction. I’ve had a back tooth pulled once, and while it wasn’t fun, it was necessary.

An extraction alone usually costs $150 to $400 for a simple pull, and up to $800 if it’s surgical (like for impacted or broken root teeth). But the real expense comes if you want to replace the tooth.

Here are your main replacement options:

  • Dental Implants: $3,000 to $6,000 per tooth
  • Dental Bridges: $1,500 to $3,000
  • Dentures (partial): $600 to $2,500

I went with a bridge because an implant was out of my price range. It’s a personal choice and depends on where the tooth is located, your budget, and what you’re comfortable with.

Just remember: not replacing a missing tooth can cause your other teeth to shift, mess with your bite, and lead to bone loss in your jaw. It’s not just cosmetic it’s functional too.

Additional Costs You Might Not Expect

When you’re trying to figure out how much to fix a broken tooth without insurance, the sticker prices for treatments are just the beginning. What really surprised me was all the extra stuff that creeps into the final bill stuff I didn’t even know to ask about at first.

For starters, X-rays are almost always required. They help the dentist see the extent of the damage and whether the nerve is involved. X-rays typically cost $25 to $250, depending on whether it’s a single image or a full panoramic scan.

Then there’s the consultation fee, which can run from $50 to $150, just to get in the chair. If you’re in an emergency situation, expect that to be higher possibly even double.

You might also need:

  • Temporary crowns if your permanent one takes a week or two to arrive – $100 to $300
  • Antibiotics or pain meds – another $20 to $100, depending on the prescription and pharmacy
  • Follow-up appointments – often billed separately at $75 to $200

So yeah, these “extras” can easily add a few hundred dollars to your bill. My advice? Don’t be afraid to ask your dentist for a full breakdown. Get it in writing if you can, especially if you’re on a budget. It’s not being rude it’s being smart.

How to Find Affordable Dental Care Without Insurance

I get it. Looking at those prices might make you feel like you’re stuck. I’ve been there. But there are some real ways to reduce the cost of fixing a broken tooth, even if you don’t have dental insurance. Here are a few tips that have personally saved me hundreds:

Community Health Clinics

These nonprofit clinics often provide dental services at reduced rates or even free. They’re usually income-based, so if you’re low on funds, this could be your best option. Just be prepared for longer wait times.

Dental Schools

This is my personal go-to. Dental students need hands-on practice (under supervision), and they charge way less sometimes 50% to 70% lower than private clinics. I had a bonding job done here, and it turned out great.

Discount Dental Plans

Unlike insurance, these are memberships where you pay a yearly fee (often $100 to $200), and then you get discounted rates sometimes up to 60% off at participating dentists. Plans like Careington or DentalPlans.com are worth checking out.

Negotiate with Your Dentist

Don’t be shy. Ask if they offer cash discounts or payment plans. A lot of dental offices are willing to help uninsured patients with flexible options if you ask upfront.

Use a Health Savings Account (HSA) or Flexible Spending Account (FSA)

If you have one through your job, you can use pre-tax dollars to pay for your dental work—even cosmetic fixes like crowns or veneers.

Payment Plans and Financing Options

Let’s be honest, not everyone has a couple thousand bucks lying around for a dental emergency. I sure didn’t. That’s why knowing your payment options is a game-changer.

Many dental clinics partner with third-party financing companies like CareCredit or LendingClub. These companies let you break the bill into monthly payments, sometimes with 0% interest for the first few months. Be sure to read the fine print though late payments can lead to sky-high fees.

Some offices even offer in-house payment plans, especially for repeat patients or simple procedures. If your dentist doesn’t advertise one, ask anyway. They might work something out privately.

Here’s a quick table to help you compare common financing methods:

OptionProsCons
CareCreditFast approval, interest-free promosHigh interest if unpaid on time
In-House Payment PlanNo credit check neededLimited to that specific office
Personal LoanFixed interest and payment scheduleCredit check and fees apply
Credit CardConvenient and immediateHigh interest if not paid off fast

It’s all about being proactive. The earlier you speak up, the more options you’ll have to manage your dental bill without going broke.

Tips for Preventing Another Broken Tooth

After dealing with one broken tooth and a fat bill, you better believe I’m more careful now. Prevention is everything. Here’s what I’ve learned (sometimes the hard way):

1. Stop Chewing Hard Stuff

This sounds obvious, but ice, popcorn kernels, hard candy, and pens? They’re tooth killers. I’ve stopped chewing on anything not labeled “food.”

2. Wear a Mouthguard if You Grind

If you grind your teeth at night (called bruxism), you’re at risk for cracks and breaks. A mouthguard, especially a custom one, can save you thousands.

3. Watch Out for Old Fillings

Fillings can weaken the tooth structure over time. Get them checked regularly so they don’t become the weak link that leads to a fracture.

4. Brush, Floss, and Get Cleanings

Yep, the basics. The stronger your teeth and gums, the less likely you are to experience breaks from decay or weakness.

5. Don’t Ignore the Small Stuff

A little chip might seem like nothing, but it can turn into a full-on fracture faster than you’d expect. Always get it looked at early.

FAQs

Is there a cheap way to fix a broken tooth without insurance?

Yes! If it’s a minor chip, dental bonding is the most affordable fix, usually costing $100–$600 per tooth. For deeper cracks, check dental schools or clinics that offer sliding-scale fees.

Can a broken tooth heal on its own?

No. Once a tooth is broken, it can’t regenerate. It might not hurt right away, but without treatment, it can worsen and become infected.

What if I can’t afford to fix my tooth?

Look into community health centers, dental school clinics, or financing options like CareCredit. Many places offer payment plans or income-based rates.

Is dental insurance worth it just for a broken tooth?

It depends on your future needs. Insurance often comes with waiting periods, so it might not help in an emergency, but it can save you big on long-term dental work.

How can I get emergency dental care without insurance?

Try urgent dental clinics, public health departments, or dental schools. They may offer quicker, more affordable emergency care, even without coverage.

Conclusion

If you’re wondering how much to fix a broken tooth without insurance, the short answer is: it depends. But the long answer? It could cost you anywhere from $100 to $6,000 or more, depending on the severity of the damage and the treatment you need. I’ve been through a few of these fixes myself, and while it’s scary to see the price tags, there are ways to make it manageable.

Whether it’s bonding, crowns, root canals, or even an implant, the key is not to wait. Delaying treatment only makes things worse (and more expensive). Talk to your dentist, ask questions, and explore every option especially payment plans or dental schools if you’re on a tight budget. Your smile and your wallet will thank you.

How to Sue a Car Insurance Company Without a Lawyer

0

Let me be real with you I never imagined I’d have to figure out how to sue a car insurance company without a lawyer. But life has a funny way of throwing curveballs, right? One moment I was expecting my claim to be processed like clockwork, and the next thing I knew, I was knee-deep in paperwork, phone calls, and frustration. If you’re reading this, chances are you’re in the same boat or pretty close to it.

Suing a car insurance company without a lawyer might sound scary or even downright impossible, but trust me, it’s totally doable if you know the steps. I’ve walked this path myself. Sure, it took patience and some guts, but in the end, it was empowering. You don’t need a law degree to stand up for yourself. You just need the right information, a little preparation, and a lot of determination.

How Much is Homeowners Insurance on a $150000 House
How Much Would a $1000 Payday Loan Cost
Mortgage Lenders have the Lowest Rates
Get a Loan- Find a Loan Lender
Housing Assistance Payments
Mortgage 30 Year Fixed Rate – Find the Best Rates & Info
Mortgage 0 Down – Buy a Home with No Down Payment
Loan Discharge – Understand Your Options & Eligibility
Loan Xpress Pay – Fast Online Personal Loans
Loan 3000 – Get a $3000 Loan Instantly
Loan to Pay Off Credit Cards – Consolidate Debt & Save Money
Mortgage 150k House – How Much House Can I Afford

Understanding When to Sue Your Car Insurance Company

Before you rush off to the courthouse, let’s take a breath and talk about when it actually makes sense to sue a car insurance company. Suing isn’t just about being mad it’s about knowing you’ve been wronged and that the company isn’t playing fair. In my case, they kept delaying the payout for repairs I had already made out of pocket. Weeks turned into months, and my calls were met with radio silence. That’s when I knew something wasn’t right.

Here are a few red flags that might mean it’s time to consider legal action:

  • Your claim is unfairly denied: Sometimes companies look for technicalities to deny valid claims. If their reason doesn’t add up, it might be a sign they’re acting in bad faith.
  • They offer a lowball settlement: If their offer doesn’t cover your damages or it’s insultingly low you have the right to push back.
  • They’re delaying or ignoring your claim: Time is money, and you can’t wait forever for a response. If they keep stalling, that’s a power move you don’t have to tolerate.

Bad faith insurance practices are real, and they’re more common than you’d think. Companies have a duty to handle your claim promptly and fairly. If they don’t, you may have every right to hold them accountable. That’s what I did and you can too.

Can You Really Sue Without a Lawyer?

Absolutely. I’ll admit, the idea sounded a bit nuts at first. I mean, you see lawyers on TV handling these cases all the time. But I figured, “Why not me?” Hiring a lawyer would’ve cost thousands money I didn’t have and besides, most of the small claims process is designed for regular people like us to navigate on our own.

Here’s why self-representation can actually work in your favor:

  • Saves money: No attorney fees, which can eat up a huge chunk of any payout you might win.
  • Empowers you: Taking control of the process made me feel strong, not helpless.
  • Simplified court systems: Small claims courts are built for non-lawyers. They don’t expect you to speak in legal code or wear a suit.

That said, I won’t sugarcoat it it takes work. You’ve got to do your homework, stay organized, and stay calm under pressure. But if you’ve got those bases covered, you’ve got a fighting chance.

Know Your Insurance Policy Inside Out

This part might sound boring, but trust me it’s mission critical. Before I even thought about suing, I sat down with a highlighter and read through every single page of my policy. That’s where I found the tiny clause they were using to justify denying my claim and guess what? They were interpreting it all wrong.

Here’s how you can do the same:

  • Print it out: You’ll want to take notes, highlight sections, and write questions in the margins.
  • Look for the coverage section: What exactly does your policy cover? And what are the exclusions?
  • Review the claim process: Did you follow all the steps they require? That helps your case later.
  • Check the deadlines: Some policies require claims to be filed within certain timeframes. If you’re within that window, that’s one more thing in your favor.

Also, don’t forget to keep a detailed record of every single interaction you’ve had with the company—emails, call logs, names of people you spoke to, dates, and what was said. That paper trail becomes gold if you go to court. I had a printed binder with timestamps and summaries of each call. It impressed the judge, and it helped me stay organized.

Start With a Strong Foundation – Gather the Right Evidence

If suing an insurance company was like building a house, then your evidence would be the bricks. No matter how passionate you are or how wronged you feel, the court wants proof. And lots of it.

Here’s what I gathered before filing:

  • Photos of the damage: Take clear, dated pictures from multiple angles.
  • Police report (if available): This is often a key piece of unbiased documentation.
  • Repair estimates or bills: I got three estimates to show what the fair cost was.
  • Email correspondence: Every message between me and the insurance reps went into a folder.
  • Witness statements: If someone else saw what happened, get them to write a short, signed statement.

The goal is to paint a picture that leaves no room for doubt. When I showed the judge how the insurance company had all the facts and still denied my claim, it made their defense look shaky. So, document everything. Don’t assume anything is too small it might be what tips the scales in your favor.

Try to Settle First – Demand Letter Magic

Now, before you jump into court, there’s a smart move you should try first and that’s sending a demand letter. I know it sounds fancy, but it’s really just a well-worded, formal letter where you clearly ask the insurance company to pay what they owe, explain why they should, and mention that you’re ready to take legal action if they don’t.

Let me tell you, my demand letter was a game-changer. I had spent weeks feeling ignored. The moment I sent this letter, certified mail and all, they suddenly started paying attention. It didn’t lead to a full payout right away, but it definitely turned up the heat.

Here’s what to include in your demand letter:

  1. Your personal details and claim number: Start by stating who you are, your policy number, and your claim number.
  2. A short summary of the incident: Describe what happened, including dates and important facts.
  3. The amount you’re demanding: Be specific. Include copies of repair estimates, medical bills, etc.
  4. A clear statement of what they did wrong: Whether they denied your claim unfairly or delayed for too long be direct but respectful.
  5. A deadline to respond: Give them 10–14 days to get back to you before you file in court.
  6. A copy of your evidence: Attach photos, reports, or receipts that support your claim.

Sign it, send it via certified mail with return receipt, and keep a copy. When I did this, I included a binder of documents with my letter. It showed them I meant business. They didn’t think I’d actually sue but I was ready, and that changed the game.

Filing in Small Claims Court – Your First Legal Step

If your demand letter doesn’t lead to a fair settlement, it’s time to file a lawsuit. But don’t worry—it’s not as terrifying as it sounds, especially if you go through small claims court. That’s where I went, and it’s built specifically for everyday people like us, not legal pros.

Here’s how I filed my case:

  1. Check your state’s small claims court limit: Each state has a maximum amount you can sue for in small claims. Some are $5,000, others go up to $10,000 or even more.
  2. Go to your local courthouse or their website: Most courts have fillable forms online. You’ll need a “Plaintiff’s Claim” form or something similar.
  3. Fill out the complaint: Be concise: explain the dispute, including your policy number, the amount you’re owed, and your efforts to settle it beforehand.
  4. Pay the filing fee: Expect to pay between $25 and $75. If you’re low-income, you might qualify for a waiver.
  5. Serve the papers to the insurance company: This is super important. You can’t just email them. Use a professional process server or a sheriff’s deputy to deliver the court papers.

Once I filed, I received a court date about a month later. The moment they got the court summons, I noticed a major shift in how the insurance company spoke to me. Suddenly, I was being taken seriously. Suing isn’t just paperwork it’s a statement that you won’t be pushed around.

Preparing for Court Like a Pro (Even Without a Lawyer)

This is where you turn into a one-person legal team. Don’t freak out you’ve got this. The secret is being ridiculously prepared. Think of it like going to a job interview where the judge is your boss, and your goal is to convince them that you’re right and the insurance company is not.

Here’s what I did to get ready:

  • Organized my evidence chronologically: I used folders and labeled each section: photos, receipts, emails, etc. The judge appreciated the clarity.
  • Wrote a simple summary of my case: I practiced explaining my story in 5 minutes or less. No fluff just facts.
  • Prepared answers to possible questions: I thought like the insurance company: What might they say to defend themselves? Then I built counterpoints for each one.
  • Brought printed copies of everything: Always bring extra copies for the judge, yourself, and the defendant.
  • Dressed neatly and stayed calm: Look, you don’t need to wear a suit, but don’t show up in gym clothes either. Confidence and politeness go a long way.

I also sat in on another small claims hearing before mine. That gave me a feel for the courtroom and helped calm my nerves. By the time my day came, I wasn’t just ready I was confident.

Presenting Your Case in Court

Court day. This is where all your hard work comes together. I won’t lie, I was nervous as hell. But once I started speaking, everything clicked. The judge didn’t expect me to sound like a lawyer—just to tell my story clearly and show my evidence.

Here’s what you can expect and how to crush it:

  • The judge calls your case: You and the insurance rep go to the front. They’ll ask who’s who and what the case is about.
  • You go first: Start by thanking the judge and calmly explain your case: what happened, why it matters, and what proof you have.
  • Keep your emotions in check: I get it, it’s personal. But don’t rant. Speak calmly and stick to the facts. That makes you look more credible.
  • Show your documents one by one: Hand them over as you speak. Use visuals like photos and charts to back up your story.
  • Anticipate their arguments: If they say you didn’t follow policy steps, show evidence that you did. Be one step ahead.

The judge may ask questions. Don’t panic, just answer honestly. If you don’t know something, say so. Judges can smell lies a mile away, and they respect honesty.

When I finished my case, the judge looked impressed. The insurance rep? Not so much. They mumbled through their defense and had almost no documentation. It made a huge difference.

What Happens After the Verdict?

After both sides speak, the judge will either make a decision right away or take a few days to think it over. When I got my verdict, I won. The judge awarded me the full amount I asked for—and even added court costs.

Here’s what could happen:

  • If you win: You’ll get a judgment, which is a legal order saying the insurance company owes you money. They usually have 30 days to pay.
  • If they don’t pay: You can take further steps like wage garnishment or asset seizure. You might need to file more paperwork, but trust me, the law’s on your side.
  • If you lose: Don’t give up. Ask the judge if you can appeal or refile. Sometimes small errors can be fixed the second time around.
  • They might offer to settle after the verdict: That happened to me. They called two days later and offered a lump sum less than the judgment, but I accepted it to wrap things up.

Winning wasn’t just about the money. It was about justice. I proved that I wasn’t just another policy number they had to treat me with respect. And I did it all without hiring a lawyer.

Dealing with Delays and Intimidation Tactics

Let me be clear, insurance companies don’t always play nice when you sue them. Once they know you’re serious, they might pull every trick in the book to throw you off. I went through this personally, and it wasn’t fun. They stalled, ignored my messages, and even sent a letter filled with legal jargon designed to scare me off. But I didn’t budge.

Here’s what you might face and how to handle it:

  • Delays in response: They’ll tell you they “need more time to investigate” or that the person handling your case is “out of office.” Don’t fall for it. Keep following up in writing and log every excuse.
  • Scare tactics: You might receive formal-sounding letters implying you don’t stand a chance without a lawyer. I got one that looked like it came from a law firm, but it was just a bluff.
  • Lowball settlements: Right before the hearing, they may offer you a small check to make the case go away. Think carefully. If it’s fair, consider it. But if it’s insulting, stand firm.
  • Trying to move your case out of small claims court: Some companies try to push the case to a higher court, thinking it’ll overwhelm you. Know your rights small claims court rules protect you from this if your case is eligible.

The best way to shut down these tactics is by being persistent and professional. I kept everything in writing, didn’t engage emotionally, and made sure every deadline was met on my end. That consistency wore them down and helped me win. Remember: They’re hoping you’ll quit. Prove them wrong.

Alternatives to Suing – Mediation and Arbitration

Now, maybe you’re thinking, “I don’t want to go to court at all.” That’s fair. Legal stuff isn’t for everyone. There are other ways to resolve your issue, and in some cases, they work even better. I actually tried mediation before I filed my lawsuit, and while it didn’t fully solve my problem, it moved things forward.

Let’s talk about mediation and arbitration, and when they might be right for you.

Mediation

This is a voluntary meeting between you, the insurance company, and a neutral third party. The mediator helps both sides reach an agreement. It’s informal, and it often takes just a few hours. If both parties agree on a number, the case is settled.

Arbitration

This is more formal. It’s like a mini-trial where an arbitrator hears both sides and makes a decision. Sometimes it’s binding (meaning you have to accept the decision), so read your policy—some include mandatory arbitration clauses.

Here’s why these might work:

  • Faster resolution: No court schedules to wait on.
  • Private: No public records.
  • Less intimidating: No judge, no courtroom.

But there are downsides, too:

  • You might not get as much compensation as you would in court.
  • In binding arbitration, you can’t appeal the decision.
  • If the company doesn’t act in good faith, mediation can just waste time.

For me, mediation helped me understand what the other side was thinking and even pushed them to up their offer. It didn’t fix everything, but it made them take me seriously. If you’re nervous about court, this could be a solid first step.

Knowing Your Legal Limits

As empowering as it is to take your own case to court, you’ve also got to be realistic about what you can and can’t do legally. I learned this the hard way when I almost missed the deadline to file—thankfully, I caught it in time.

Here are a few legal boundaries you need to be aware of:

  • Statute of limitations: This is the legal deadline to file your lawsuit. In most states, you’ve got 2–3 years from the incident, but it varies. Check your local laws.
  • Claims cap in small claims court: You can only sue for a certain maximum amount usually between $5,000 and $10,000 depending on where you live. If your claim is bigger, you may have to break it into smaller parts or file in a higher court (which might require a lawyer).
  • Contract clauses in your policy: Some policies include clauses that require arbitration or limit your legal options. Read carefully, those fine-print rules can impact your case.
  • Jurisdiction rules: You’ll usually file the case in the county where the incident happened or where the insurance company has an office.
  • Appeals process: If you lose, you may not always have the right to appeal in small claims. Sometimes the company can appeal, but you can’t. It depends on your state.

Knowing these limits doesn’t mean you should back down, it just means you need to play smart. Understand the field you’re playing on so you don’t get blindsided. I set calendar reminders for every deadline and read my court’s self-help resources like a pro. That preparation saved me from slipping up.

Avoiding Common Pitfalls in Self-Representation

You can absolutely sue a car insurance company without a lawyer, but you’ve got to avoid the common traps that catch people off guard. I saw other folks in court who didn’t prepare properly, and the judge dismissed their cases within minutes. It was painful to watch.

Here’s what to look out for:

  • Lack of documentation: You can’t just tell your story you’ve got to show it. Bring evidence, not just emotion.
  • Being too emotional: I get it. You’ve been through a lot. But judges aren’t therapists they want facts, not feelings.
  • Not reading your policy: If you don’t understand your coverage, the insurance company will twist it against you. Know your rights.
  • Missing court deadlines: If you don’t show up or file the right forms, your case could be thrown out automatically.
  • Over-asking: Don’t ask for outrageous amounts just because you’re mad. Be realistic and back it up with real numbers bills, quotes, etc.
  • Not rehearsing: Practice your story out loud. Time yourself. Cut out the fluff. Confidence shows.

I spent hours preparing, not because I love homework, but because I knew one mistake could ruin everything. When you walk into court organized, calm, and ready, it makes a massive difference. You don’t have to be a lawyer to win. You just have to act like someone who’s serious.

FAQs

Can I sue for emotional distress from my car insurance company?

Yes, but it’s tricky. Emotional distress is hard to prove unless there’s clear evidence that the insurance company acted in extreme bad faith. Most small claims courts don’t cover emotional damages. You’d likely need to file in a higher court, which might involve a lawyer.

How long does a small claims court case take to resolve?

It depends on your local court’s schedule, but typically, from filing to verdict, it can take 1 to 3 months. Some areas are quicker, some slower. The actual hearing might only take 15–30 minutes, but be prepared for paperwork and follow-up.

What if the insurance company still doesn’t pay after I win?

If they ignore the judgment, you can request a wage garnishment, put a lien on their property, or use a collections agency. The court can help you enforce the judgment, and many states have tools for self-represented plaintiffs to do this.

Can I settle the case even after I’ve filed a lawsuit?

Absolutely. You can settle at any time before the judge gives a ruling even during the hearing. If they offer you a fair amount and you agree, you can withdraw the case. Just make sure to get the agreement in writing.

What’s the biggest mistake people make when suing without a lawyer?

Not being prepared. People often think passion alone will win the case. But if you don’t bring evidence, understand your policy, or follow court rules, you’ll lose even if you’re right. Preparation beats emotion every time.

Conclusion


If you’ve made it this far, you now know that you can absolutely sue a car insurance company without a lawyer and not just that, you can win. I’ve been there. I know what it feels like to be overwhelmed, ignored, and dismissed by a company that’s supposed to have your back. But I also know the satisfaction of standing up for myself and proving them wrong.

Do I Need a Lawyer For Car Insurance Claim

0

​So, you’re asking yourself, “Do I need a lawyer for a car insurance claim?” That question popped into my head too after I had my own fender-bender. At first glance, it seemed straightforward: file a claim, wait a few days, get my car fixed, and move on with life. But oh boy, it turned out to be a lot more complicated than I expected. Suddenly, the insurance adjuster was lowballing my estimate, asking for documents I’d never heard of, and moving painfully slow. That’s when I started wondering if I was in over my head.

And that’s exactly why you’re here, right? You’re trying to figure out if bringing a lawyer into this whole insurance mess is really worth it or if you can handle it on your own without wasting time and money. The truth is, not every car insurance claim needs a lawyer, but knowing when to bring one in could mean the difference between getting shortchanged or walking away with what you rightfully deserve.

How Much is Homeowners Insurance on a $150000 House
How Much Would a $1000 Payday Loan Cost
Mortgage Lenders have the Lowest Rates
Get a Loan- Find a Loan Lender
Housing Assistance Payments
Mortgage 30 Year Fixed Rate – Find the Best Rates & Info
Mortgage 0 Down – Buy a Home with No Down Payment
Loan Discharge – Understand Your Options & Eligibility
Loan Xpress Pay – Fast Online Personal Loans
Loan 3000 – Get a $3000 Loan Instantly
Loan to Pay Off Credit Cards – Consolidate Debt & Save Money
Mortgage 150k House – How Much House Can I Afford

What is a Car Insurance Claim?

A car insurance claim is basically a request you make to your insurance company to cover damage, injury, or loss resulting from an accident. Sounds simple, right? In theory, it is. But once paperwork, phone calls, and negotiations get involved, it quickly turns into a whole process.

When you file a claim, you’re asking the insurer to make good on the promise they sold you whether it’s paying for your medical bills, covering repairs, or handling liability if you were at fault. Insurance adjusters are the ones who evaluate the situation. They’ll ask for documents, photos, repair estimates, police reports you name it. Then they determine how much (if anything) you’re entitled to.

Insurers aren’t running charities. Their job is to minimize payouts and protect profits. That’s not paranoia it’s business. They might delay your claim, argue your injuries weren’t caused by the accident, or offer a lowball settlement. It’s no wonder so many people get frustrated and feel overwhelmed.

I remember when I filed my first claim. I thought I had everything in order photos, estimates, even a witness statement. Still, the adjuster tried to tell me my car’s value was less than what any mechanic quoted. It was then I realized this wasn’t going to be a fair fight without some legal backup.

Common Reasons People File Claims

Let’s talk about why people even file these claims. Understanding the reasons helps you gauge the complexity of your case.

Here are the most common ones:

Property Damage

This is the most straightforward claim. You rear-end someone, your bumper’s wrecked, and you need it fixed. But even this gets tricky if parts are back-ordered, mechanics find hidden issues, or if the damage total exceeds your car’s market value.

Injuries

This is where things get dicey. Medical bills stack up fast especially if you need physical therapy, surgery, or medication. Even minor injuries like whiplash can take months to heal and aren’t always visible in scans.

Total Loss

When your car is beyond repair or the repair cost exceeds its value, your insurer will “total” it. But the amount they offer for a totaled car isn’t always fair. You could end up with way less than it’s actually worth unless you push back.

Lost Wages

If you can’t work because of the accident, you can file a claim for the income you’ve lost. But you’ll need to prove it doctor’s notes, employer statements, the whole nine yards.

Each of these comes with its own set of complications. If your claim involves any of the above and you’re not sure what to do, it might be time to talk to someone who knows the legal ropes.

When You Might NOT Need a Lawyer

Clear-Cut Claims with No Injuries

Believe it or not, not every car accident turns into a legal drama. Sometimes everything goes as smoothly as you’d hope. I’ve been in a minor fender bender before, and since nobody was hurt and both sides agreed on what happened, the claim went through like clockwork.

If your situation looks something like this:

  • The damage is minimal (like a scratched bumper or broken taillight)
  • Nobody got hurt
  • Both you and the other driver agree on who was at fault
  • The insurance company accepts your claim and makes a fair offer quickly

…then you’re probably okay without a lawyer. These are the types of claims you can usually manage on your own, especially if you’re organized and proactive. Just make sure to take clear photos, get a police report (if required in your state), and keep all your receipts.

Still, be cautious. Even in these “easy” cases, insurance companies can try to pull a fast one. If the settlement doesn’t cover all your costs, you have every right to push back.

Insurance Company is Being Cooperative

Once in a while, you’ll deal with an insurance adjuster who actually seems to have your back. They call you regularly, explain what they need, and send you a settlement check that genuinely feels fair. I know, it’s rare but it happens.

In these cases, if the company is:

  • Communicating clearly and honestly
  • Not pressuring you into accepting a settlement
  • Offering to pay all your documented expenses
  • Processing your claim in a timely manner

…you might not need legal help. That said, always read the fine print. Don’t sign any waivers or releases until you’re 100% sure that the amount covers everything, especially medical costs that might pop up later.

When You SHOULD Consider Hiring a Lawyer

You’re Injured in the Accident

Let me tell you if you’ve been hurt in a car accident, don’t wait too long to ask yourself, “Do I need a lawyer for a car insurance claim?” The short answer? Probably yes.

When I was rear-ended a couple of years ago, I didn’t feel pain right away. But a few days later, my neck was stiff, and I couldn’t turn my head without discomfort. Fast forward a week, and I needed physical therapy. The insurance company initially brushed it off as “soft tissue” and tried to downplay it. That’s when I knew I was on my own unless I got legal help.

Here’s the deal: injury claims are the most contested part of any car insurance case. Insurance companies will:

  • Question whether your injuries were caused by the accident
  • Demand excessive medical documentation
  • Push you to settle quickly before all your symptoms show up

Even “minor” injuries like whiplash, back pain, or concussions can lead to long-term problems. And if you’re dealing with something serious like a fractured bone or surgery? You’re talking big money and big risk if you don’t know how to negotiate.

A lawyer knows how to calculate not just your current medical bills, but also:

  • Future treatment costs
  • Lost wages
  • Pain and suffering
  • Diminished quality of life

You shouldn’t have to stress over forms, phone calls, and fine print while you’re trying to heal. Having someone on your side who’s done this before? That can make all the difference in getting what you truly deserve.

Fault is Disputed

You might think the other driver caused the accident, and maybe you’re right but that doesn’t mean their insurance company will agree. One of the trickiest situations is when fault is up in the air.

This happened to a friend of mine. He was driving through an intersection when another car blew a stop sign and hit him. It looked obvious, but because there were no cameras and no clear witnesses, both parties ended up blaming each other. His insurance company dragged its feet, and the other driver’s provider flat-out denied the claim.

If you’re in this kind of situation, do not go it alone.

Lawyers can:

  • Gather and preserve evidence (like traffic cam footage, if available)
  • Interview witnesses
  • Hire accident reconstruction experts
  • Challenge inaccurate police reports

When fault is disputed, a good attorney becomes your best weapon. They know how to build a case that backs your side of the story and they’re not afraid to take it to court if necessary.

The Insurance Company Denies Your Claim

There’s nothing more frustrating than thinking your claim is airtight…only to get a letter saying it’s been denied. Maybe they said you filed too late, or they found some technicality in your policy. Or maybe they’re just hoping you’ll give up and go away.

Don’t.

A denial isn’t the end of the road. But it is a sign you need a lawyer to step in and fight for you. Insurance companies sometimes use “bad faith” tactics, which means they’re acting dishonestly delaying claims, misinterpreting policy language, or not investigating properly.

Here’s how a lawyer helps when your claim is denied:

  • They’ll review your policy and explain what you’re actually entitled to
  • They’ll appeal the denial with solid legal arguments
  • If needed, they can file a lawsuit against the insurer for acting in bad faith

If you try to appeal on your own, you’ll likely end up lost in legalese and red tape. But with a lawyer? You’ve got someone who speaks their language and isn’t afraid to push back.

Settlement Offer is Too Low

Let’s be real: insurance companies want to pay as little as possible. Even if they accept your claim, that doesn’t mean they’re being generous. They might offer a check quickly, hoping you’ll accept before realizing how much you actually need.

I nearly made this mistake myself. After a crash that messed up my back, I got a $4,000 settlement offer. It felt like a lot at first but then I looked at my physical therapy bills, missed days at work, and the fact that I still couldn’t lift my kid without pain. Suddenly that money didn’t seem so fair.

Here’s why a low offer should make you hit the brakes:

  • It often doesn’t cover future medical care
  • You might not have factored in pain and suffering
  • You give up the right to sue once you accept it

A lawyer knows how to calculate your full damages. They’ll compare your situation to past settlements and court awards to get a realistic number. And if the insurer won’t budge, they can take it to court.

You deserve to be made whole not just patched up and rushed off. If that settlement doesn’t feel right, trust your gut and call someone who can help you do better.

The Role of a Lawyer in a Car Insurance Claim

How a Lawyer Can Help

Alright, so let’s say you’ve decided to bring in legal help. What exactly does a lawyer do in a car insurance claim? Spoiler: a lot more than just making phone calls.

Here’s what a solid accident attorney will do for you:

  • Handle all communication: They talk to the insurance company, the adjuster, and any other parties so you don’t have to. No more long hold times or confusing questions.
  • Collect and organize evidence: This includes everything from photos and repair estimates to witness statements and medical reports.
  • Negotiate for a better settlement: Lawyers are professional negotiators. They’ve seen all the lowball tricks and know how to counter them.
  • Keep you on track: There are deadlines and forms to worry about. A lawyer ensures you don’t miss anything that could hurt your case.
  • Prepare for court if needed: If your claim can’t be resolved, they’ll build a lawsuit and fight for you in front of a judge or jury.

Hiring a lawyer doesn’t mean things will automatically go to court. In fact, most cases settle out of court but with a lawyer by your side, you’re in a stronger position from the start.

What Lawyers Do That You Might Not Know

You might think it’s just about negotiating but a good car accident lawyer brings a lot more to the table. Here’s what surprised me when I hired mine:

  • Access to expert witnesses: Medical professionals, accident reconstructionists, economists people who can back up your claims with solid data.
  • They know the laws inside and out: Every state has different rules about fault, deadlines (statutes of limitation), and damage caps. A lawyer makes sure you don’t miss any of them.
  • They handle liens and bills: Medical providers and insurers might try to claim a cut of your settlement. Lawyers can negotiate those down so you keep more of your money.
  • They act as a buffer: You don’t have to deal with stress, threats, or pressure tactics from insurers. Your lawyer absorbs that stress for you.

Honestly, the peace of mind alone was worth it. It allowed me to focus on healing and taking care of my family while they handled the legal chaos.

Costs Involved in Hiring a Lawyer

Contingency Fees Explained

One of the first questions I had was, “How much is this going to cost me?” I didn’t have a bunch of extra money lying around after the accident, and maybe you don’t either. The good news? Most car accident lawyers work on something called a contingency fee.

What does that mean for you? Simply put: you don’t pay anything upfront. The lawyer only gets paid if you win your case or receive a settlement. No win = no fee.

Typically, the fee is a percentage of your settlement, usually between 30% and 40%. So, if you win a $20,000 settlement and your lawyer takes 33%, they get $6,600. That may sound like a chunk, but if your original settlement offer was only $5,000 before the lawyer stepped in and they helped you get $20K then you’re still coming out way ahead.

Here’s why it makes sense:

  • You don’t need to worry about hourly rates or upfront retainers
  • The lawyer is motivated to get you as much money as possible
  • You can afford legal help even if you’re broke after the accident

Just make sure you understand what percentage they’ll take before you sign any agreement. Ask about additional expenses too things like filing fees, expert witnesses, or travel costs. Most lawyers will deduct those from your settlement, but it’s good to get it all in writing.

Hidden Costs and Things to Ask About

Okay, so contingency sounds great. But what about those hidden costs nobody tells you about?

Even though most personal injury lawyers work on a contingency basis, you may still be responsible for some case-related expenses. These include:

  • Court filing fees
  • Fees for obtaining medical records or accident reports
  • Expert witness fees
  • Costs to subpoena witnesses or documents
  • Postage, travel, or document copying

Some law firms will cover these as they go and take them out of your settlement later. Others might ask you to reimburse them upfront or if the case is lost.

When you’re shopping around for a lawyer (and yes, you should shop around), ask these questions:

  1. Do you cover case expenses, or do I need to pay as we go?
  2. Will these costs come out of the gross or net settlement?
  3. What happens if we don’t win the case?
  4. Are there any hidden fees I should know about?

Transparency is key. A reputable lawyer won’t dodge these questions. If someone’s vague about costs, move on to the next option.

How to Choose the Right Lawyer

Questions You Should Ask

Choosing the right lawyer can feel a little like online dating. You don’t want to commit to someone after a 10-minute phone call. Take the time to ask the right questions and trust your gut.

Here are the must-ask questions:

  • Have you handled car insurance claims like mine before?
  • How many similar cases have you won?
  • Will you be handling my case personally, or passing it off to a junior associate?
  • What’s your communication style? How often will I hear from you?
  • What’s your strategy for cases like mine?

You want someone who’s not only experienced but also a good communicator. If they’re dodgy, overconfident, or seem like they’re just pushing paperwork run. You’re hiring an advocate, not a robot.

In my case, I talked to three lawyers before picking one. The one I chose took time to listen, asked smart questions, and didn’t pressure me. They treated me like a person, not a case file and that made all the difference.

Where to Find Trusted Lawyers

Finding a good lawyer doesn’t mean picking the first ad you see on TV or a billboard. Those firms might be great or they might be overloaded with clients and pass your case off to someone with no experience.

Try these strategies instead:

  1. Ask for personal referrals. If someone you trust had a good experience, that’s a solid lead.
  2. Check online reviews. Google, Yelp, Avvo, and even Facebook can be helpful for honest feedback.
  3. Use legal directories. Websites like Martindale-Hubbell, Super Lawyers, or your state’s bar association list licensed attorneys with credentials and reviews.
  4. Consult more than one. Most offer free consultations. Take advantage of that.

And remember, this is your case. You don’t owe loyalty to the first person you talk to. Find someone who gets it and gets you.

Steps to Take Before Hiring a Lawyer

Gather All Documentation

Before you even call a lawyer, do yourself a favor and get your paperwork in order. The more prepared you are, the smoother your first consultation will go and the better chance they have of building a strong case.

Here’s what to gather:

  • Police report from the accident
  • Photos of the scene, vehicle damage, and injuries
  • Medical records and bills related to the accident
  • Proof of lost wages (pay stubs, doctor’s notes)
  • Your car insurance policy and any emails or letters from the insurer
  • Names and contact info of any witnesses

You don’t need to have everything perfect. But even a basic folder with organized documents will save time and help your lawyer jump into action faster.

If you’re missing something, your attorney can help track it down. But coming in prepared shows them you’re serious and makes it easier to hit the ground running.

Review Your Insurance Policy Carefully

When’s the last time you actually read your insurance policy cover to cover? Yeah, same here until I had to.

Before you even meet with a lawyer, spend some time going through your policy. Look for:

  • Your deductible amount
  • Collision vs. comprehensive coverage
  • Medical payments coverage (MedPay)
  • Uninsured/underinsured motorist coverage
  • Rental reimbursement

It’s not the most exciting read, but it helps you understand what your insurer is supposed to cover. Plus, your lawyer will want to know this stuff when building your case.

And don’t worry if it’s confusing (and it probably will be), your attorney can help explain it in plain English. Just try to highlight the important parts or bring a copy to your first meeting.

What If You’re Partially at Fault?

How Comparative Negligence Works

Now, let’s talk about something that really throws people off being partially at fault in a car accident. Yeah, it sucks. I’ve been there, too. You know you weren’t totally to blame, but maybe you were going a little over the speed limit or didn’t see the other driver coming. That doesn’t mean you’re out of options.

Most states follow something called comparative negligence. Here’s what that means in simple terms:

  • You can still recover damages even if you were partly at fault
  • Your settlement will just be reduced by the percentage of blame assigned to you

Let’s say you’re found to be 20% at fault for an accident and your total damages come to $10,000. You’d still be able to recover $8,000. Not too bad, right?

Now, there are two main types of comparative negligence laws:

  1. Pure Comparative Negligence – Even if you’re 99% at fault, you can still claim 1% of the damages.
  2. Modified Comparative Negligence – You can only collect if you’re less than 50% or 51% at fault, depending on the state.

Some states (like Alabama and North Carolina) are more strict. They follow contributory negligence, which means if you’re even 1% at fault, you might get nothing. Harsh, right?

That’s why understanding your local laws and how they apply to your case is so important.

Why a Lawyer is Even More Crucial Here

If there’s even a chance you might be partially to blame, get a lawyer involved. Insurance companies will do everything they can to assign you a bigger slice of the blame pie. Why? Because the more blame you get, the less they have to pay you.

A good attorney will:

  • Investigate the accident scene
  • Gather evidence to minimize your share of fault
  • Challenge the insurance company’s findings
  • Present your case clearly if it goes to court

In my own case, they tried to pin 40% of the blame on me because I didn’t have my headlights on (it was broad daylight, by the way). My lawyer pushed back hard and we got that number down to 10%. That alone made a huge difference in my settlement.

FAQs

Can I switch lawyers if I’m not happy?

Absolutely. You’re not locked into any one attorney. If your current lawyer isn’t communicating or handling things properly, you can fire them and hire someone else. Just make sure to review your contract and understand if there are any fees involved in switching.

What happens if I lose the case?

If your lawyer is working on a contingency basis, you won’t owe them anything if you lose. However, you might still be on the hook for case expenses (like court filing fees or expert witness costs). Ask your lawyer how they handle this upfront.

How soon should I contact a lawyer after an accident?

As soon as possible ideally within days of the crash. The sooner a lawyer is involved, the faster they can gather evidence, handle the insurance company, and protect your rights. Waiting too long could weaken your case.

Can I handle a minor injury claim myself?

Yes, if the injury is very minor (like bruises or soreness that goes away in a few days) and the insurance company offers to pay your medical bills and repair costs, you might not need a lawyer. Just be cautious some injuries take time to show up.

Will hiring a lawyer delay my settlement?

Not necessarily. In some cases, it can speed things up because the insurance company knows they’re dealing with someone serious. But even if it takes longer, the payout is usually much higher so it’s worth the wait.

Conclusion

So, back to the big question: Do I need a lawyer for a car insurance claim? If your claim is simple, no injuries, and the insurance company is playing fair you might be okay handling it on your own.

But if there’s injury, dispute over fault, denial, or a lowball offer, then YES you probably do need a lawyer. And that decision could save you thousands of dollars and hours of stress.

I’ve been through it. I know how overwhelming it can feel. But once I handed it over to someone who actually understood the process, it was like a huge weight was lifted off my shoulders. I could focus on getting better while my lawyer took care of the rest.

Remember: insurance companies have teams of lawyers working for them. Don’t go into that fight alone.

Do I need a lawyer for a car insurance claim? If you’re even asking, it’s probably time to talk to one.

How Long Can a Lawyer Hold Your Settlement Check

0

How long can a lawyer hold your settlement check is a question I get asked more often than you’d think and trust me, I understand why. After months (sometimes years) of pain, paperwork, and patience, you finally win your case or reach a settlement. The big moment arrives, and you think, “Alright, where’s my check?” But instead of getting paid right away, your lawyer tells you it’s still “being processed.” Sound familiar?

How Long Can a Lawyer Hold Your Settlement Check

Let me break it down for you: the check doesn’t usually come to you directly from the insurance company or the other party. Nope it goes to your lawyer first. That’s where the hold-up can happen. And while some delays are totally legit (and even legally required), other times it feels like your lawyer is dragging their feet.

So in this article, I’ll walk you through every step of what’s really happening, how long a lawyer can legally hold your settlement check, and what to do if things seem fishy. And don’t worry I’m keeping it in plain English, just like I’d explain it to a friend over coffee.

What Is a Settlement Check?

Before we dive into the nitty-gritty of how long a lawyer can keep your settlement check, let’s back it up a bit. What exactly is a settlement check?

A settlement check is the money you’re paid after winning or resolving a legal claim. Usually, this comes after you’ve been injured or wronged maybe in a car accident, a slip and fall, medical malpractice, or even a wrongful termination. The money you receive is meant to cover your losses. We’re talking about things like medical bills, lost wages, pain and suffering, and sometimes emotional distress or punitive damages.

Once both parties agree on a settlement amount, the check is issued by the at-fault party or their insurance company. But here’s the thing: it doesn’t go straight into your pocket. The check is made out to your lawyer’s firm and gets deposited into a special trust account first. From there, the lawyer handles all necessary deductions like legal fees, medical liens, or any other agreed-upon expenses before you see a dime.

This process is completely normal, but it’s also where the timeline can get murky. You might expect the check in a few days, but in reality, it might take weeks or even longer. That’s why understanding what’s going on behind the scenes is so important.

The Settlement Process – Step by Step

Let’s walk through what really happens between the moment your case settles and when you finally get your check in hand. It’s not just someone writing a check and mailing it it’s a bit more complicated than that.

Step 1: Signing the Release Form

Once the settlement is agreed upon, the very first thing that needs to happen is you sign a release of claims. This is a legal document that says you won’t sue the other party in the future for this incident. Until you sign it, no check is coming your way.

Step 2: The Insurance Company Issues the Check

After receiving the signed release, the insurance company cuts the check. This usually happens within 7–14 business days. Sometimes it’s quicker, sometimes slower—depending on the company and how efficient they are.

Step 3: Your Lawyer Deposits the Check

When your lawyer receives the settlement check, it’s deposited into a special account called an IOLTA (Interest on Lawyers’ Trust Account). It must clear the bank before any money can be distributed. This clearing process can take up to 5–10 business days, depending on the amount and bank.

Step 4: Deductions Are Made

Here’s where most of the work happens. Your lawyer will pay off any outstanding medical bills, reimburse themselves for case-related expenses, and take out their legal fees (which are often a percentage of your settlement). This is also the step where delays can creep in especially if there are multiple lienholders who need to be contacted or negotiated with.

Step 5: You Get Paid

Once all the math is done and checks are cut, you’ll finally receive your portion of the settlement. This can be done via check or direct deposit, depending on the firm.

Each of these steps can take time, but it’s crucial they’re done properly. Rushing could mean errors, missed payments, or worse legal trouble for your lawyer.

Why Does Your Lawyer Hold the Settlement Check?

Now let’s tackle the elephant in the room why is your lawyer holding onto your settlement check, anyway? If you’re like most people, you’re probably thinking, “It’s my money why can’t I just have it?”

Well, there are a few legitimate reasons. Let’s break them down:

1. Pending Medical Bills

If you received medical treatment on a lien basis, your healthcare provider may be entitled to part of your settlement. Your lawyer has to ensure those bills are paid before releasing your funds. Ignoring them could land you in debt or damage your credit.

2. Lien Resolutions

Sometimes, other parties like your health insurance, Medicare, or Medicaid might have paid for your treatment and want to be reimbursed. Your lawyer can’t release the money to you until those liens are resolved. And believe me, these negotiations can take time weeks, sometimes months.

3. Fee Deductions

Your lawyer also needs time to calculate and deduct their fees, along with any costs associated with the case (think: court filing fees, expert witnesses, document preparation). They’ll usually provide you with an itemized breakdown of where every dollar is going.

4. Legal Compliance

Lawyers are bound by strict ethical and legal rules. They can’t just hand you the money without making sure everything’s squared away. Doing so could put their license at risk and no attorney wants that.

So yes, it’s frustrating to wait. But in many cases, it’s being done to protect you and make sure nothing comes back to bite you later.

How Long Can a Lawyer Legally Hold Your Settlement Check?

Let’s get to the heart of the matter: how long can a lawyer actually hold your settlement check?

Legally, there’s no hard-and-fast nationwide deadline. But generally speaking, lawyers are expected to disburse the settlement funds promptly after they’ve cleared and all obligations are handled. Most state bar associations consider 30 days a reasonable time frame from the moment the check is deposited.

That said, this timeframe can vary depending on:

  • The complexity of your case
  • Outstanding liens or bills
  • State laws and local bar guidelines
  • Banking and clearing delays

For example, in California, the State Bar requires attorneys to distribute funds “as soon as reasonably possible.” In Florida, delays must be explained and documented, or else it can be considered misconduct. Across the board, unnecessary or unexplained delays are frowned upon and can even be grounds for disciplinary action.

So if your lawyer is holding onto the check for more than 30–45 days without a clear explanation? It’s time to start asking questions.

What Are Lawyer Trust Accounts?

When you hear the question, how long can a lawyer hold your settlement check, it helps to understand what happens with that money behind the scenes. I want to break down lawyer trust accounts what they are, why they matter, and how they impact the timeline you’re waiting on.

Most states require lawyers to use specialized bank accounts called IOLTA accounts (short for Interest on Lawyers’ Trust Accounts). Here’s why:

Segregation of Funds

Once your lawyer gets the settlement check, they can’t just deposit it into their firm’s general operating account. It must go into a neutral, pooled trust account. This fund is strictly to hold money that belongs to clients whether it’s your full settlement or someone else’s.

Interest and Transparency

With IOLTA, small amounts of interest may be generated, which supports legal aid programs. But the important part for you is that these accounts are monitored by the bar association or other regulators, so there’s oversight. That means there’s an incentive to process everything in good order and not hold funds unjustly.

Clearance Time

Just like your personal check, a settlement check must clear the bank. Even after months of waiting for the insurance company to issue it, your waiting continues until the bank confirms it. Larger settlements can take 5–10 business days to verify, depending on the bank’s policy.

Distribution Rules

Trust accounts are heavily regulated. Your lawyer must track dates, amounts, payees, and provide clear accounting. This is where delays can occur administrative tasks like producing itemized statements, preparing payments to lienholders, and cutting checks to you all slow things down.

In short, the lawyer can’t just hand you the money immediately not because they’re holding out, but because the system they’re regulated by demands proper handling. Since lawyers are bound by ethics to keep client funds safe, this trust-account step is critical and unavoidable.

Valid Reasons for Delay

Let’s face it: waiting for your settlement check is stressful. But most of the time, delays are based on valid, necessary reasons not laziness or greed. Here’s what typically holds things up:

1. Resolving Liens

If you received medical treatment under someone else’s insurance whether it’s Medicaid, Medicare, your own health insurer, or even an individual healthcare provider they may legally have a claim (called a lien) against your settlement. Before you get your money, your lawyer must contact them, negotiate repayment, or wait for a court-ordered approval. These lien processes can take DAYS or even WEEKS, depending on responsiveness.

2. Outstanding Medical Expenses

Providers who didn’t file liens might still expect payment. Your lawyer must collect invoices, verify accuracy, and pay them out of your funds. Mistakes here can lead to underpayment or overpayment issues, so doing it carefully takes time.

3. Reimbursable Case Costs

Law firms often front out-of-pocket costs think court fees, expert witness payments, deposition fees, medical record requests, mileage, etc. Each cost needs documentation and itemization before being reimbursed. Lawyers typically don’t reimburse themselves until all documentation is properly assembled and accurate.

4. Paperwork Errors

Even a small typo in your name, incorrect case number, or miscalculated lien amount can cause paperwork to bounce back. Lawyers must double, even triple-check documents before issuing payments. While annoying, these checks are in place to protect you from bigger headaches.

5. Unusual Settlement Terms

Less common, but possible your settlement might require court oversight or structured payments over time. The terms could specify different release provisions, escrow conditions or “holdbacks” until certain conditions are met (like completion of medical treatment). That’s not a lawyer’s stalling it’s your agreement in action.

All of that adds up. So when you’re feeling impatient, remember these steps help protect you and keep the process ethical, accurate, and fair.

Red Flags: When It’s Taking Too Long

Although delays are often valid, there are times when your lawyer might be dragging things out unfairly. Know when to raise a red flag:

No Clear Explanation or Timeline

If you’ve been 30+ days past the deposit and your lawyer won’t explain why or give you a schedule that’s a concern. A reputable attorney should be able to walk you through each remaining step.

Avoiding Communication

Repeatedly calling or emailing your lawyer and getting no reply? That’s not normal. Professionals should acknowledge your messages and give timely updates.

Incomplete Accounting

You deserve a detailed breakdown: what was deducted, who got paid, what’s still pending. If you’re just told “it’s complicated” without items or proof, ask for documentation.

Unjustified Fee Deductions

Check the deduction amounts. If something seems inflated or unclear like higher than agreed contingency fees or questionable expenses ask for an explanation. If it still feels off, get a second opinion (more on that later).

Checking for Misconduct

Your state bar has rules around maintaining client funds. If your lawyer consistently fails to distribute in a reasonable time or misuses funds, they may be in violation but you must first document your concerns.

In short: if something doesn’t feel right, don’t ignore it. Your instincts and inquiries matter.

Your Rights as a Client

Let’s make it clear this is your money. As the client, you have rights. Here’s what you’re entitled to:

1. Timely Payment

Rulebooks don’t say “pay you in 50 days.” They say your funds must be handled promptly once all things are cleared. Thirty days post-clearance is widely accepted as reasonable, depending on the case complexity.

2. Full Transparency

You have a right to see exactly what’s happening: when the check was received, when it cleared, who’s being paid, and why. Don’t hesitate to ask for detailed accounting.

3. Accountability for Funds

Because your funds are in trust accounts, lawyers must track them carefully and avoid commingling. This is non-negotiable you deserve peace of mind that your money is safe.

4. Right to an Itemized Breakdown

You’re entitled to request, at any time, an itemized list of every disbursement made legal fees, costs, expenses, and lien payments. Without it, you don’t really know what you’re getting.

5. Right to Challenge

If deductions seem wrong or expenses inflated, you can challenge them. Seek explanations, request receipts, or even hire an independent CPA if you suspect the numbers are off.

In all of this, remember: you’re not being confrontational by asking. You’re being responsible. And any reputable attorney should respect that.

What to Do If Your Lawyer Is Delaying the Check

Let’s say it’s been way longer than 30–45 days and nothing’s moving. What steps should you take? Here’s a practical roadmap:

Document Everything

Keep a record of emails, dates, phone calls, and all communications. Clear documentation makes everything easier if things escalate.

Request a Written Statement

Ask your lawyer to provide a written timeline: deposit date, reasons for delays, expected disbursement date. This gives clarity and pushes them to formalize the timeline.

Ask for an Itemized Breakdown

Even if they’re vague, insist on an itemized accounting. It’s your right and may uncover clerical or ethical issues.

Get a Second Opinion

Consult with another experienced personal injury attorney no need to switch. Ask whether your current hold-up is typical or excessive. A fresh perspective can be enlightening.

File a Bar Complaint (if needed)

If your lawyer refuses to provide info, exceeds reasonable timelines without cause, or misuses funds, you may have grounds to file a grievance with your state bar association. They oversee attorney conduct and can investigate.

Lawyer Fees and Deductions Explained

By now, you might be wondering: when your settlement check arrives, how much of it actually goes into your hands? And how much does your lawyer keep? It’s a fair question and one I hear all the time.

Let’s break it down simply.

1. Contingency Fees

Most personal injury lawyers work on what’s called a contingency fee basis. That means they don’t get paid unless you win or settle your case. When you do get paid, they take a percentage of your settlement. The typical fee is:

  • 33.33% if settled before filing a lawsuit
  • 40% or more if the case goes to court or trial

So, if your settlement check is for $90,000, your lawyer might take $30,000 if you settled before filing. If your case went to trial, they might take up to $36,000 or more.

2. Reimbursement of Case Expenses

In addition to their fee, your lawyer will also deduct case-related expenses. These aren’t shady fees—they’re costs they fronted for things like:

  • Medical records
  • Filing fees
  • Private investigators
  • Expert witnesses
  • Postage, printing, and courier fees

It’s fair game for your lawyer to get reimbursed for these but they must be clearly documented. You have a right to see receipts or a written breakdown.

3. Medical Liens or Subrogation

If your treatment was covered by health insurance, Medicare, or Medicaid, they may want their piece of the pie back. This is called subrogation. Your lawyer has to pay these claims before you get your cut, and these can often be negotiated down to save you more money.

4. How to Know What’s Fair

Wondering whether the deductions seem reasonable? Ask yourself:

  • Did the lawyer explain the fee structure in your initial agreement?
  • Do you have a full itemized statement of all expenses?
  • Are the numbers consistent with what you were told?

If anything feels off, don’t hesitate to ask. Transparency is your right, and any honest attorney will welcome your questions.

Taxes and the Settlement Check

Let’s talk taxes. It’s not the most exciting topic, I know but when that settlement check hits your account, the last thing you want is a surprise visit from the IRS.

So do you have to pay taxes on your settlement money? Well… it depends.

1. Compensatory Damages (Usually Tax-Free)

If you were compensated for physical injuries like medical bills, pain, and suffering, or lost wages due to injury those amounts are generally not taxable. That’s because they’re meant to make you “whole,” not enrich you.

But there are exceptions.

2. Emotional Distress or Mental Anguish

If your emotional distress was directly tied to a physical injury, it’s also not taxed. But if the emotional distress came from something like a wrongful termination or defamation case (with no physical injury involved), that part could be taxable.

3. Punitive Damages (Always Taxable)

If you were awarded punitive damages money meant to punish the other party, not just compensate you those are always taxable under IRS rules. These amounts must be reported as “other income.”

4. Interest on Settlement Amounts

Sometimes settlements come with prejudgment or post judgment interest. That interest is taxable even if the original award isn’t.

5. What You Should Do

  • Ask your lawyer whether any part of your settlement is taxable.
  • Keep all your paperwork in case the IRS asks questions.
  • Talk to a tax advisor before you file it’s worth the peace of mind.

Remember, taxes are a one-size-doesn’t-fit-all situation. Every case is different, so don’t guess ask.

How Long After Lawyer Deducts Fees Will You Get Paid?

Okay, let’s say all the math is done. Your lawyer has deducted their fees, paid off the medical liens, and tied up the loose ends. So… when do you actually get your money?

In most cases, once all deductions are completed, you should receive your portion within 7 to 10 business days.

Here’s how it usually plays out:

  1. Your Lawyer Finalizes the Math: They confirm that all checks have cleared, liens are paid, and fees are settled. This takes a couple of days to finalize.
  2. They Cut You a Check or Wire the Funds: You may be asked whether you prefer a paper check or a wire transfer. Most people go with a check unless it’s a high-dollar amount.
  3. You Receive Your Disbursement Letter: This is a breakdown of what was paid to whom, how much your lawyer deducted, and what’s coming to you. Always read this carefully.
  4. Payment Is Issued: A check is either mailed or picked up at the office or the money is wired directly to your bank.

Things That Might Delay This Step:

  • Holidays and weekends
  • Errors on your paperwork
  • Waiting for lienholders to cash their checks
  • Internal review delays (especially at large law firms)

The key takeaway? If your lawyer tells you they’re done with deductions but two weeks pass with no check follow up. You’ve waited long enough.

Tips to Speed Up the Process

You’re probably wondering: is there anything you can do to make sure you get paid faster? Yep, there’s a lot that’s in your control. Here are some tried-and-true tips:

1. Stay in Communication

Respond to your lawyer’s calls or emails quickly. Delays often happen when clients go MIA right before paperwork needs to be signed or liens need clarification.

2. Get Medical Bills Early

If you know your doctor or hospital will bill your settlement, ask for your final statements early. The sooner your lawyer has those, the faster they can pay them and release your check.

3. Ask About Liens Up Front

As soon as you settle, ask your lawyer if there are any liens. Get clear on who’s owed what, and if possible, give them permission to start negotiating right away.

4. Request Electronic Payment

Many firms can wire your funds instead of mailing a check. It’s faster, more secure, and avoids postal delays.

5. Be Proactive Without Being Pushy

It’s okay to check in every few days. Be polite but assertive. Ask, “What’s the status of my disbursement?” or “Are there any final steps I can help speed up?”

By being proactive, you show your lawyer you’re engaged and ready to move things forward.

FAQs

What if my lawyer won’t return my calls about the settlement check?

This is a red flag. You should always be able to get a status update on your case. Start by sending an email or written request for information. If that fails, consider contacting the state bar or getting another attorney’s opinion. Document everything.

Can I fire my lawyer if they’re delaying my check?

Technically, yes you can fire your lawyer at any time. But if they’ve already done the work and received the check, it’s usually better to resolve the issue directly rather than start over. If needed, you can hire another attorney to help you negotiate the release of your funds.

Will I be charged if I switch lawyers after the settlement?

Most lawyers will still be entitled to a portion of the original contingency fee if they did the bulk of the work. If you switch late in the game, the original lawyer might claim a lien on your settlement for the time and effort they invested.

How are liens paid out of a settlement?

Liens are paid directly from your settlement before you receive your portion. Your lawyer contacts the lienholders (like hospitals or insurance companies), negotiates where possible, and sends them a check. After that, you get what’s left.

Can my lawyer cash my check without telling me?

Nope. That would be illegal and unethical. The check is usually deposited into a trust account and held there until everything is finalized. You must be informed of the funds, given an itemized statement, and receive your share promptly.

Conclusion

So, how long can a lawyer hold your settlement check? In most cases, the answer is: not very long—unless there are valid legal, ethical, or logistical reasons for the delay. Once your lawyer receives your settlement check, they typically have to deposit it, let it clear, handle any liens or fees, and then get your money to you. This usually takes about 30 days, give or take, depending on the complexity of your case.

How Much Does a Lawyer Charge for Chapter 7

0

Do lawyer charge about $2,000 USD to $5,000 USD for chapter7? When filing for Chapter 7 bankruptcy, one of the first questions that pop on the mind of people, “how much does a lawyer charge for chapter 7?” And if you’re in a tough spot financially, I bet you’re wondering the same. Here’s the thing: most bankruptcy lawyers understand you’re not made of money after all, you’re filing for bankruptcy, right? That’s why many of them offer flexible payment plans.

How Much Does a Lawyer Charge for Chapter 7

Can You Pay in Installments?

Yes, absolutely. A lot of bankruptcy lawyers allow clients to pay their fees in installments. This typically starts with a partial upfront payment just to get the ball rolling maybe $300 USD to $500 USD. Then, the remaining balance is split into monthly payments. It helps ease the pressure and gives you a little breathing room to come up with the cash.

But here’s the catch (there’s always one): in most cases, the entire lawyer fee must be paid in full before they actually file your Chapter 7 petition. Why? Because once the case is filed, creditors are legally barred from collecting debts including any fees owed to your lawyer. So if you owe them money and they file your case, they’re out of luck. That’s why most attorneys stick to a “pay-first, file-later” rule.

Upfront vs. Post-Filing Fees

Now, some law firms offer something called “bifurcated payments.” It’s a fancy term that basically means they split the process into two parts. First, they do a little bit of pre-filing work and charge a small upfront fee. Then, after your bankruptcy is filed, they charge you for the remaining work through a post-filing payment plan. This structure skirts around the legal issue of collecting fees post-bankruptcy because technically, the post-filing fees are for work done after the case begins.

This option can be a lifesaver if you truly can’t come up with a large sum right away. Just make sure you understand the full terms some of these plans come with added costs or interest.

What Affects a Lawyer’s Fees in Chapter 7?

Chapter 7 cases are not always a one-size-fits-all deal. Some are super simple and take minimal work. Others? A total mess with complex paperwork, multiple assets, or even possible fraud red flags. And that complexity is one of the biggest reasons why a lawyer might charge more.

Case Complexity Matters

If your bankruptcy case is straightforward no assets to protect, simple debts, and no red flags then expect to pay on the lower end, maybe $1,000 to $1,500. But if things start getting messy, like owning a business, having non-exempt assets, or facing lawsuits from creditors, your lawyer’s job gets tougher. And tougher jobs mean higher fees. I’ve seen complex cases climb up to $3,000 or more just because of the extra hours involved.

Your Financial Situation Also Counts

Lawyers don’t just look at your debts they consider your entire financial picture. If you’re self-employed or your income fluctuates, they’ll have to dig deeper into your finances, which means more work for them. And of course, more work equals more fees.

The Paperwork Load

It’s fascinating how much paperwork goes into filing Chapter 7. If you’re not super organized and hand over a pile of unsorted bills, paycheck stubs, and financial records, your lawyer will have to spend time sorting through it. That added time? Yep, it gets factored into your fee.

So, the cleaner and clearer your case is, the more likely you are to pay the minimum end of the fee range. Help your lawyer help you and save some money in the process.

Free and Low-Cost Legal Aid Options

It’s ideal when you’re broke and drowning in debt, even the idea of paying a lawyer can feel impossible. But you’ve got options, and I want to make sure you know about them.

Legal Aid Societies

Every state in the U.S. has at least one legal aid society or nonprofit organization that helps low-income folks get access to legal services, including bankruptcy. These organizations are often funded by grants or public donations, so they can offer free legal advice or even represent you during your Chapter 7 case.

Now, keep in mind that these services are usually in high demand. You might have to prove your income level, be placed on a waiting list, or qualify under other criteria. But if you’re truly in a bind, it’s absolutely worth checking out.

Pro Bono Bankruptcy Lawyers

Many bankruptcy attorneys volunteer their time through pro bono programs. That means they take on a case or two completely free of charge each year. The American Bar Association and local bar associations often maintain a list of lawyers who participate in these programs. Some even rotate lawyers for free bankruptcy clinics, where you can get one-on-one advice.

Red Flags to Watch Out For When Hiring a Bankruptcy Lawyer

Not every bankruptcy lawyer has your best interest at heart. Some are just out to make a quick buck, and when you’re desperate, it’s easy to fall for smooth talk or ultra-low pricing.

Beware of “Bargain” Bankruptcy Lawyers

If a lawyer is advertising Chapter 7 filings for $499 or something suspiciously low, that should raise an eyebrow. Why? Because quality bankruptcy representation usually costs more than that and there’s a reason. You’re paying for their experience, the time they spend analyzing your financial life, and their ability to navigate the legal system on your behalf. Dirt-cheap lawyers often cut corners, rush through the process, or hand you off to a paralegal.

In some worst-case scenarios, those bargain deals don’t even include filing fees or essential services like representing you at the creditors’ meeting. So that $499 can quickly balloon to $1,500 or more when all is said and done.

Watch for Shady Behavior

Another red flag is how the lawyer communicates. Are they hard to reach? Do they dodge your questions or give vague answers? Are they pressuring you to file right away without fully understanding your case? That’s a big no-no.

You want someone who listens, explains things clearly in plain English, and doesn’t make you feel rushed or dumb for asking questions. After all, filing for bankruptcy is a big decision—you deserve someone who treats it like one.

How to Choose the Right Chapter 7 Bankruptcy Lawyer

Finding the right lawyer feels a bit like dating you need chemistry, trust, and the sense that this person actually gets you. So don’t just Google “bankruptcy lawyer near me” and call it a day. Take your time. Here’s what worked for me and what can work for you.

Important Questions to Ask

Before you commit, ask them things like:

  • How many Chapter 7 cases have you handled?
  • What’s included in your fee?
  • Do you offer payment plans?
  • Will I be dealing with you directly or a paralegal?
  • What’s your process from start to finish?

A good lawyer will answer these without hesitation and won’t make you feel rushed.

Consultations Matter

Most bankruptcy attorneys offer a free initial consultation. Take advantage of that. Use it as a time to feel them out. Are they professional but approachable? Do they talk down to you or explain things in a way you understand? Trust your gut if something feels off, it probably is.

During my consultation, my lawyer actually sketched out a rough timeline on paper and showed me where my money was going. That small act of transparency sealed the deal for me.

Alternatives to Hiring a Lawyer for Chapter 7

Sometimes, you might be thinking, “Can I just file Chapter 7 without hiring a lawyer at all?” And technically, yes you can. But should you? That depends.

Filing Pro Se (Going It Alone)

When you file without a lawyer, it’s called filing pro se. And while it might save you attorney fees, it comes with serious risks. I considered this route myself, but after looking at the paperwork—dozens of pages, strict deadlines, and unfamiliar legal terms I quickly realized I was in over my head.

Filing pro se might work if:

  • Your case is extremely simple (no property, no income issues, no business-related debt)
  • You’re organized and detail-oriented
  • You have time to study bankruptcy laws and procedures

But if you mess up even one form or miss a deadline, the court can dismiss your case. You could lose protections, face collection efforts again, or worse—end up losing assets you could have kept.

Bankruptcy Petition Preparers: A Cheaper Option?

Another alternative you’ll hear about is a bankruptcy petition preparer (BPP). These are non-lawyers who help fill out bankruptcy forms for a lower fee. Sounds good, right? Here’s the kicker they legally can’t give you legal advice, guide you through the process, or represent you in court.

So, if your case hits a snag or gets complicated (and many do), you’re on your own. In short, you’re paying someone to be a glorified typist. It’s cheaper, sure, but riskier if you don’t know the legal system inside and out.

In my experience, nothing replaces the peace of mind you get from hiring someone who truly knows the law and who has your back in court.

How to Save Money on Chapter 7 Legal Fees

Nobody wants to spend more than they have to especially when money is already tight. But if you’re smart about it, there are ways to lower your Chapter 7 legal fees without sacrificing quality.

Be Organized and Honest

When I first met with my bankruptcy lawyer, I brought a messy folder of bills, pay stubs, and bank statements. He was polite, but it was clear I was making his job harder. On my next visit, I had everything sorted by date, type, and category and he noticed.

The more organized you are, the less time your lawyer has to spend deciphering your paperwork. That directly affects the cost. Be upfront about everything, too. Don’t hide income or leave out assets. If they find surprises mid-process, it creates extra work and costs.

Compare Before You Commit

Just like any service, it pays to get multiple quotes. Call at least three local bankruptcy attorneys and schedule free consultations. Ask each one about their fees, payment plans, and what’s included. Some may offer flat fees that bundle everything, while others charge separately for different services.

Also, look at reviews and client testimonials. Price matters, but so does trust and experience. You want someone who’s transparent, experienced, and genuinely interested in helping you get a fresh start not just collecting a fee.

Timeline of a Chapter 7 Case and When Fees Are Due

One thing I wish someone had explained to me clearly? The timeline. Understanding how long Chapter 7 takes and when your lawyer fees are due can make a huge difference in how you plan financially.

Chapter 7 Timeline: From Start to Finish

Here’s a rough breakdown of the Chapter 7 timeline:

  • Pre-filing consultation & paperwork gathering – 1–2 weeks
  • Credit counseling course – Mandatory before filing
  • Filing the case with the court – Once the lawyer is paid in full
  • Automatic stay begins – Creditors must stop contacting you
  • 341 Meeting of Creditors – About 30–40 days after filing
  • Financial education course – Mandatory post-filing
  • Discharge order issued – Typically 60–90 days after your creditor meeting

So, from start to finish, a typical Chapter 7 case wraps up in about 3 to 5 months. But your lawyer’s fee? That’s usually due before step 3.

When Do You Have to Pay Your Lawyer?

Most lawyers won’t file your case until they’ve been paid in full. That’s because once your case is filed, they’re legally blocked from trying to collect fees. Some may offer you a structured payment plan in advance, and a few (as mentioned earlier) do bifurcated payment plans where part of the payment comes after filing.

Make sure you clarify these terms upfront during your consultation. Ask for a written breakdown of fees and payment schedules so there are no surprises later on.

Common Mistakes That Can Cost You More

Let me tell you when it comes to bankruptcy, mistakes aren’t just annoying; they can be expensive. I learned the hard way that one small oversight could throw your entire case off track.

Missing Documents or Filing Late

Courts are strict with deadlines and paperwork. If you forget a single document, say, a bank statement or tax return your case could be delayed or dismissed. And if your case gets dismissed, guess what? You’ll need to pay to refile.

That’s why working with a good lawyer is so crucial. They help make sure every “i” is dotted and every “t” is crossed. They know what the trustee will look for and can help you prep for that all-important meeting of creditors.

Not Being Honest on Your Forms

Another big mistake? Hiding income or assets. You might be tempted to keep a side gig secret or forget to list a savings account, but don’t do it. The bankruptcy court can smell dishonesty a mile away. If you’re caught, not only could your case get thrown out, but you could face fines or even fraud charges.

Always tell your lawyer everything. They’re not there to judge they’re there to help. But they can only protect you if they know the full picture.

FAQs

Can I file Chapter 7 bankruptcy without a lawyer?

Yes, but it’s risky. If your case is complex or you make mistakes, you could face delays, dismissals, or even lose property unnecessarily.

What is the cheapest way to file Chapter 7?

Using legal aid or finding a pro bono lawyer is the cheapest route. Filing pro se is an option but can be risky without legal knowledge.

Do bankruptcy lawyers charge hourly or flat fees?

Most Chapter 7 lawyers charge a flat fee, which covers the entire case. Always confirm what’s included to avoid surprise charges.

Are Chapter 7 filing fees included in the lawyer’s cost?

Not usually. Expect to pay around $338 for court filing fees in addition to your lawyer’s fees, unless your lawyer bundles them.

Can I negotiate the cost with a bankruptcy lawyer?

Yes. Many lawyers are open to discussing fees, especially if you have a simple case or can pay upfront.

Final Thoughts – Is Hiring a Chapter 7 Lawyer Worth It?

So… how much does a lawyer charge for Chapter 7? Well, it varies. On average, you’re looking at anywhere from $1,000 USD to $2,500 USD depending on your case, location, and financial complexity. But here’s what I’ve come to realize it’s not just about the money. It’s about peace of mind.

Having someone in your corner who understands the law, watches your back, and handles the stressful stuff for you? That’s priceless. If you’re like me stressed, broke, and just trying to make the right call then yes, hiring a bankruptcy lawyer is absolutely worth every penny.

Just remember to ask the right questions, stay organized, and be transparent about your financial situation. It might feel overwhelming right now, but you’re closer to a fresh start than you think.

How Much Does a Lawyer Charge to Transfer a Deed

0

​How much does a lawyer charge to transfer a deed? A flat fee is a single, upfront payment you make for the entire service. Lawyers often offer this for straightforward deed transfers because it’s predictable. If your deed situation is pretty standard say you’re adding a spouse to the deed or gifting a home to your child then a flat fee is usually the way to go. Most lawyers will quote anywhere between $200 USD to $600 USD, depending on where you live and the complexity of the paperwork.

How Much Does a Lawyer Charge to Transfer a Deed

I’ve found that many folks prefer this because there are no surprises. You know from the start what you’re paying, and that’s especially helpful when you’re juggling moving costs, mortgage changes, or estate planning.

Hourly Rate – Best for Complex Transfers

On the other hand, if your deed involves a more complex situation like disputes over ownership, inherited property with multiple heirs, or a transfer tied to a divorce then an hourly rate might apply. Lawyers might charge $150 USD to $400 USD an hour, depending on their experience and your location.

Here’s the deal though: you need to ask for an estimate of hours upfront. Nobody likes getting a legal bill that’s twice what they expected because of “extra time.”

Which One Should You Choose?

If your case is simple, go flat fee all the way. If it involves multiple parties, unusual legal situations, or significant title research, the hourly route may be unavoidable. But always ask your lawyer whether a flat fee is possible before agreeing to hourly billing. Some may agree to cap the hourly hours too.

Hidden Costs You Might Not Expect

Now, I wish I could tell you that the lawyer’s fee is the only thing you’ll pay but let’s keep it real. There are other costs involved in transferring a deed, and they can sneak up on you.

Recording Fees

Every deed transfer needs to be recorded with your county or city. These fees usually range from $20 to $100, depending on your jurisdiction. It might not sound like much, but it adds up especially if you’re managing other legal or property costs.

Title Search or Title Insurance

Sometimes, a lawyer might recommend a title search just to make sure the property is free of liens or ownership disputes. This could cost you an extra $75 to $200, but trust me, it’s worth it. You don’t want to find out later that there’s a tax lien you didn’t know about.

Title insurance, while optional in some cases, can also be added for an additional $500 to $1,000. Again, not required for all transfers, but if you’re buying a property or handling an estate, it might be smart to invest in it.

Notary and Courier Services

A few other minor charges can come into play like notary fees (around $10–$50) and courier or mailing fees if documents need to be sent physically. These are small, but when you’re trying to budget precisely, it helps to know every potential cost.

Comparing DIY vs. Hiring a Lawyer

I’ll be honest: I once considered handling a deed transfer on my own. But the more I researched, the more I realized there are risks involved. Let’s break it down together.

The Cost of DIY

You can find deed transfer forms online for as low as $30–$50, and in some counties, they even provide templates. That might seem tempting, right? Just fill in the blanks and file it with the county. But the danger lies in making a small mistake that leads to big problems later.

For example, forgetting to include the correct legal description of the property or not using the proper terminology can result in the deed being rejected or worse, creating a legal mess.

When DIY Might Work

If the transfer is very straightforward say, transferring property between spouses or siblings and you’re confident in your ability to follow directions and local legal language, then sure, you might go the DIY route. But always double-check with your county office first.

Why I Ultimately Chose a Lawyer

After weighing all the options, I went with a lawyer. The peace of mind, the proper legal formatting, and the confidence that everything was filed correctly was worth the extra $400 I paid. And I didn’t have to keep calling the county clerk to ask if I’d done it right.

Cost Breakdown Table for Deed Transfer

Here’s a quick cheat sheet you can reference if you’re planning a deed transfer and wondering about the cost.

ServiceEstimated Cost
Lawyer$200 – $600
Lawyer (Hourly Rate)$150 – $400/hr
Recording Fee$20 – $100
Title Search$75 – $200
Title Insurance (Optional)$500 – $1,000
Notary Fees$10 – $50
DIY Deed Transfer Kit$30 – $50
Courier/Mailing Fees$10 – $30

This should give you a better idea of what to expect and help you avoid any surprise expenses.

How to Find an Affordable Lawyer for Deed Transfers

Start with Local Recommendations

Your best bet is to start asking around. I talked to friends, family, and even a real estate agent I knew. They often have contacts with experienced real estate lawyers who don’t overcharge. In my case, I got a great referral from someone who had just gone through a similar process.

Use Online Legal Directories

Websites like Avvo, LegalMatch, Thumbtack, and Justia are loaded with attorney profiles, including their specialties, pricing structures, and client reviews. I personally used Avvo to compare lawyers in my city—and many of them listed their typical flat fees for services like deed transfers.

Ask the Right Questions Upfront

When I was calling around, I made sure to ask these questions:

  • Do you offer a flat fee for deed transfers?
  • What’s included in your fee? (e.g., document prep, notary, recording)
  • Are there any additional costs I should know about?

A good lawyer will give you straight answers without trying to upsell you on unnecessary services. Don’t be shy about requesting a written estimate or quote either.

What’s Included in the Lawyer’s Fee?

Before I signed any paperwork, I wanted to make sure I knew exactly what I was paying for. A clear breakdown can help you avoid being hit with surprise add-ons later.

Document Preparation

Most lawyers will prepare the deed itself. This includes accurately entering the legal property description, verifying ownership records, and ensuring all necessary details are legally sound. Trust me, this part is way more complicated than just filling in a few blanks.

Title Review

In many cases, the lawyer will check the title for existing liens, unpaid taxes, or issues that could delay or void the transfer. This is super important because if there’s a hidden claim, you could be in for a legal nightmare later.

County Recording

Your lawyer usually handles the submission of the deed to your local county office. This process ensures that the new deed becomes part of the official public record. I didn’t have to worry about making an extra trip to the county clerk’s office that alone made the lawyer fee feel worth it.

Legal Advice

Lastly, your lawyer should give you personalized legal advice based on your situation. In my case, I learned I also needed to file a preliminary change of ownership report in my county a requirement I had never even heard of.

Deed Transfers Involving Special Situations

Some deed transfers are just more complicated than others, and they can cost you more because they demand more time and legal expertise. I’ll break down a few scenarios where you should expect higher lawyer fees.

Divorce or Separation

If you’re transferring a deed after a divorce, things can get messy especially when both names are on the title, but one person is keeping the property. A lawyer needs to make sure the transfer doesn’t conflict with your divorce decree or create future legal battles.

Expect to pay toward the higher end of the scale here possibly $500 to $1,000 or more.

Estate Transfers After Death

When someone passes away and their property is inherited, the deed transfer often happens through probate or trust administration. In this case, you’re not just paying for the deed work you’re paying for legal advice on inheritance laws, taxes, and estate documentation.

Depending on the state, these can range from $800 to $2,000 or more, especially if multiple heirs are involved.

Transferring to an LLC or Trust

Putting property into a living trust or transferring it to a business entity like an LLC is a smart move for asset protection but it also complicates the deed transfer. Your lawyer needs to coordinate the paperwork with your trust documents or business filings, which takes more time.

These typically cost $500 to $1,200, depending on how much customization is required.

How Long Does It Take to Transfer a Deed Through a Lawyer?

One of the first things I asked my lawyer was: “How long will this take?” Because let’s face it if you’re in the middle of buying, selling, or moving, time matters.

Standard Timeline

For a simple transfer, once the lawyer has all the details, it can take 3 to 7 business days to prepare the deed and get it signed. Then, depending on the county, recording it can take 1 to 3 weeks. Some counties offer e-recording, which speeds things up.

Delays to Watch Out For

Here are a few things that can slow down the process:

  • Incomplete property information
  • Outstanding title issues or liens
  • Missing signatures from multiple parties
  • County backlogs (especially during holidays)

In my case, the whole process took about two weeks but it felt smooth because my lawyer handled everything.

Can You Negotiate Lawyer Fees for Deed Transfers?

Absolutely. One thing I’ve learned over the years lawyer fees aren’t set in stone.

Be Upfront About Your Budget

Tell them what you’re working with. I called a few law offices and said something like, “I’m transferring a deed, and I’m hoping to keep my total costs under $500. Can you work with that?” You’d be surprised how many said yes or at least offered alternatives.

Bundle Services

Some lawyers will reduce fees if you’re doing multiple things like creating a will and transferring a deed at the same time. Ask if bundling services can get you a discount.

Shop Around

You have the power to compare options. If one lawyer gives you a high quote, don’t be afraid to say, “Thanks, I’m going to get a few more quotes before deciding.” It shows you’re serious and sometimes, they’ll even lower their fee on the spot.

State-by-State Differences in Lawyer Charges for Deed Transfers

You might be surprised, but where you live plays a huge role in how much a lawyer charges to transfer a deed. I discovered this the hard way when I compared what a friend paid in Texas versus what I was quoted in California. The difference was nearly double!

States with Lower Legal Fees

In states like Texas, Florida, and Georgia, legal fees for simple deed transfers tend to be more affordable. You can expect to pay around $150 to $400, especially in suburban or rural areas. Why? These states have more streamlined processes, and some counties even provide online services that reduce the need for back-and-forth paperwork.

States with Higher Costs

On the flip side, places like California, New York, and Illinois often come with higher legal fees. Attorneys in these states might charge $400 to $800 or more, even for straightforward transfers. Add in court filing fees and county recording charges, and the total can hit over $1,000, especially in metro areas.

Why It Matters

Knowing your state’s average helps you budget better. Before hiring anyone, check your county recorder’s website they usually list local requirements and fees. Then, ask your lawyer to walk you through any state-specific taxes, like transfer taxes or recordation fees, that could surprise you at the last minute.

Red Flags to Watch Out for When Hiring a Lawyer

Choosing the wrong lawyer can cost you more than money it can cost you peace of mind, time, and even your property rights. Here are some warning signs I wish I had known sooner.

Vague Pricing

If a lawyer can’t clearly explain their pricing whether flat fee or hourly that’s a red flag. You deserve transparency. Any hesitation to provide a written quote or breakdown is a clue that hidden fees might be on the way.

Lack of Real Estate Experience

Not all lawyers are equal when it comes to real estate. If the lawyer doesn’t regularly handle deed transfers, you risk delays or errors. Ask how many deed transfers they’ve done in the last year. The more, the better.

Poor Communication

If it takes days to get a call or email returned during your initial inquiry, imagine how long it’ll take when you actually need updates. A reliable lawyer will keep you in the loop and explain each step in plain English.

What If You Can’t Afford a Lawyer? Free and Low-Cost Options

Hey, life happens and not everyone can drop a few hundred bucks on legal help. But you’ve still got options, and they’re better than risking a botched deed transfer.

Legal Aid Clinics

Many cities have legal aid clinics or non-profit legal centers that offer free or low-cost legal services. If your income qualifies, you could get professional help with your deed transfer at zero cost.

Check out national directories like LawHelp.org or local university law schools. Law students, supervised by professors, often handle simple legal paperwork for free.

County Resources

Some counties have self-help legal centers or offer free deed templates and filing instructions. A few even hold deed transfer workshops. I attended one in my area, and it was surprisingly helpful even if you plan to hire a lawyer later.

Prepaid Legal Services

If you have a prepaid legal plan (through your employer or union, for example), you may be able to get your deed transferred for little or no cost. Always check what’s included in your plan before paying a lawyer out of pocket.

FAQs

Can I transfer a deed without a lawyer?

Yes, but it’s risky. If the transfer is straightforward and you understand the process, you might do it yourself. Still, mistakes can be costly, so legal guidance is strongly recommended.

How long does it take to complete a deed transfer with a lawyer?

On average, 1 to 3 weeks. It can be faster if your county supports e-recording and there are no title issues.

Are lawyer fees tax-deductible when transferring a deed?

Generally, no. Legal fees related to personal property transfers are not deductible. However, if the deed is for investment or business property, it might qualify—ask a tax professional.

Can I negotiate the lawyer’s fee for a deed transfer?

Absolutely. Many lawyers are open to flat fees or will lower their rate if your case is simple or if you’re bundling services.

What’s the cheapest way to transfer a deed?

Doing it yourself using online forms and filing directly with the county is the cheapest route, but it’s best for only the simplest situations.

Final Thoughts: Is Hiring a Lawyer to Transfer a Deed Worth It?

So, after breaking down everything from flat fees and hourly rates to hidden costs and state differences you’re probably wondering: Is it really worth hiring a lawyer to transfer a deed?

Here’s my honest answer: Yes, most of the time. The peace of mind, legal protection, and overall convenience are hard to beat. I paid $450 total, and my lawyer handled the deed, reviewed the title, and filed everything with the county. No errors. No stress.

Sure, if you’re confident and the transfer is simple, you might do it yourself for under $100. But for anything more complex like transfers involving estates, divorces, trusts, or co-ownership—don’t take the risk. One small mistake can turn into a legal disaster.

How much does a lawyer charge to transfer a deed? It varies. But the value they provide, especially in protecting one of your most important assets, often outweighs the fee.