Home Blog Page 6

Lowes.syf.com Login – How to Log In To Your Account

0

If you’ve ever used a Lowe’s store for home improvement shopping, you probably already know that managing your purchases and payments can get tricky. That’s where this Lowes.syf.com Login portal comes in, it’s designed to make your financial management simple, fast, and secure.

Lowes.syf.com Login

Lowes.syf.com login is the official login page for Lowe’s credit card holders, managed by Synchrony Bank. Through this platform, you can access your account 24/7, pay bills online, check balances, and even keep an eye on any exclusive offers. Think of it as your personal digital wallet for all things Lowe’s.

The beauty of using the Lowes.syf.com login system is convenience. No more waiting in lines, no more mailing checks, and no more stressing about missed due dates. Everything you need is just a few clicks away. And honestly, once you’ve logged in a few times, it feels as natural as scrolling through social media.

So, if you’ve been wondering why you should care about Lowes.syf.com login, let me tell you this, it’s your ticket to hassle-free management of your Lowe’s credit card. Whether you’re new to the platform or you’ve struggled with logging in before, this guide will walk you through everything step by step.

How Much is Homeowners Insurance on a $150000 House
How Much Would a $1000 Payday Loan Cost
Mortgage Lenders have the Lowest Rates
Get a Loan- Find a Loan Lender
Housing Assistance Payments
Mortgage 30 Year Fixed Rate – Find the Best Rates & Info
Mortgage 0 Down – Buy a Home with No Down Payment
Loan Discharge – Understand Your Options & Eligibility
Loan Xpress Pay – Fast Online Personal Loans
Loan 3000 – Get a $3000 Loan Instantly
Loan to Pay Off Credit Cards – Consolidate Debt & Save Money
Mortgage 150k House – How Much House Can I Afford

Benefits of Having a Lowes.syf.com Account

Having a Lowe’s credit card without using the online account is like having a smartphone but never connecting it to Wi-Fi. You’re missing out on a lot of benefits. With Lowes.syf.com login, the advantages go far beyond just paying your bills.

  • Account Management Made Easy: you can log in anytime to check your available credit, view recent transactions, and make sure you’re on track with your payments. No guessing, no waiting.
  • Bill Payments Without Stress: Paying bills used to be such a chore. But now, with just a few clicks, you can settle your balance directly through the portal. You can even set up automatic payments so you never have to worry about forgetting.
  • Exclusive Rewards and Offers: Lowe’s credit cards often come with deals like discounts on big purchases. Through the online portal, you can see these offers and make sure you’re not missing out.
  • Security and Control: Lowes.syf.com provides a secure environment where you feel confident that your personal and financial information is safe.

In short, if you’re only using your Lowe’s card in-store and ignoring the online account, you’re leaving money and convenience on the table. It’s like buying a fancy coffee machine but still drinking instant coffee every morning.

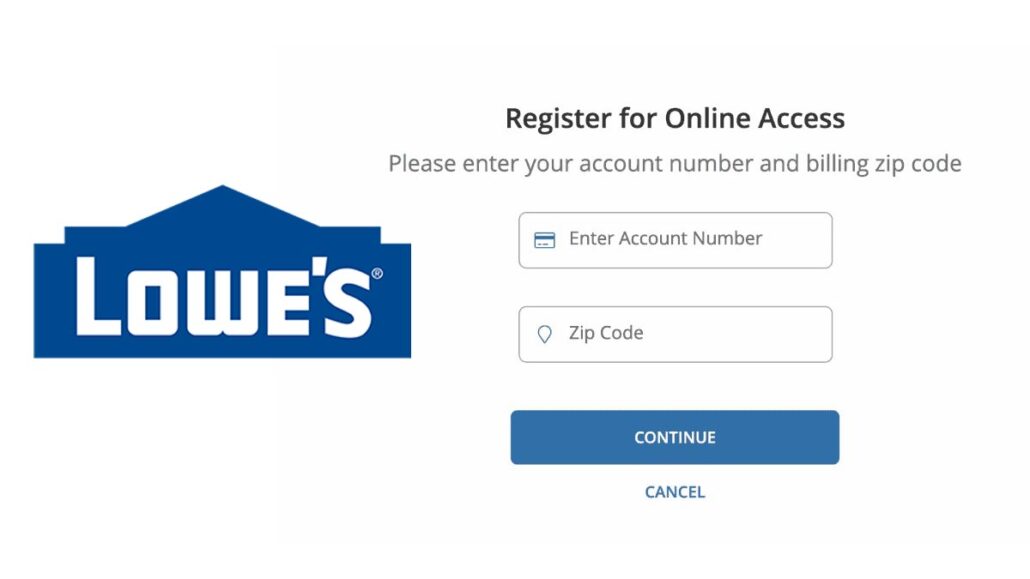
How to Create a Lowes.syf.com Account

Now, if you’re new to this, the first thing you’ll need to do is set up your account. Creating a Lowes.syf.com account isn’t rocket science, but you’ll want to get it right the first time to avoid frustration later.

Here’s the step-by-step process:

  1. Visit the official site: Go to Lowes.syf.com.
  2. Click on “Register”: You’ll see this option near the login box.
  3. Enter your account details: You’ll need your Lowe’s credit card number, ZIP code, and the last four digits of your Social Security Number.
  4. Create your login credentials: This includes choosing a username and a strong password.
  5. Set up security questions: These will help you recover your account if you ever forget your password.
  6. Review and confirm: Once all information is filled in correctly, confirm your details and complete the registration.

Pro tip: When creating your password, avoid using obvious things like your name, birthdate, or “123456.” A strong password is like a sturdy lock on your front door, it keeps unwanted visitors out.

And that’s it, you’re officially ready to log in and start managing your account like a pro.

Step-by-Step Guide to Lowes.syf.com Login

Okay, now that you’ve created your account, let’s talk about the actual login process. I’ll break it down so you can follow along whether you’re on a computer or a phone.

Logging in from Desktop

  1. Go to the official site Lowes.syf.com.
  2. Enter your username and password in the login box.
  3. Click on the “Secure Login” button.
  4. Once logged in, you’ll see your account dashboard.

Logging in from Mobile

  1. Open your browser and go to Lowes.syf.com.
  2. Type in your username and password.
  3. Tap on “Secure Login.”
  4. You’ll be redirected to a mobile-friendly version of your account.

Things to check before logging in:

  • Make sure you have a stable internet connection.
  • Double-check that you’re on the official site (look for “https” in the address bar).
  • If you’re using a shared device, never save your login details.

Trust me, once you’ve done this a couple of times, it becomes second nature.

Troubleshooting Lowes.syf.com Login Issues

Here’s how to usually handle these situations:

  • Forgot Password: If you forget your password, click on “Forgot Password?” and follow the reset instructions. It’s quick and painless.
  • Locked Account: Sometimes, too many failed login attempts can lock your account. In that case, you’ll need to wait a while or contact customer support.
  • Technical Glitches: If the site is loading slowly or not responding, it could be an issue with your browser. Try clearing cookies or switching to a different browser.

Resetting Your Lowes.syf.com Password

Luckily, resetting your Lowes.syf.com login password is simple, and you don’t need to stress about it.

Here’s how you can reset it step by step:

  1. Go to the login page: Head over to Lowes.syf.com.
  2. Click on “I forgot my User ID or Password”: You’ll see this link right under the login form.
  3. Enter your account information: You’ll be asked to provide your credit card number, ZIP code, and the last four digits of your Social Security Number.
  4. Verification step: Depending on your account setup, you may receive a security code via email or phone.
  5. Create a new password: Once verified, you can create a fresh password.

Tips for Creating a Strong Password

  • Use at least 8–12 characters with a mix of letters, numbers, and symbols.
  • Avoid predictable words like your name, birthday, or “password123.”
  • Try using a passphrase (like a short sentence) that only you can remember.

Security Tips to Protect Your Lowes.syf.com Login

  • Never share your login details with anyone.
  • Always log out if you’re using a shared computer.
  • Update your password every few months.

How to Pay Your Bill Through Lowes.syf.com Login

One of the main reasons users use my Lowes.syf.com login regularly is for bill payments. Instead of writing checks or waiting in line, you can pay my credit card bill in minutes.

Payment Methods Available

  • One-time payment: Perfect if you just want to pay what you owe at the moment.
  • Scheduled payments: You can set a specific date for your payment to go through.
  • AutoPay: This is my favorite option because it ensures I never miss a due date. The amount is deducted automatically every month.

Steps to Pay Your Bill Online

  1. Log in to your account at Lowes.syf.com.
  2. Navigate to the “Payments” section.
  3. Choose your preferred payment method.
  4. Enter your bank account details (if not already saved).
  5. Confirm your payment.

Within minutes, you’ll get a confirmation, and your balance will be updated shortly after.

Understanding Lowe’s Credit Cards via Lowes.syf.com

If you’ve ever shopped at Lowe’s, you probably know they offer different credit card options. Through your Lowes.syf.com login, you can manage whichever Lowe’s credit card you own.

Types of Lowe’s Credit Cards

  1. Lowe’s Advantage Card: Offers special financing and discounts on eligible purchases.
  2. Lowe’s Business Credit Cards: Designed for contractors and business owners, with features like itemized billing.
  3. Lowe’s PreLoad Card: A prepaid option for flexible spending.

Benefits of Each Card

  • Advantage Card: 5% off eligible purchases every day or special financing on big purchases.
  • Business Card: Helps keep track of company expenses with added flexibility.
  • PreLoad Card: Great for budgeting or giving spending control to employees.

Which Card is Right for You?

It really depends on your needs. If you’re a regular shopper like me, the Advantage Card gives you everyday savings. If you run a business, then the business credit card is more practical.

The great thing is that all these cards can be managed in one place, your Lowes.syf.com login dashboard.

Managing Rewards and Offers in Your Account

Who doesn’t like rewards? One of the perks of having a Lowe’s credit card is access to special offers, discounts, and rewards. Through your Lowes.syf.com login, you can easily track and redeem them.

How to Track Rewards

  • Log in and go to the Rewards section.
  • Check your accumulated points or discounts.
  • Review any special promotions you qualify for.

Redeeming Rewards

  • Some rewards are applied automatically at checkout.
  • Others may need to be redeemed online through your account.
  • You can also keep track of expiration dates so you don’t miss out.

Maximizing Your Rewards

  • Use your card for big purchases to earn more discounts.
  • Keep an eye on seasonal promotions (like holiday discounts).
  • Combine rewards with store offers to save even more.

Mobile Access – Lowes.syf.com Login on the Go

Access Through a Mobile Browser

You don’t need a special app if you don’t want one. Just open your mobile browser, type in Lowes.syf.com, and log in like you would on a computer. The site is mobile-friendly, so it adjusts to your screen automatically.

Using the Synchrony App

If you prefer an app, you can download the Synchrony Bank mobile app from the App Store or Google Play. Once installed, just log in with your Lowe’s account credentials. The app gives you easy access to your balance, payments, and even transaction history.

Mobile vs Desktop Experience

  • On desktop, the dashboard is more detailed and shows everything on one screen.
  • On mobile, the layout is cleaner and simplified for quick actions like checking balances or paying bills.

Customer Support for Lowes.syf.com Login

How to Contact Support

  • Phone Support: Call the number on the back of your Lowe’s credit card for quick assistance.
  • Email Support: Use the official Synchrony contact form if you prefer written communication.
  • Live Chat: Available on the Synchrony website during business hours.

Best Practices When Contacting Support

  • Have your account details ready (but never share your full card number in emails).
  • Be specific about the issue saying “I can’t log in” is less helpful than “I keep getting an error message after entering my password.”
  • Be patient; sometimes wait times can be a bit long.

The reps are usually friendly and helpful once you explain your problem clearly.

FAQs about Lowes.syf.com Login

What is Lowes.syf.com login?

It’s the official portal managed by Synchrony Bank for Lowe’s credit card holders. You can use it to pay bills, check balances, and manage your account.

How do I reset my password if I forget it?

Click on “I forgot my User ID or Password” on the login page, follow the verification steps, and create a new password.

Can I pay my Lowe’s bill without logging in?

Yes, Synchrony offers a “Pay as Guest” option, but logging in gives you more control and access to rewards.

Is Lowes.syf.com safe to use?

Absolutely. The site uses encryption, two-factor authentication, and other security measures to protect your information.

Can I access Lowes.syf.com from outside the U.S.?

Yes, you can log in internationally as long as you have internet access, but some payment methods may be limited.

Conclusion

To wrap it all up, using Lowes.syf.com login has completely changed the way I manage my Lowe’s credit card. From paying bills and tracking rewards to checking balances on the go, it’s an all-in-one solution for busy people like us. Sure, there might be occasional hiccups, but with the right tips and security practices, it’s one of the most reliable tools out there.

If you haven’t set up your account yet, now’s the perfect time. Trust me, once you experience the convenience, you won’t want to go back to old-school methods like mailing checks.

Dunkinrunsonyou.com Survey – Get a Dunkinrunsonyou Coupon Code

0

If you’ve ever visited Dunkin’ for a hot cup of coffee or a box of fresh donuts, you might have noticed something called the Dunkinrunsonyou.com Survey printed at the bottom of your receipt. A lot of people honestly don’t pay much attention to it, but you realized you could earn rewards and discounts.

Dunkinrunsonyou.com Survey

The Dunkinrunsonyou survey is an online feedback system that Dunkin’ created to understand how we, the customers, feel about our experience. From the taste of the coffee to the friendliness of staff, every detail matters. You may not think your feedback makes a big difference, but trust me, it absolutely does. Dunkin uses these surveys to fine-tune its menu, improve services, and ensure we keep coming back for more.

How Much is Homeowners Insurance on a $150000 House
How Much Would a $1000 Payday Loan Cost
Mortgage Lenders have the Lowest Rates
Get a Loan- Find a Loan Lender
Housing Assistance Payments
Mortgage 30 Year Fixed Rate – Find the Best Rates & Info
Mortgage 0 Down – Buy a Home with No Down Payment
Loan Discharge – Understand Your Options & Eligibility
Loan Xpress Pay – Fast Online Personal Loans
Loan 3000 – Get a $3000 Loan Instantly
Loan to Pay Off Credit Cards – Consolidate Debt & Save Money
Mortgage 150k House – How Much House Can I Afford

Purpose and Importance of Dunkinrunsonyou.com Survey

So, why did Dunkin bother creating the Dunkinrunsonyou.com Survey in the first place? Well, think about it this way: Dunkin has thousands of stores, millions of customers, and countless menu items. There’s no way for them to know what’s working and what isn’t unless we speak up. That’s where the survey steps in.

How the Survey Helps Dunkin

From Dunkin’s perspective, the survey is like a direct line into the customer’s mind. It helps them identify what customers love, maybe it’s the new seasonal latte or the speed of drive-thru service, and what frustrates us, like an order that took too long or a missing item in the bag. Without honest feedback, Dunkin would just be guessing about what makes us happy.

Why Your Feedback Matters as a Customer

Companies listen to customers who take the time to share their experiences. By filling out the Dunkinrunsonyou.com Survey, you’re shaping future experiences not only for yourself but also for everyone else. Imagine you had a bad experience at one location. If you report it, Dunkin can take action, whether that means retraining staff, fixing systems, or adding more menu choices.

The rewards are a sweet bonus. Getting a discount or free item just for spending a few minutes online feels like a win-win. For me, it’s like having a small voice that actually gets heard and rewarded.

Step-by-Step Guide to Taking the Dunkinrunsonyou.com Survey

Requirements for Entering the Survey

Before jumping in, make sure you have:

  • A valid Dunkin receipt with a survey code.
  • A device with internet access (phone, laptop, tablet).
  • A few minutes of your time.

That’s literally all you need.

How to Access Dunkinrunsonyou.com

  1. Open your browser and go to Dunkinrunsonyou.com.
  2. Enter the survey code printed on your receipt.
  3. Choose your preferred language (English or Spanish).
  4. Once you’re in, the survey begins.

Filling Out the Survey – Step-by-Step Instructions

  1. Enter the store number, date, and time of your visit.
  2. Answer questions about your experience, things like food quality, staff friendliness, order accuracy, and store cleanliness.
  3. Rate your overall satisfaction on a scale (usually 1 to 5).
  4. Provide specific comments if you want to. This is where you can point out the good and the bad.
  5. Submit the survey and note down the validation code you receive at the end.

That validation code is golden, it’s what you’ll use to redeem your discount or freebie on your next visit.

Dunkinrunsonyou.com Survey Rewards

Here’s the part that most people (including me) get excited about: the rewards. Because let’s face it, who doesn’t love free coffee or donuts?

What Rewards Can You Expect?

Depending on the offer printed on your receipt, you might get:

  • A free donut with the purchase of a beverage.
  • A discount on your next order.
  • Bonus points added to your Dunkin Rewards account.

How the Rewards System Works

When you complete the survey, Dunkin gives you a validation code. You’ll need to write this code on your original receipt and present it the next time you visit. That’s how you claim your reward.

Terms and Conditions for Rewards

  • The validation code is only valid for a limited time (usually 5–7 days).
  • You must bring the original receipt with the code.
  • Rewards can’t be exchanged for cash.
  • One survey per receipt.

So, always keep your receipt safe until you’ve redeemed your reward.

Tips for Making the Most of the Dunkinrunsonyou.com Survey

Taking the survey is simple, but there are a few tricks I’ve learned to make the process smoother and more rewarding.

Ensuring a Smooth Survey Experience

  • Always double-check your receipt for the correct survey code.
  • Use a reliable internet connection, nothing’s more annoying than being halfway through and losing progress.
  • Keep your answers honest. Dunkin doesn’t expect perfection, they just want the truth.

Common Mistakes to Avoid

  • Entering the wrong survey code (it won’t work).
  • Forgetting to write down your validation code.
  • Waiting too long to redeem your coupon.

Why You Should Always Save Your Survey Coupon Code

Think of the coupon code as your golden ticket. Without it, you miss out on free stuff.  It may seem like a small thing, but it adds up, especially if you’re a regular Dunkin customer.

Eligibility Criteria for Dunkinrunsonyou.com Survey

Before you jump into filling out the Dunkinrunsonyou.com Survey, it’s important to know if you’re eligible. Not everyone can participate, and Dunkin has set some basic rules to keep the process fair and genuine.

Age and Residency Requirements

To take part in the survey, you need to be at least 18 years old. This makes sense because surveys often involve reward redemption and legal terms that minors can’t be bound to. On top of that, you must be a legal resident of the United States. If you’re visiting Dunkin from another country, sadly, you won’t qualify for survey rewards.

Who Can’t Take Part in the Survey?

  • Dunkin employees and their immediate family members are not allowed.
  • People who don’t have a valid receipt with a survey code.
  • Anyone trying to complete multiple surveys with the same receipt code.

It might seem strict, but it ensures the feedback comes directly from genuine customers. After all, Dunkin wants to hear from people like you and me who actually bought something and experienced their service.

Troubleshooting Dunkinrunsonyou.com Survey Issues

What to Do If the Site Doesn’t Load

  • Refresh your browser.
  • Try opening it in a different browser (Chrome, Firefox, Safari).
  • If you’re on mobile, switch to Wi-Fi instead of mobile data.

Sometimes the site might be down for maintenance. In that case, just wait a bit and try again later.

How to Handle Invalid Survey Codes

If you enter your receipt code and it doesn’t work, check for these:

  • Did you type the numbers correctly?
  • Is your receipt too old? Codes usually expire within a few days.
  • Is the store number missing or smudged?

If all else fails, you can always call Dunkin’s customer service. I did that once, and they were quick to give me guidance.

FAQs

How do I enter the Dunkinrunsonyou Survey?

To enter, visit Dunkinrunsonyou.com, enter the survey code from your receipt, and follow the on-screen instructions. Make sure you have a valid receipt handy.

What is the Dunkinrunsonyou Survey?

It’s an online feedback program where Dunkin customers can share their experiences. In return, participants often receive rewards like free donuts or discounts.

How do Dunkinrunsonyou Survey rewards work?

Once you complete the survey, you’ll get a validation code. Write that code on your receipt and present it at Dunkin on your next visit to redeem your reward.

How do I get a Dunkinrunsonyou coupon code?

Finish the survey at Dunkinrunsonyou.com, and at the end, you’ll receive a coupon code. This code is your ticket to discounts or freebies on your next Dunkin purchase.

Conclusion

To wrap things up, the Dunkinrunsonyou.com Survey is more than just a quick questionnaire, it’s a way for Dunkin to connect with us on a deeper level. From improving service to introducing new menu items, our voices matter. Plus, who doesn’t love the extra perks like free donuts or discounts?

So, the next time you grab your favorite drink, don’t toss your receipt. Take the survey, share your honest feedback, and enjoy your rewards. Trust me, it’s worth it.

Where is My Hotmail Account

0

“Where is my Hotmail account?” That’s a question I found people asking ago, and if you’re here, you’re probably in the same boat. Hotmail was once one of the most popular email services in the world, and millions of us created our very first email address there. For years, it was the go-to option for chatting, emailing friends, and signing up for websites. But, you may have stopped using it for a while, only to come back later and realize things look very different.

Where is My Hotmail Account

Hotmail as we knew it doesn’t really exist anymore. Microsoft made some changes, and while your account is still there, it lives under a new name, Outlook.com. That shift left many people scratching their heads, wondering if their old accounts disappeared or got deleted. The good news is, if you once had a Hotmail account, chances are you can still access it today, it just takes a little navigation.

Why You Might Be Wondering ‘Where is My Hotmail Account’

If you’ve been searching for your Hotmail account, you’re not alone. There are several reasons why people lose track of their old accounts or get confused about how to access them today.

For starters, many of us created our first Hotmail account years ago, maybe even decades ago. Over time, you might have switched to Gmail, Yahoo, or another service. After years of not logging in, it’s easy to forget your username, password, or even the fact that Hotmail is now Outlook.

Another reason is Microsoft’s consolidation of accounts. Your Hotmail account eventually merged into the larger Microsoft account system. That means the same login could be used for Outlook, OneDrive, Skype, Xbox, and more. If you weren’t paying close attention during that change, you might have thought your Hotmail vanished when really it just got absorbed.

Many of us feel nostalgic about Hotmail. It was part of our digital childhood. Losing access to it feels like losing an old diary or photo album. That’s why so many people keep searching for “where is my Hotmail account,” even today

How to Find Your Hotmail Account Today

How do you actually find your Hotmail account now? The good news is, it’s usually still there, waiting for you.

Here are a few simple ways to track your email account:

  1. Go to Outlook.com: This is the new home for Hotmail. Simply go to www.outlook.com and log in using your old Hotmail email address and password. Even though the website says Outlook, your Hotmail address will still work.
  2. Use Microsoft’s Account Recovery Page: If you’ve forgotten your password or can’t log in, head to the recovery page. Microsoft will walk you through steps to reset your password or confirm your identity using a recovery email or phone number you added earlier.
  3. Check Saved Logins: Sometimes, your browser might still have your login details saved. Look through your saved passwords in Chrome, Edge, or Firefox. You might get lucky.
  4. Check Your Devices: If you ever set up Hotmail on your phone or tablet, it might still be connected in the email app.
  5. Finding your account often comes down to patience and trying a few different methods. It’s kind of like looking for your house keys: you usually find them in the place you last left them, even if it takes a few minutes of digging.

Step-by-Step Guide to Accessing Your Hotmail Account

Once you’ve located your account, logging in is straightforward. Here’s exactly how to get back into yours:

  1. Go to Outlook.com: This is where Hotmail lives now. Don’t worry about the name change.
  2. Enter Your Hotmail Address: Yes, you can still type in your old @hotmail.com address.
  3. Enter Your Password: If you remember it, great. If not, click “Forgot Password.”
  4. Use Recovery Options: Microsoft may send a code to your backup email or phone number. Enter that to prove it’s really you.
  5. Enable Two-Step Verification: For extra security, I recommend setting this up once you’re back inside your account.

If you’re wondering why Microsoft made things this way, it’s because they wanted all their services under one login system. That way, the same account works for Outlook, OneDrive, Skype, Xbox, and even Windows itself.

It might feel frustrating at first, but once you realize your Hotmail didn’t vanish, it just got rebranded, you’ll feel more at ease.

Troubleshooting Common Login Problems

Even after figuring out that Hotmail is now Outlook, you might still run into login problems. Most issues have simple fixes.

Incorrect Password

This is by far the most common problem. If you haven’t logged in for years, chances are you just don’t remember the password you used back then. The fix is easy, click on “Forgot Password” and follow Microsoft’s recovery process. If you have a recovery email or phone number linked, you’ll receive a code to reset everything. If you didn’t set that up, things get trickier, but Microsoft may still let you verify your identity by answering old security questions.

Forgotten Username or Email Address

Sometimes the problem isn’t the password, it’s that you can’t even remember your Hotmail address. Maybe you had several accounts, or maybe you set it up so long ago that it slipped your mind. To fix this, you can use Microsoft’s username recovery tool. If you know a recovery phone number or email address linked to your Hotmail, Microsoft will send you a list of associated accounts.

Locked or Suspended Account

Microsoft occasionally locks accounts if it suspects suspicious activity, like someone trying to hack into it. The fix? You’ll need to verify your identity, usually by entering a code sent to your recovery contact.

Browser or App Issues

Believe it or not, sometimes the problem isn’t your account, it’s the device or app you’re using. Outdated apps, cached data, or browser issues can block you from logging in. Try clearing your browser cookies, updating your email app, or using a different browser altogether.

The bottom line? Most login problems come down to forgotten credentials or outdated recovery info. With a little patience, you can usually get back in.

What Happens If Your Hotmail Account Is Inactive

One of the biggest fears people have when asking “Where is my Hotmail account?” is whether Microsoft deleted it. Unfortunately, inactivity can be an issue.

Microsoft has a policy: if you don’t log into your account for more than two years, it may be considered inactive. Once that happens, your emails could be deleted, and the account itself might be permanently closed. It’s like leaving a storage locker unattended for too long, eventually, the company assumes you’ve abandoned it.

That said, if your account is still within the two-year limit (or if you’ve logged in recently), it’s usually safe. Even if you don’t use Hotmail every day, just signing in once in a while can keep it alive.

I personally recommend logging in at least every six months. Even if you don’t check your inbox regularly, it helps to keep the account active. Plus, many old Hotmail addresses are still linked to important things, like old subscriptions, forgotten social media accounts, or even online shopping accounts. Losing access could mean a lot of hassle later.

So, if you’re worried about your Hotmail vanishing, the solution is simple: log in now, even if just for a minute. Think of it as giving your account a little tap on the shoulder to remind Microsoft you’re still around.

Can You Still Create a Hotmail Account?

This is another question I often hear: can you still sign up for a brand-new Hotmail account? The short answer is no, at least not in the way you used to. Microsoft officially retired Hotmail as a brand back in 2013, so new registrations for @hotmail.com addresses are no longer possible.

But here’s the catch: you can still create a new Outlook.com account, which works exactly the same way. You’ll just get an @outlook.com email address instead of @hotmail.com. Functionally, there’s no difference. You can send, receive, and manage emails the same way you would with Hotmail.

If you’re feeling nostalgic, here’s a workaround: some users report that when signing up for a new Microsoft account, they’re sometimes given the option to select @hotmail.com as the domain. It doesn’t always appear, but it’s worth checking. Otherwise, your best bet is sticking with Outlook.com.

So, while you can’t really create a fresh Hotmail account today, you can continue using your old one, and if you want something new, Outlook is your next best thing.

Managing Your Hotmail/Outlook Account

Now that you’ve found your account and can log in again, the next step is managing it properly. Microsoft has added a lot of new features over the years, so your Hotmail account is more powerful now than it ever was.

Update Recovery Information

This is the most important step. If your recovery phone number or backup email address is outdated, you could get locked out for good next time you forget your password. Go to your account settings and update everything to your current info.

Adjust Security Settings

Your Hotmail account is now part of the larger Microsoft ecosystem. That means hackers see it as a gateway to your files, your Xbox, your Skype, and more. Set up two-factor authentication and review your login history to keep everything safe.

Organize Your Inbox

If you’re logging back into your Hotmail for the first time in years, prepare yourself, your inbox is probably flooded. Luckily, Outlook has smart filtering tools. You can create folders, block spam, and even set up rules so that certain emails go exactly where you want them.

Check Storage Space

Back in the day, Hotmail accounts came with limited storage. Today, Outlook gives you much more room, but it’s still worth checking if you’re close to full. Deleting old junk mail and attachments can help free up space.

Managing your Hotmail/Outlook account is kind of like cleaning out a garage, you may have ignored it for years, but once you roll up your sleeves and organize things, you’ll feel way better.

Benefits of Having a Hotmail Account

You might be wondering, “Why bother keeping my Hotmail account alive if Outlook is the new thing?” The truth is, there are still plenty of benefits.

Integration with Microsoft Services

Your Hotmail is now a Microsoft account. That means you can use the same login for Windows, Xbox, Skype, OneDrive, and even Office 365. It’s like having one key that opens multiple doors.

Familiarity and Reliability

Hotmail has been around for decades. It’s stood the test of time, and millions of people still rely on it. If you’re comfortable with it, why switch?

Access from Any Device

Whether you’re on a laptop, phone, or tablet, you can log into your Hotmail via Outlook.com. There are also official apps for iOS and Android, making it easy to check your inbox on the go.

A Piece of Internet History

Having a Hotmail address is like owning a vintage car. Sure, newer models exist, but there’s something special about keeping that old identity alive. Many of us signed up for our very first online accounts using Hotmail, it’s part of who we are digitally.

So, the benefits go beyond convenience. Keeping your Hotmail account active is like holding on to a piece of internet history while still enjoying modern-day functionality.

Accessing Hotmail from Different Devices

The good news? Microsoft has made this super easy. You don’t have to stick to just one computer anymore, you can check your Hotmail anywhere.

Desktop (Windows and Mac)

If you’re on a Windows PC, things are straightforward. Hotmail is already integrated into Windows Mail. All you have to do is open the Mail app, log in with your Hotmail (or Outlook) account, and you’re set. If you’re using a Mac, you can add your Hotmail address to Apple Mail, and it works just fine.

Mobile (iOS and Android apps)

This is where Hotmail really shines today. Microsoft has a free Outlook app for both iPhones and Android phones. Download it, enter your Hotmail address and password, and your emails will sync instantly. The app also comes with handy extras, like calendar integration and focused inbox filtering, which separates important emails from junk.

Web Browsers

The easiest way to access your Hotmail is still through a browser. Go to Outlook.com, sign in with your Hotmail address, and you’re in. It doesn’t matter if you’re on Chrome, Edge, Firefox, or Safari, it works everywhere.

Email Clients

If you’re old-school and prefer apps like Thunderbird or Outlook (the desktop version), you can still add your Hotmail using IMAP or POP settings. This lets you download your emails directly to your computer and manage them offline.

The flexibility of accessing Hotmail today is honestly miles better than it was years ago. Back in the early 2000s, you’d be stuck on a desktop. Now, your account follows you wherever you go, like carrying your inbox in your pocket.

How to Secure Your Hotmail Account

One thing I quickly realized is that old accounts like Hotmail are prime targets for hackers. Think about it, if you’ve had this account for years, it might still be linked to old social media, online stores, or even banking information. Securing your Hotmail account is more important than ever.

Strong Passwords

Forget using “123456” or your pet’s name. A strong password today means a mix of letters, numbers, and special characters. Better yet, use a password manager to generate something unique.

Two-Factor Authentication (2FA)

This is a lifesaver. With 2FA, even if someone guesses your password, they can’t get in without a code sent to your phone or authentication app. I highly recommend setting this up, it’s like having a second lock on your front door.

Recognizing Phishing Attempts

Hackers love sending fake emails that look like they’re from Microsoft. They’ll try to trick you into giving away your password. Always double-check the sender’s address and never click suspicious links. If an email feels off, it probably is.

Regular Security Checkups

Microsoft has a “Security & Privacy” dashboard where you can see recent logins, connected devices, and even review alerts about suspicious activity. Checking this once in a while keeps you in control.

Think of your Hotmail like your house. Would you leave your front door unlocked just because it’s old? Of course not. Even if you don’t use your Hotmail every day, it’s worth locking it up tight.

Alternatives to Hotmail

If you’re thinking about leaving Hotmail behind, you’re probably wondering what other options you have. Luckily, there are plenty of great alternatives out there.

Outlook.com

This is the most natural replacement since it’s what Hotmail evolved into. It has all the modern features, great security, and seamless integration with Microsoft products.

Gmail

Google’s Gmail is currently the most popular email service in the world. It comes with a clean interface, strong spam filters, and integration with Google Drive, Docs, and Calendar.

Yahoo Mail

While it’s not as dominant as it used to be, Yahoo Mail still has loyal users. It offers a generous amount of storage and solid spam protection.

Other Secure Email Providers

If privacy is your top concern, you might want to try providers like Proton Mail or Tutanota. These focus heavily on encryption and data security.

Switching from Hotmail doesn’t mean you’re losing everything. You can forward your emails to a new account, export contacts, and start fresh without leaving anything behind. Think of it like trading in an old car for a new one, it’s just an upgrade.

FAQs

What are the benefits of having a Hotmail account?

The biggest benefits are Microsoft integration, reliability, access from anywhere, and nostalgia. You can use your Hotmail to log into Windows, Xbox, and other Microsoft services, while still keeping your old digital identity.

How do I access my Hotmail account?

Simply go to Outlook.com, type in your Hotmail email address, and log in with your password. If you’ve forgotten your password, use the recovery options to reset it.

How do I create a Hotmail account?

Unfortunately, you can’t create new @hotmail.com accounts anymore. However, you can create an Outlook.com account, which works the same way.

How do I delete my Hotmail account?

Go to account.microsoft.com, log in, and follow the steps to close your account. Remember that this deletes all linked Microsoft services as well.

Why did Microsoft change Hotmail to Outlook?

Microsoft wanted a modern email system that matched up against Gmail. Outlook offered better design, integration, and features, so Hotmail accounts were upgraded instead of being shut down.

Conclusion

So, where is my Hotmail account? The answer is simple: it’s still here, just under a new name, Outlook.com. Microsoft may have retired the old Hotmail brand, but your account didn’t disappear. Whether you want to recover it, keep using it, or close it down for good, the choice is yours.

The important thing is that you’re not locked out of your digital past. With a little patience, you can access your Hotmail, secure it, and even integrate it into today’s modern devices. Or, if you’ve moved on, you can safely back it up and say goodbye.

FMCDealer DealerConnection Login – Ford Motor Company Dealer Login Page

0

What is FMCDealer DealerConnection login? If you work at a dealership or with Ford in any capacity, this login portal is like your digital key to everything you need, training, payroll, HR tools, dealership resources, and even vehicle inventory details. In this guide, I’ll walk you through everything you need to know about using the FMCDealer DealerConnection system. I’ll explain how to log in, what to do if you forget your password, the features you’ll find inside, and some tips to make your experience smoother and safer. Think of it as a friendly roadmap that’ll help you get the most out of this platform.

FMCDealer DealerConnection Login

FMCDealer is Ford Motor Company’s official online portal designed for employees, dealers, and partners. It’s not a public website, it’s exclusively for authorized users. If you’re part of a Ford or Lincoln dealership, this portal is your one-stop shop for everything work-related.

The main purpose of FMCDealer is to create a secure, centralized platform where employees can access work resources without needing to go through multiple systems. For example, instead of logging into separate platforms for payroll, HR, and training, you can do it all from this one portal. This saves time, reduces errors, and ensures employees always have the latest information.

How Much is Homeowners Insurance on a $150000 House
How Much Would a $1000 Payday Loan Cost
Mortgage Lenders have the Lowest Rates
Get a Loan- Find a Loan Lender
Housing Assistance Payments
Mortgage 30 Year Fixed Rate – Find the Best Rates & Info
Mortgage 0 Down – Buy a Home with No Down Payment
Loan Discharge – Understand Your Options & Eligibility
Loan Xpress Pay – Fast Online Personal Loans
Loan 3000 – Get a $3000 Loan Instantly
Loan to Pay Off Credit Cards – Consolidate Debt & Save Money
Mortgage 150k House – How Much House Can I Afford

How FMCDealer DealerConnection Login Works

The FMCDealer DealerConnection login is pretty straightforward, but if you’re new, it can feel confusing at first.

Here’s how it works:

  • You need valid login credentials, usually provided by your dealership or Ford HR department.
  • Those credentials typically include a User ID and a password.
  • Once you go to the official FMCDealer website, you’ll see the login fields where you enter this information.

After that, depending on your security settings, you might have to go through an additional verification step, like answering a security question or receiving a code via email or text.

It’s worth noting that some users run into common issues here. For instance, if your browser isn’t compatible or if you’ve saved old login details, you might get an error. Sometimes the site might also be temporarily down for maintenance.

Step-by-Step Guide to FMCDealer DealerConnection Login

Accessing the Official Website

The first step is simple but important, you’ve got to make sure you’re visiting the official FMCDealer DealerConnection website. I recommend bookmarking it to avoid accidentally landing on a fake or phishing site. Official Ford portals are secure and usually start with “https,” so always double-check.

Entering Your User ID and Password

Next, type in your User ID and password. These details are unique to you and assigned when you join your dealership. Make sure you type carefully, as the system is case-sensitive. One wrong letter and you might get locked out after too many failed attempts.

Security Measures and Verification Steps

Sometimes, after entering your credentials, you may be asked to verify your identity. This can include answering a security question you set up earlier or entering a verification code sent to your phone or email. It may feel like an extra step, but it’s there to protect your account.

Successful Login Dashboard Overview

Once you’re in, the dashboard opens up. From here, you can navigate to payroll, training modules, dealership communication tools, and other resources. Think of the dashboard as your control panel, everything you need is right there at your fingertips.

Resetting Your FMCDealer DealerConnection Password

When to Reset Your Password

If you can’t log in because you’ve forgotten your password or your account is locked, don’t panic. It happens to the best of us. Sometimes, you’ll also be required to reset your password after a certain period as part of Ford’s security policy.

How to Use the ‘Forgot Password’ Option

On the login page, there’s a “Forgot Password” link. Click it, and you’ll be guided through a simple process. Usually, you’ll need to enter your User ID and possibly answer a security question. After that, you’ll get a reset link or temporary password via email.

Tips for Creating a Strong New Password

When resetting, don’t just reuse an old password. Create something strong but easy for you to remember. A mix of upper and lowercase letters, numbers, and symbols is best. For example, instead of “ford123,” you could go with something like “F0rd!23Secure.” This way, you reduce the chances of someone guessing it.

Features Available After FMCDealer DealerConnection Login

Accessing Payroll and HR Services

Once you successfully complete your FMCDealer DealerConnection login, one of the first things you’ll notice is the option to access payroll and HR services. Personally, I find this incredibly convenient because it means you don’t have to contact HR every time you want to check something small, like your pay stub or benefit details. Instead, you can just log in, click a few buttons, and have all the information right in front of me.

Through this section, you can view your salary details, tax information, and even manage your direct deposit settings. If you want to update your personal information, like your home address or emergency contact, you can also do that without needing to fill out endless paperwork. It’s a real time-saver, and it helps keep things organized.

Training and Certification Programs

Another feature I love is the training section. Ford is always rolling out new programs, and staying updated is crucial if you’re working at a dealership. Through FMCDealer, you can complete training modules, access certification exams, and even track your progress. Think of it like an online classroom tailored to your role.

If you’re aiming for a promotion or looking to enhance your skills, this training hub is your best friend. The modules are designed to be user-friendly, and you can complete them at your own pace. That flexibility makes it easier to balance work and personal life.

Communication Tools for Dealers

Staying connected with your dealership team is easier when you have the right tools. Inside FMCDealer, there are built-in communication options that help you receive announcements, read internal memos, or even contact management directly. Instead of waiting for meetings or relying on word of mouth, you can get official updates instantly.

I’ve found this feature to be especially useful during busy seasons. When the dealership is packed with customers, the last thing you want is confusion among employees. Quick communication through FMCDealer keeps everyone on the same page.

Inventory and Vehicle Information Access

Finally, let’s talk about inventory. As someone who deals with cars daily, having access to real-time inventory and vehicle details is priceless. Through the FMCDealer portal, you can check vehicle specs, availability, and pricing details right from your login dashboard.

This helps sales teams serve customers better because they can quickly confirm whether a vehicle is available, what features it has, and even locate it in the dealership system. For service employees, it helps in ordering parts and ensuring customers get accurate updates on their vehicles.

Troubleshooting FMCDealer DealerConnection Login Issues

Browser Compatibility Problems

One of the most common problems you might run into with FMCDealer DealerConnection login is browser compatibility. The portal works best on updated browsers like Google Chrome or Microsoft Edge. If you’re using an outdated browser, you might face issues like slow loading, buttons not working, or the login page refusing to open.

If that happens, my advice is simple: update your browser first. If that doesn’t help, switch to another one. Sometimes, it’s just a matter of which browser the system prefers at that moment.

Clearing Cache and Cookies

If you’re still having trouble, try clearing your cache and cookies. These little files often store outdated information that can mess up your login process. Then you notice the portal usually loads smoother and faster. It only takes a few seconds, but it can solve a lot of login headaches.

Contacting IT Support for Help

Of course, if none of the above works, don’t hesitate to reach out to your dealership’s IT support. They’re trained to handle these issues and can reset your login details or check if there’s a system-wide problem. Sometimes, the site itself may be undergoing maintenance, and you just have to wait.

Mobile Access to FMCDealer DealerConnection

Using a Smartphone or Tablet

The great thing about FMCDealer is that it’s not limited to just desktop computers. The portal is mobile-friendly, meaning you can still access your payroll, training, and dealership tools right from your pocket.

Mobile-Friendly Features

Some of the most useful features on mobile include checking your work schedule, reviewing quick updates from management, and accessing inventory details for customers right on the showroom floor. It’s a handy tool when you’re away from your desk but still need information quickly.

Pros and Cons of Mobile Access

While mobile access is convenient, it’s not always perfect. On the plus side, you get flexibility and can log in anytime, anywhere. On the downside, some features are easier to use on a larger screen, especially when dealing with detailed reports or training modules.

Benefits of FMCDealer DealerConnection for Employees

Time-Saving Tools

As an employee, one of the first things you’ll notice about FMCDealer is how much time it saves. Instead of running around asking HR for every small detail or waiting for updates from management, you can log in and find everything in one place.

Easy Communication with Management

Communication is another big benefit. Employees no longer have to rely on bulletin boards or memos that might get lost. Instead, management can post updates directly on the portal, ensuring everyone stays informed.

Career Growth and Training Access

The training modules stand out as one of the most valuable features. They help employees like us grow in our roles, gain new skills, and even prepare for promotions. That kind of growth opportunity is something every employee should take advantage of.

Benefits of FMCDealer DealerConnection for Dealerships

Streamlining Dealership Operations

From a dealership’s perspective, FMCDealer DealerConnection login is more than just an employee portal, it’s a tool that simplifies operations. Imagine trying to manage payroll, inventory, training, and communication using separate platforms. It would be chaotic. DealerConnection brings all of these under one roof.

This centralization cuts down on wasted time, improves accuracy, and keeps everyone aligned. Whether it’s updating employee schedules or ensuring service teams have the right vehicle parts, everything flows more smoothly. Dealerships save both time and money by using one efficient system instead of juggling multiple tools.

Inventory and Sales Management

One of the biggest advantages for dealerships is access to real-time inventory and sales management tools. As a dealer, you can quickly track which vehicles are in stock, which ones are in transit, and which have already been sold. This makes it easier to meet customer demands and avoid awkward situations where a customer is promised a vehicle that’s no longer available.

Sales teams can also use this tool to check vehicle details instantly, which helps them close deals faster. For service departments, it ensures that parts and accessories are ordered promptly, reducing customer wait times.

Enhancing Customer Service

Happy employees lead to happy customers, and FMCDealer plays a direct role in improving customer service. Since employees have quick access to the tools and information they need, they can assist customers more effectively. For instance, if a customer wants to know about the availability of a specific Ford model, the sales rep can check the portal within seconds.

This instant access builds trust with customers because they see that the dealership is organized and responsive. Better customer experiences naturally lead to repeat business and stronger brand loyalty.

Frequently Asked Questions (FAQs)

How do I log in to FMCDealer DealerConnection?

You can log in by visiting the official FMCDealer website, entering your User ID and password, and completing any required security verification.

What should I do if I forget my FMCDealer password?

Simply click the “Forgot Password” option on the login page. You’ll be guided through the process of resetting it, usually via email or security questions.

Can I access FMCDealer DealerConnection from my phone?

Yes, the portal is mobile-friendly and works on smartphones and tablets. However, some features are easier to use on a computer.

Is FMCDealer DealerConnection secure to use?

Absolutely. The portal uses security measures like encrypted connections and two-step verification to protect your data. Just remember to keep your password private.

Why can’t I log in to FMCDealer DealerConnection sometimes?

Common reasons include browser compatibility issues, incorrect login credentials, or system maintenance. Try clearing your cache, switching browsers, or contacting IT support if the issue persists.

Conclusion

In the end, the FMCDealer DealerConnection login is much more than a simple sign-in page, it’s your gateway to a wide range of dealership tools, employee services, and resources that make your work life easier. Whether you’re checking your payroll, completing training, or managing dealership inventory, this portal brings everything together in one secure place.

Fidelityrewards.com Login – Log in Fidelity Credit Card

0

Fidelityrewards.com Login is about unlocking a tool that helps you stay in control of your money, track my rewards, and even plan your future spending more wisely. If you’ve ever juggled multiple credit cards, forgotten about points you earned, or worried about keeping your account secure, you’ll understand why this login process matters so much.

Fidelityrewards.com Login

Think of Fidelityrewards.com as your personal gateway. Every time you log in, you’re not just checking numbers, you’re gaining insight into your financial behavior. You get to see where your money is going, how your rewards are stacking up, and whether you’re making the most of your credit card perks. And let’s be honest, who doesn’t want to make sure they’re getting every bit of value from their hard-earned spending?

How Much is Homeowners Insurance on a $150000 House
How Much Would a $1000 Payday Loan Cost
Mortgage Lenders have the Lowest Rates
Get a Loan- Find a Loan Lender
Housing Assistance Payments
Mortgage 30 Year Fixed Rate – Find the Best Rates & Info
Mortgage 0 Down – Buy a Home with No Down Payment
Loan Discharge – Understand Your Options & Eligibility
Loan Xpress Pay – Fast Online Personal Loans
Loan 3000 – Get a $3000 Loan Instantly
Loan to Pay Off Credit Cards – Consolidate Debt & Save Money
Mortgage 150k House – How Much House Can I Afford

Why Fidelityrewards.com Login Matters

Why does the actual act of logging in matter so much? Can’t you just use your card and let things take care of themselves? Sure, you could do that, but you’d be missing out on several key benefits.

When you log into Fidelityrewards.com, you get real-time updates on your account. This means you don’t have to wait for monthly statements to know how you’re doing financially. If you made a big purchase yesterday, you can see it reflected today. That helps you stay accountable and avoid overspending.

Then there are the rewards, Fidelity’s rewards program is one of the main reasons people sign up for the card in the first place. But here’s the catch, you need to log in regularly to track how many points you’ve earned and decide how to redeem them. Without logging in, those points could just sit there unnoticed. Imagine having free money on the table and not picking it up. That’s what it feels like when you don’t check your rewards.

How to Access Fidelityrewards.com Login

How exactly do you log into Fidelityrewards.com? Don’t worry, it’s a lot easier than it sounds. I’ll break it down step by step.

Go to the Official Website

Open your browser and type in “Fidelityrewards.com.” Make sure you’re visiting the official site. Avoid clicking on random ads or suspicious links, you don’t want to risk giving your information to the wrong place.

Enter Your Credentials

Once the homepage loads, you’ll see the login area. Here, you’ll need to enter your username and password. If you’ve logged in before, these are the same details you’ve been using.

Click ‘Login’

After entering your information, just click the login button. If your credentials are correct, you’ll immediately gain access to your account dashboard.

Troubleshooting Access Issues

Sometimes, things don’t go as smoothly as we’d like. Maybe you’ve forgotten your password, or your account has been temporarily locked for security reasons. Don’t panic, there’s usually a “Forgot Username or Password” link right below the login fields. Click it, follow the steps, and you’ll be back in no time.

Creating a Fidelityrewards.com Account

If you’re new and haven’t signed up yet, don’t worry. Creating a Fidelityrewards.com account is straightforward. Let me walk you through the process.

Visit the Official Website

Just like logging in, the first step is heading over to Fidelityrewards.com. Instead of going to the login section, you’ll look for a “Register” or “Create Account” option.

Provide Personal Information

You’ll need to enter details like your card number, full name, and other identifying information. This is how the system knows you’re a legitimate cardholder.

Set Up a Username and Password

Choose something unique and secure. I always recommend avoiding obvious choices like your birth year or “12345.” Instead, combine uppercase letters, lowercase letters, numbers, and symbols.

Confirm and Secure Your Account

Once you’ve filled out all the necessary fields, confirm your registration. Some accounts may require you to verify your email address or phone number.

Mistakes to Avoid

Don’t rush. Double-check your information before hitting submit. Also, make sure you’re on the official website, scammers often create fake look-alike sites.

Managing Your Fidelityrewards.com Login Dashboard

Once you’ve successfully logged in, the first thing you’ll notice is the dashboard. Think of this dashboard as your command center, it’s where all the magic happens.

When you log into your account, you can immediately see your account balance, pending transactions, and available rewards. It’s kind of like opening your wallet, but with extra insights you wouldn’t normally have at a glance. The dashboard also provides quick links to payment options, transaction history, and reward redemption.

One of my favorite parts is the “Rewards Tracker.” This section lets you see exactly how many points you’ve earned and how close you are to redeeming them for cash back, travel, or other perks. It feels a little like checking the progress bar on a video game, you’re motivated to keep going until you hit the next milestone.

The dashboard also gives you access to statements and downloadable reports. You can sometimes use these when you want to double-check your monthly budget or prepare for tax season. Having everything in one place saves me the headache of shuffling through paper statements.

In short, the Fidelityrewards.com login dashboard is more than just a landing page, it’s the control room where you take charge of your finances. And trust me, once you get used to it, you’ll wonder how you ever managed without it.

Resetting Your Password or Username

If you ever forget your username or password, just head over to the login page. Right below the login fields, you’ll see links that say “Forgot Username?” or “Forgot Password?” Click the one you need, and you’ll be guided through the recovery process.

For passwords, the system will usually ask you to provide your username and possibly some identifying information, like your card number or email. Once verified, you’ll get a link or a code sent to your registered email or phone number. From there, you can create a brand-new password.

For usernames, the process is similar. The system verifies your identity and then either shows you your username or sends it to your email.

Don’t reuse old passwords. If you’re resetting, it’s a perfect time to create something stronger and more unique.

The reset process only takes a few minutes, but it can save you from weeks of stress. So, if you’re locked out, don’t panic. Fidelityrewards.com makes it easy to get back in.

Security Features of Fidelityrewards.com Login

Whenever you talk about online banking or credit card portals, the number one concern people raise is security. And rightfully so, we’re talking about sensitive financial information.

First off, the site uses encryption. In simple terms, that means the information you send between your browser and the website is scrambled, making it nearly impossible for hackers to intercept and read. You’ll notice this by looking for the little padlock symbol in your browser bar whenever you’re on the site.

Then there’s multi-factor authentication (MFA). If you’ve set it up, the system won’t just ask for your username and password, it’ll also send a verification code to your phone or email. This extra step might feel like a hassle at first, but it adds a powerful layer of protection. I personally turned MFA on after hearing about a friend’s experience with identity theft. Trust me, the peace of mind is worth those extra few seconds.

The platform also monitors for suspicious activity. If the system notices a login attempt from an unusual location or device, it may lock your account temporarily or send you a security alert.

Fidelityrewards.com login security isn’t just an afterthought, it’s a core feature. And as someone who values both convenience and safety, I find that really reassuring.

Mobile Access: Fidelityrewards.com on the Go

We live in a world where almost everything happens on our phones. Personally, you don’t always have the time to sit down at a computer just to check your account. That’s why I love that Fidelityrewards.com is mobile-friendly.

You can access the site directly through your phone’s browser, and the layout automatically adjusts to fit your screen. This means you can log in, check your balance, or track rewards while waiting in line for coffee. Everything you see on the desktop version, account summary, rewards tracker, and statements, is available on mobile too.

For even more convenience, there’s also a dedicated Fidelity mobile app. While it’s not exactly the same as going to Fidelityrewards.com, it connects seamlessly with your account. Through the app, you can manage transactions, monitor spending, and even redeem rewards.

If you’re someone who values flexibility and wants access to your financial tools no matter where you are, mobile access is a game-changer. Fidelityrewards.com makes sure you’re never out of touch with your money.

Redeeming Rewards Through Fidelityrewards.com Login

Let’s talk about the fun part: rewards. After all, one of the main reasons you use the Fidelity® Rewards Visa Signature® Card is the perks that come with it. And the easiest way to take advantage of those perks is by logging into Fidelityrewards.com.

Once you’re logged in, you’ll see a section dedicated to your reward points. Here, you can check your total balance and explore different redemption options. Fidelity makes it flexible, you can redeem for cash back, deposit into your Fidelity account, or even use points for travel, gift cards, and merchandise.

The redemption process itself is smooth. Select your option, confirm, and within a short time, you’ll see the reward applied. No complicated hoops to jump through, which I really appreciate.

Don’t let your points sit unused for too long. It’s easy to forget about them, but those rewards are part of the value you’re earning from your card. By checking your Fidelityrewards.com login regularly, you’ll make sure you’re always getting the most out of your account.

Troubleshooting Common Fidelityrewards.com Login Issues

No matter how smooth a platform is, sometimes things just don’t go as planned.

The most common issue? Incorrect credentials. Maybe you mistyped your password, or maybe the caps lock key was on. Always double-check before assuming something’s broken.

Another common issue is browser-related problems. If the page doesn’t load properly or you keep getting errors, clearing your browser’s cache or switching to a different browser often solves it.

If you’ve forgotten your credentials, don’t forget the “Forgot Password” or “Forgot Username” links. They’re lifesavers. And if your account gets locked after too many failed attempts, don’t stress, it’s just a security measure. You can reset your access through email or by calling customer service.

Sometimes, the issue isn’t you, it’s the website. On rare occasions, Fidelityrewards.com may have scheduled maintenance or temporary outages. When that happens, give it some time and try again later. Checking Fidelity’s official channels or even a quick Google search can confirm if others are experiencing the same issue.

In short, most login problems aren’t deal breakers. With a little patience and some simple troubleshooting, you’ll be back in your account in no time.

Linking Fidelityrewards.com with Fidelity Accounts

One of the biggest perks of using Fidelityrewards.com is how seamlessly it connects with Fidelity’s broader ecosystem. If you already have a Fidelity brokerage or retirement account, you can link it to your Fidelity® Rewards Visa Signature® Card.

Why does this matter? Well, linking your accounts makes redeeming rewards even easier. Instead of cashing out to a third-party platform or gift card, you can deposit your points directly into your Fidelity account.

The linking process is simple. Once logged in, go to the rewards redemption section. There, you’ll see an option to connect your eligible Fidelity accounts. After a quick verification step, you’re all set. From that point on, every time you redeem points, you can choose to send them straight to your brokerage, IRA, or other Fidelity accounts.

So, if you’re serious about building long-term wealth, linking your Fidelityrewards.com login with your investment accounts is a smart move. It turns your spending into an investment strategy.

Customer Support for Fidelityrewards.com Login

Even with the best tools, sometimes you just need help. The moments where you couldn’t figure something out on your own, and that’s when customer support became a real lifesaver.

Fidelityrewards.com provides several ways to get support. The most direct option is to call their customer service number.

There’s also an FAQ section on the website, which is great for quick answers.

Email support is another option, though it’s not as fast as calling.

One thing I like is that Fidelity provides 24/7 support for urgent issues like fraud alerts. That kind of round-the-clock assistance really reassures me that my account is in safe hands.

In short, Fidelityrewards.com doesn’t leave you hanging. Whether you prefer phone, email, or self-service options, there’s always a way to get the help you need.

FAQs About Fidelityrewards.com Login

What is Fidelityrewards.com Login used for?

It’s the official portal where Fidelity® Rewards Visa Signature® Cardholders manage accounts, track spending, and redeem rewards.

How do I reset my Fidelityrewards.com login password?

Click the “Forgot Password” link on the login page, follow the verification steps, and create a new secure password.

Can I access Fidelityrewards.com on my phone?

Yes! The site is mobile-friendly, and you can also use the Fidelity mobile app for quick access.

Is Fidelityrewards.com Login safe?

Absolutely. It uses encryption, multi-factor authentication, and fraud monitoring to keep your account secure.

Why should I log in regularly?

Logging in often helps you track spending, monitor security, and maximize your reward redemption opportunities.

Conclusion

In the end, using Fidelityrewards.com Login is about more than just signing into a website. It’s about staying on top of your money, making smarter financial choices, and making sure you’re taking full advantage of every reward you’ve earned. For me, logging in has become a simple but powerful habit—one that keeps me informed, secure, and rewarded.

Capital One Make a Payment – Pay Capital One Credit Card Online

0

Looking for how to manage your credit card bills, one phrase kept popping up everywhere: Capital One Make a Payment. It sounds pretty straightforward, right? But if you’re like me, you know that when it comes to money, banking apps, and deadlines, nothing ever feels as simple as it should. Making payments isn’t just about clicking a button, it’s about knowing your options, avoiding late fees, and making sure your hard-earned money goes exactly where it’s supposed to.

Capital One Make a Payment

Capital One offers several ways for you to make a payment, whether it’s for a credit card, auto loan, or even a personal loan. And while that sounds convenient, it can also feel overwhelming if you don’t know which option is best for you. Should you pay online? Use autopay? Send a check in the mail? Or maybe you’re curious about how long it takes for payments to actually process.

How Much is Homeowners Insurance on a $150000 House
How Much Would a $1000 Payday Loan Cost
Mortgage Lenders have the Lowest Rates
Get a Loan- Find a Loan Lender
Housing Assistance Payments
Mortgage 30 Year Fixed Rate – Find the Best Rates & Info
Mortgage 0 Down – Buy a Home with No Down Payment
Loan Discharge – Understand Your Options & Eligibility
Loan Xpress Pay – Fast Online Personal Loans
Loan 3000 – Get a $3000 Loan Instantly
Loan to Pay Off Credit Cards – Consolidate Debt & Save Money
Mortgage 150k House – How Much House Can I Afford

Understanding Capital One Make a Payment

When we talk about Capital One Make a Payment, what we’re really talking about is flexibility. Capital One gives you multiple ways to handle your bills, and that’s a good thing. But before we get into the “how,” let’s break down the “what.”

Capital One lets you make payments on three main types of accounts:

  • Credit cards: These are the most common. If you have a Capital One credit card, you’ll need to make at least a minimum payment every month.
  • Auto loans: If you’ve financed your car through Capital One, you can also make your loan payments online or through other methods.
  • Personal loans: Fewer people know this, but Capital One also allows payments on certain personal loans.

Now, why does this matter? Because the type of account you have can affect your payment method, your due date, and even how long it takes for your payment to process. For example, credit card payments might clear faster than loan payments.

How to Pay Your Capital One Credit Card Bill

Okay, let’s get practical. If you’re holding a Capital One credit card in your wallet, you’ll eventually need to pay off that balance. Thankfully, Capital One makes it relatively easy.

Here’s a step-by-step guide to paying your Capital One credit card bill:

  1. Log in to your account: You can do this on the Capital One website or through their mobile app.
  2. Navigate to the payment section: Once you’re in, find the option labeled “Make a Payment.”
  3. Choose your payment method: You can link a checking or savings account, use a debit card, or even mail in a check.
  4. Enter the amount: Decide whether you’re paying the minimum due, the full balance, or a custom amount.
  5. Schedule your payment: Pick a date. You can pay today or set a future date.
  6. Confirm the payment: Always double-check before hitting submit.

Try not to wait until the very last minute. Payments sometimes take a day or two to process, and you don’t want to risk a late fee just because you scheduled it too close to your due date.

How Does Capital One Bill Pay Work?

If you’ve ever wondered how Capital One Bill Pay works, let me break it down for you in simple terms. Think of it as a service that lets you pay your bills directly from your Capital One account without needing to log in separately to each company you owe money to.

Here’s how it works:

  • You log in to your Capital One account.
  • You add the companies or service providers you want to pay.
  • You schedule your payments, and Capital One takes care of the rest.

Pretty convenient, right? Instead of juggling multiple websites, passwords, and payment deadlines, everything is in one place.

The best part is the security. Every payment is tracked, and you’ll get confirmation once it’s processed. Plus, Capital One uses encryption to keep your data safe.

Choosing the Right Payment Method for Your Capital One Credit Card

Now, here’s the million-dollar question: which payment method should you use for your Capital One credit card? Well, it depends on your situation.

Here are your main options:

  • Bank account transfer: Link your checking or savings account and transfer funds directly. This is fast and reliable.
  • Debit card payment: Good if you don’t want to link your bank account.
  • Autopay: Set it and forget it. Your bill is paid automatically every month.
  • Mailed check: Slower, but still works if you like paper records.

Each option has pros and cons. For example, autopay is great for peace of mind, but it might cause problems if your account doesn’t have enough funds on the scheduled date. Mailing a check feels secure to some people, but it takes longer to process and could arrive late.

How Long Does It Take Capital One Bill Pay to Deliver Payments?

One of the questions I had early on was, “If I make a payment today, when will Capital One actually receive it?” The truth is, payment timing can vary depending on the method you use. Understanding this can save you from the frustration of unexpected late fees.

For online payments made through the Capital One website or mobile app, most of them process the same day or by the next business day. If you submit before the cut-off time (usually around 5 p.m. ET), your payment often posts that evening. Payments made after the cut-off are usually processed the next day.

If you choose Bill Pay from another bank, it might take a bit longer, sometimes two to three business days, because the payment has to travel through the banking system before Capital One credits it. And if you’re old-school and send a check by mail, you’ll need to allow at least 5–7 business days for it to arrive and process.

Don’t wait until the last minute. Schedule your payment at least a day or two in advance. It gives you peace of mind, and you won’t have to worry about cut-off times or mailing delays.

When Do I Have to Pay My Capital One Bill?

Paying your bill on time is more than just a good habit, it’s essential if you want to avoid fees and keep your credit score healthy. But when exactly do you have to pay your Capital One bill?

Every Capital One credit card comes with a monthly due date. You can find this date on your statement, in the app, or by logging into your online account. Usually, the due date falls on the same day each month, but you may have the option to request a different date if that works better for your schedule.

Now, here’s the important part: you don’t always have to pay your full balance, but you do need to make at least the minimum payment. If you only pay the minimum, though, you’ll get hit with interest on the remaining balance. That’s why I always recommend paying as much as you can, even if it’s not the full amount.

Capital One also gives you a grace period, usually about 25 days after your statement closes. If you pay your balance in full during this period, you won’t be charged interest. That’s like getting a short-term loan without fees, as long as you pay on time.

Using Capital One AutoPay for Convenience

If you’re like me and don’t want to worry about due dates every month, AutoPay can be a lifesaver. With AutoPay, Capital One automatically deducts your payment from your chosen account on your due date. It’s the ultimate “set it and forget it” option.

Here’s how it works:

  • You log into your Capital One account.
  • You go to the AutoPay setup section.
  • You choose how much you want to pay each month (minimum payment, full balance, or a fixed custom amount).
  • You link your checking or savings account.
  • Once it’s set, Capital One will take care of it every month.

The benefits are obvious, you’ll never miss a payment, and you won’t have to stress about remembering dates. Plus, it helps protect your credit score since on-time payments are a huge factor in keeping it strong.

Even if you’re on AutoPay, keep an eye on your statements. Mistakes can happen, or maybe you decide you want to pay extra one month to lower your balance faster. You can still make manual payments on top of AutoPay if you want.

Troubleshooting Capital One Payment Issues

Even with all the modern conveniences, things can go wrong sometimes. Payments might fail, accounts might get disconnected, or you might even see a payment applied incorrectly. So, what should you do if something goes wrong with Capital One Make a Payment?

Here are a few common issues and solutions:

  • Failed Payments: This usually happens if there aren’t enough funds in your bank account. If this occurs, Capital One will notify you, and you’ll need to resubmit the payment. Be aware that your bank may also charge an insufficient funds fee.
  • Incorrect Account Information: Sometimes payments fail because the bank account number or routing number was entered incorrectly. Double-check this info before saving it in your Capital One account.
  • Delayed Payments: Payments might not post right away if you made them after the cut-off time or used mail. If you think your payment is late, check the status in your online account before panicking.
  • Duplicate Payments: Occasionally, people accidentally pay twice. If this happens, the extra payment usually goes toward your balance, or you might see a credit. You can also call customer service if you want a refund.

The key is not to ignore the issue. If you see something wrong with your payment, act right away. Waiting could mean late fees, extra interest, or even a hit to your credit score.

Paying Your Capital One Bill by Mail or Phone

While most of us rely on online banking these days, Capital One still allows you to pay by mail or phone. These methods can be handy if you prefer traditional ways of handling money or if you run into technical issues online.

Paying by Mail

You can send a check or money order to the address listed on your billing statement. Just make sure to include your account number so they know which account to apply it to. Remember, mailing takes time, so send your payment at least a week before the due date.

Paying by Phone

You can also call Capital One’s automated phone system or speak to a customer service agent to make a payment. You’ll need your account information and your bank details handy. Payments made by phone usually process faster than mail, but there may be a service fee in some cases.

Managing Payments Through the Capital One Mobile App

Making a payment through the app is as simple as checking your text messages. Here’s what to usually do:

  1. Open the Capital One app and log in with Face ID or a passcode.
  2. Tap on my credit card account.
  3. Hit “Make a Payment.”
  4. Choose the amount you want to pay (minimum due, full balance, or custom).
  5. Select your bank account.
  6. Confirm and submit.

Within seconds, you get a confirmation, and your balance updates pretty quickly. The app also lets you schedule payments in advance, which you find really useful when you want to pay before going on a trip or when you know you’ll be busy during the week.

Beyond payments, the app gives you tools to manage your entire account. You can track your spending, see when your bill is due, and even get alerts when you’re close to your credit limit. That means fewer surprises at the end of the month.

Setting Up External Payments from Another Bank

Sometimes, you may not want to make payments directly from Capital One. Maybe you already have a favorite bank where you manage all your bills, or maybe you prefer to keep everything in one place. That’s where external payments come in.

Most banks let you set up Bill Pay and send payments to your Capital One credit card or loan account. Here’s how to do it once through your main checking account:

  1. Log into your other bank’s online portal.
  2. Add “Capital One” as a payee.
  3. Enter your Capital One account number (found on your statement).
  4.  Schedule a payment date and amount.
  5. After a couple of days, the payment showed up in your Capital One account. Easy enough, right?

The biggest advantage of using an external bank is that you can see all your bills in one place. Instead of hopping between apps, everything comes from one dashboard. That said, there are two downsides you’ll notice:

  1. Payments may take 2–3 business days to process.
  2. If you make a mistake entering your account info, the payment could bounce.

So while this method works, it’s suitable using the Capital One app directly because it’s faster and safer. Still, if you’re already managing multiple bills from one account, setting up external payments could be the right move for you.

What If My Kohl’s Credit Card Is Transitioning to Capital One?

If you’ve ever had a Kohl’s credit card, you might have already heard that it’s transitioning to Capital One. At first, this kind of news can be confusing. You might wonder, “Do I still pay the same way? Will my old Kohl’s account work? What happens to my rewards?”

Here’s the breakdown:

  • Accounts are moving over to Capital One’s system. That means your payments will eventually go through Capital One instead of Kohl’s.
  • If you had autopay or Bill Pay set up with Kohl’s, you may need to update it once your account is officially moved.
  • Your new Capital One card will come with a fresh account number, so you’ll need to use that for payments.

The good news? You don’t lose your credit history in the process. Everything, your payment history, balance, and credit limit, transfers over. From a credit score standpoint, it’s as if nothing changed.

Best Practices to Stay on Top of Capital One Payments

Paying your bill is one thing, but staying on top of it month after month is another challenge.

  • Set Reminders: Even if you’re using AutoPay, you can always set reminders a few days before your due date. It’s just a backup to make sure your payment goes through.
  • Budget for Payments: Instead of waiting until the end of the month, you can set aside money each week for your credit card bill. That way, I’m never scrambling when the due date arrives.
  • Pay More Than the Minimum: The minimum might keep you in good standing, but it won’t help with interest. You can try to pay more whenever you can to cut down on debt faster.
  • Use Alerts: Capital One lets you set text or email alerts for due dates and spending. You highly recommend turning these on.
  • Check Statements Regularly: It’s not just about making payments; it’s about making sure the charges are correct. If you spot a mistake early, it’s easier to dispute it.

The key is treating your payment like any other important bill, like rent or utilities. Once you shift your mindset, you stop seeing it as a chore and more as a way to protect your financial health.

FAQs

How do I pay my Capital One credit card bill?

You can pay online through the website or app, set up AutoPay, mail a check, or call customer service to pay by phone.

How does Capital One bill pay work?

It lets you schedule payments to Capital One directly, keeping everything in one place. Payments can be set for the minimum due, full balance, or a custom amount.

How do I choose a payment method for my Capital One credit card?

It depends on your needs. Options include bank transfer, debit card, AutoPay, or mailing a check. Each has pros and cons, so pick the one that works best for your schedule.

How long does it take Capital One bill pay to deliver payments?

Online and app payments usually post the same day or next business day. Payments from other banks can take 2–3 days, and mailed checks can take up to a week.

When do I have to pay my Capital One bill?

Your due date is listed on your statement. You must make at least the minimum payment by that date, but paying in full within the grace period helps avoid interest.

What if my Kohl’s credit card is transitioning to Capital One?

Your account will be moved over to Capital One, and you’ll make payments directly through them once the transition is complete. Watch for notices about updating autopay or Bill Pay settings.

Conclusion

At the end of the day, Capital One Make a Payment isn’t just about sending money, it’s about staying in control of your finances. Whether you’re paying through the app, setting up AutoPay, mailing a check, or using an external bank, the goal is the same: make sure your payments are on time and stress-free.

Whatever method you choose, the most important thing is consistency. Every on-time payment helps your credit score, saves you from unnecessary fees, and brings you one step closer to financial peace of mind.

How to Connect AirPods to Laptop

0

If you’ve ever wondered how to connect AirPods to laptop, stay with me. AirPods have become one of the most popular wireless earbuds, and most of us don’t just use them with our iPhones or iPads, we want them to work with laptops too, whether it’s for work, watching movies, or gaming.

How to Connect AirPods to Laptop

In today’s world, a laptop is at the center of almost everything we do. You might be working remotely, attending online classes, or maybe just binge-watching your favorite shows. And let’s be honest, nobody wants to be tied down by messy wires anymore. That’s where AirPods come in, giving you freedom, style, and convenience all at once.

The best part is, AirPods aren’t just for Apple devices. Yes, they are designed primarily for iPhones and MacBooks, but with the right steps, you can also connect them to Windows laptops. In this guide, I’ll walk you through everything—from preparing your AirPods, connecting them to both Windows and Mac laptops, fixing common issues, and even making the most of your AirPods while using them with your laptop.

Understanding AirPods and Compatibility

Before jumping into the step-by-step guide, let’s take a moment to understand what AirPods are capable of and whether they’re compatible with different laptops.

What Makes AirPods So Popular

AirPods have become a symbol of convenience and quality. The main reason people love them is because of how quickly they connect to Apple devices. You open the case near your iPhone, and boom, they’re ready to go. They’re lightweight, have solid sound quality, and come with great features like touch controls, automatic ear detection, and noise cancellation (on Pro and Max versions).

just because they’re branded as “Apple” doesn’t mean they won’t work with other devices. AirPods use Bluetooth technology, which is universal. So, whether you’re using a Dell, HP, Lenovo, or MacBook, as long as your laptop has Bluetooth, you can connect your AirPods.

Do AirPods Work With Windows PC?

Do AirPods work with Windows PC? The answer is yes, they do. AirPods may be Apple’s product, but since they rely on Bluetooth, you can pair them with any Windows laptop. The only catch is, you won’t get some of the advanced Apple-exclusive features like automatic switching between devices or Siri integration. But for music, movies, Zoom calls, and even gaming, AirPods work perfectly fine on Windows.

AirPods Compatibility With Different Devices

Here’s a quick breakdown of how AirPods work with different laptops:

  • MacBooks: They connect seamlessly, especially if you use the same Apple ID across devices.
  • Windows Laptops (Windows 10 & 11): You can connect them just like any other Bluetooth headset.
  • Older Laptops Without Bluetooth: You might need a Bluetooth dongle.

So, no matter what laptop you have, chances are high that your AirPods can be paired with it.

Preparing Your AirPods Before Connecting

Now, before you go diving into your laptop settings, there are a couple of things you need to do with your AirPods first. Trust me, this will save you from a lot of frustration later.

Charging and Resetting AirPods

First things first, make sure your AirPods are charged. You don’t want to be halfway through pairing only to realize they’re out of battery. Pop them in the case and check the light indicator. A green light means they’re fully charged, and amber means they still need some juice.

If you’ve already connected your AirPods to another device, like your iPhone, you might want to reset them before pairing with your laptop. Here’s how you do it:

  1. Put your AirPods back in the charging case.
  2. Close the lid and wait for about 15 seconds.
  3. Open the lid.
  4. Press and hold the button on the back of the case until the light flashes white.

That flashing white light is your AirPods telling you, “Hey, I’m ready to connect to a new device.”

How the Pairing Mode Works

Think of pairing mode as AirPods’ way of introducing themselves to your laptop. When that little LED light on the case blinks white, it means they’re visible to nearby Bluetooth devices. This is the exact moment you need to head into your laptop’s Bluetooth settings and start the connection process.

A little tip here: keep the AirPods case open during pairing. If you close it, your AirPods might disconnect before you even finish the setup.

How to Connect AirPods to Laptop on Windows

This is the part most people are eager to know. And yes, connecting AirPods to a Windows laptop is totally doable, even if it feels a little less smooth than on a Mac.

Step-by-Step Guide for Windows 10 Users

If you’re on Windows 10, here’s what you need to do:

  1. Turn on Bluetooth: Go to Start Menu > Settings > Devices > Bluetooth & other devices. Make sure Bluetooth is turned on.
  2. Add a Device: Click Add Bluetooth or other device and select Bluetooth.
  3. Put AirPods in Pairing Mode: Open your AirPods case (with AirPods inside), press and hold the button on the back until you see the white light flashing.
  4. Select Your AirPods: On your laptop, you should now see your AirPods pop up in the list of available devices. Click on them.
  5. Connect: Once selected, your laptop will pair with the AirPods. You’ll get a confirmation message saying “Your device is ready to go.”
  6. And that’s it, you’re all set. Next time you open the AirPods case near your laptop, they should reconnect automatically.

How to Connect AirPods to Windows 11

Windows 11 made Bluetooth pairing a bit smoother, so if you’re using the latest version, here’s how you do it:

  1. Open Settings: Click the Start Menu and open Settings.
  2. Go to Bluetooth Settings: Navigate to Bluetooth & devices.
  3. Turn On Bluetooth: Make sure the switch is turned on.
  4. Add Device: Click Add device > Bluetooth.
  5. Pair AirPods: Just like before, put your AirPods in pairing mode, and select them once they appear in the list.

Windows 11 even shows your AirPods’ battery percentage once connected, which is a neat little feature.

Troubleshooting Common Windows Connection Issues

Sometimes, things don’t go as smoothly as we’d like. Here are some fixes if your AirPods won’t connect:

  • AirPods not showing up: Make sure they’re in pairing mode (white light blinking).
  • Already paired to another device: Disconnect them from your phone or tablet first.
  • Bluetooth driver issue: Update your laptop’s Bluetooth drivers.

Sound coming from laptop speakers instead of AirPods: Go to Sound Settings and manually set AirPods as the default output device.

How to Connect AirPods to Laptop on macOS

If you’re using a MacBook, congratulations, you have the easiest job in the world when it comes to connecting AirPods. Apple designed these gadgets to work perfectly across their ecosystem.

Simple Steps for MacBook Users

Here’s the basic process:

  1. Open your AirPods case with the earbuds inside.
  2. On your MacBook, click the Apple menu and go to System Preferences > Bluetooth.
  3. Make sure Bluetooth is on.
  4. Your AirPods should show up in the list. Click Connect.
  5. Once connected, you’ll see them listed as “Connected” under Bluetooth devices.

The beauty of connecting AirPods to a MacBook is that if you’re already signed into the same Apple ID on your iPhone, iPad, and Mac, your AirPods can switch between them automatically.

Optimizing AirPods Settings on Lapto

Once you’ve successfully figured out how to connect AirPods to laptop, the next thing you’ll want to do is optimize the settings. The default setup works, but if you tweak a few things, your experience can go from “okay” to “amazing.”

Adjusting Sound Settings

After pairing, don’t be surprised if your laptop doesn’t automatically set AirPods as the default audio device.

On Windows, go to the bottom-right corner of your taskbar and right-click the little speaker icon. Select Open Sound Settings, then under Choose your output device, pick your AirPods. This ensures all audio, from Spotify to Zoom calls, routes through your earbuds.

On MacBooks, it’s even simpler. Hold down the Option key, click the sound icon on the menu bar, and select your AirPods as the output device. You’ll notice the sound shifts instantly, and honestly, that crisp audio feels like magic compared to laptop speakers.

One more tip, if you feel the sound is too low, head into your laptop’s Sound Preferences and check the balance between left and right earbuds. Sometimes one side may sound softer, and adjusting the balance fixes it.

Enabling Microphone Use

AirPods aren’t just for listening, they also double as a microphone. If you’re planning on attending meetings or gaming online, this feature becomes a lifesaver.

On Windows, go to Control Panel > Hardware and Sound > Sound > Recording tab. You should see AirPods listed. Select them and set them as the default communication device.

On a MacBook, your AirPods automatically set themselves as the input device once connected. But if they don’t, you can change it in System Preferences > Sound > Input and choose AirPods.

One thing to keep in mind, the microphone on AirPods isn’t studio-quality. It’s perfectly fine for calls and meetings, but if you’re planning on recording podcasts, you’ll want a dedicated mic.

Improving Battery Life

AirPods last a decent amount of time, but when you’re using them with a laptop for long Zoom sessions or movie marathons, you may notice the battery draining quickly.

Here’s how to stretch yours:

  • Use one earbud at a time. If you’re in a long meeting, pop one AirPod in the case while using the other. When it dies, switch.
  • Lower the volume. It not only saves your ears but also extends battery life.
  • Turn off Noise Cancellation (AirPods Pro users). Transparency or normal mode consumes less power.
  • Keep the case charged. It sounds obvious, but forgetting to charge the case means no backup when you need it most.

With these little adjustments, you’ll get the most out of your AirPods without running back and forth for a charger.

Common Problems and Easy Fixes

Even though learning how to connect AirPods to laptop is straightforward, things don’t always go as planned. I’ve run into more than a few hiccups, so let’s look at some common problems and how to fix them.

AirPods Keep Disconnecting

This issue is frustrating, imagine being in the middle of a Zoom presentation and suddenly your AirPods cut out. The usual culprits are:

  • Interference from other devices. If your AirPods are still paired with your phone, they might try switching back. Disconnect them from other devices first.
  • Bluetooth glitches. Restarting Bluetooth on your laptop often helps.
  • Low battery. AirPods sometimes disconnect automatically when the battery is critically low.

A good trick is to remove the AirPods from your laptop’s Bluetooth list and pair them again fresh.

Low Sound Quality Issues

Sometimes AirPods sound amazing, and sometimes they sound like you’re underwater. This often happens on Windows laptops. The reason? Windows splits AirPods into two modes:

  1. Headphones (Stereo): High-quality audio.
  2. Headset (Hands-Free): Lower-quality audio but with microphone support.

If your laptop defaults to “Headset,” the sound will be terrible. The fix is to manually select “Headphones (Stereo)” in your sound settings whenever you want good quality for music or movies. Use the “Headset” option only for calls.

Laptop Not Detecting AirPods

If your laptop doesn’t see your AirPods, don’t panic. Try this:

  1. Make sure AirPods are in pairing mode (white light blinking).
  2. Turn Bluetooth off and back on in your laptop settings.
  3. Restart your laptop.
  4. Reset your AirPods and try again.

Nine times out of ten, one of these steps does the trick.

Tips for a Better Listening Experience

Now that you know the basics, let’s talk about making the most out of your AirPods when connected to a laptop. Because let’s be real, you didn’t buy them just to connect, you bought them for the experience.

Using AirPods for Online Meetings

If you’re like me, you probably spend hours in Zoom, Teams, or Google Meet. AirPods are great for this because they keep background noise out (especially AirPods Pro) and give you freedom to move around.

Here’s a small tip: always check your meeting platform’s audio settings before starting. Sometimes, even though your AirPods are connected, Zoom or Teams may still default to your laptop mic and speakers. Doing a quick sound check saves you from awkward “Can you hear me now?” moments.

Gaming With AirPods

I’ll be honest, AirPods aren’t the first choice for hardcore gamers, but if you’re into casual gaming, they work just fine. The only drawback is a slight audio delay (latency) in some Windows laptops.

If you’re using AirPods for gaming:

  • Stick to casual games where audio timing isn’t critical.
  • For faster response, use a Bluetooth dongle designed for low latency.
  • Avoid using the microphone while gaming if possible, it lowers sound quality.

Watching Movies and Streaming

This is where AirPods shine. Whether you’re watching Netflix, YouTube, or Disney+, the sound quality feels immersive compared to built-in laptop speakers. Plus, you can lie back on your couch without worrying about wires getting tangled.

Pro tip: On Windows, enable Spatial Sound (Windows Sonic) in sound settings. It adds a 3D audio effect, and trust me, it makes action movies feel like you’re inside the scene.

Alternatives and Comparisons

While AirPods are fantastic, it’s worth asking, are they the only choice? Let’s look at some comparisons.

AirPods vs. Other Wireless Earbuds

  • AirPods: Seamless with Apple, good sound, decent mic.
  • Samsung Galaxy Buds: Often cheaper, excellent sound quality, customizable controls.
  • Sony WF-1000XM4: Best noise cancellation, but pricier.
  • Jabra Elite series: Great for work calls, very reliable on Windows laptops.

So, if you’re purely a Windows laptop user, there are alternatives that might give you better integration. But if you also own an iPhone or iPad, AirPods remain the most versatile choice.

Are AirPods Worth It for Laptop Use?

This depends on your usage. If you’re buying AirPods just for a Windows laptop, you might not get full value since you’ll miss Apple-exclusive features. But if you’re using them across devices, phone, tablet, laptop, they’re definitely worth it.

Safety and Maintenance of AirPods

AirPods aren’t cheap, so taking care of them is important if you want them to last.

How to Clean AirPods Properly

Over time, earbuds collect earwax and dust, and this can actually lower sound quality. I clean mine every week with:

  • A soft, dry cloth for the outside.
  • A dry cotton swab for the speaker mesh.
  • A soft-bristled brush for hard-to-reach areas.

Never use water or cleaning sprays directly on AirPods. Moisture can damage them.

Storage Tips for Long-Term Use

When you’re not using your AirPods, always keep them in the charging case. This not only protects them but also keeps them charged and ready. Avoid leaving them in hot places like the car dashboard, it kills battery health.

Expert Tips and Tricks

By now, you’ve got the basics of how to connect AirPods to laptop, but let me share a few extra hacks I’ve learned along the way. These aren’t always written in the manuals, yet they can really level up your AirPods experience.

Using AirPods with Bluetooth Dongles

Some laptops, especially older ones, don’t have strong Bluetooth chips. That’s why connections may feel unstable, or you might hear sound lag during movies and gaming. A simple solution is to use a Bluetooth dongle, a small USB device that plugs into your laptop and boosts Bluetooth performance.

Here’s why I recommend it:

  • Faster pairing times.
  • More stable connection, especially in crowded Wi-Fi/Bluetooth areas.
  • Lower audio latency for games or videos.

Extending Battery Health with Smart Charging

AirPods use lithium-ion batteries, which degrade over time. You can’t replace the batteries easily, so protecting them from early wear is crucial. Here’s what I do to extend mine:

  • Avoid draining them completely. Once they’re at 20%, I recharge them.
  • Don’t leave them plugged in overnight every single day. Instead, unplug once they’re fully charged.
  • Store them in a cool, dry place. Heat is the number one killer of lithium batteries.

Use Apple’s Optimized Battery Charging feature if you’re on a Mac, it learns your charging routine and prevents overcharging.

With a little care, your AirPods can last several years before showing signs of battery fatigue.

FAQs

How do I connect my AirPods to my laptop?

To connect AirPods to a laptop, turn on Bluetooth in your laptop settings, put your AirPods in pairing mode by holding the button on the case until the light flashes white, then select them from the list of available Bluetooth devices. Once paired, they should connect automatically next time.

How to connect AirPods to Windows 11?

Open Settings > Bluetooth & devices, turn on Bluetooth, and click Add device > Bluetooth. With your AirPods in pairing mode, select them from the device list. Windows 11 also shows the battery percentage of your AirPods once they’re connected, which is really handy.

Do AirPods work with Windows PC?

Yes, AirPods work with Windows PCs. They connect like any other Bluetooth earbuds. The only difference is you won’t get Apple-exclusive features like automatic device switching or Siri, but you’ll still enjoy great sound for calls, meetings, music, and movies.

Can I use AirPods as a microphone on my laptop?

Absolutely. AirPods double as a microphone when connected to a laptop. On Windows, go to Control Panel > Sound > Recording and set them as your default mic. On a Mac, this happens automatically once AirPods are selected as your input device.

Why won’t my AirPods connect even though Bluetooth is on?

If your AirPods won’t connect, reset them by holding the case button until the white light flashes, then try pairing again. Also, make sure they’re not connected to another device, since AirPods often auto-connect to iPhones or iPads if nearby.

Conclusion

Learning how to connect AirPods to laptop might seem intimidating at first, but once you do it a couple of times, it becomes second nature. Whether you’re on Windows 10, Windows 11, or macOS, the process is pretty straightforward, turn on Bluetooth, put your AirPods in pairing mode, and select them on your laptop.

The real fun starts once you’ve got them connected: adjusting sound settings, using them for calls and meetings, streaming movies with crisp audio, or even gaming. Sure, you may run into hiccups like poor sound quality or random disconnects, but with a few quick fixes, your AirPods can work seamlessly on any laptop.

Amwins Agent Login – How to Manage Policies

0

If you’re an agent working with Amwins, the login portal is your personal workspace where you can manage policies, access quotes, and keep track of your clients.

Amwins Agent Login

Imagine walking into an office where every file, tool, and resource you need is organized neatly on your desk. That’s exactly what the Amwins Agent Portal feels like once you log in. It’s designed to make our work easier and faster. Without logging in, I would probably spend hours searching for documents, making calls, or sending endless emails. But with the portal, everything is at my fingertips.

So, whether you’re new to Amwins or you’ve been working with them for years, understanding how the login works is a must. And that’s why I’m going to break it down for you in detail, so you’ll never feel stuck when you need to access the portal.

How Much is Homeowners Insurance on a $150000 House
How Much Would a $1000 Payday Loan Cost
Mortgage Lenders have the Lowest Rates
Get a Loan- Find a Loan Lender
Housing Assistance Payments
Mortgage 30 Year Fixed Rate – Find the Best Rates & Info
Mortgage 0 Down – Buy a Home with No Down Payment
Loan Discharge – Understand Your Options & Eligibility
Loan Xpress Pay – Fast Online Personal Loans
Loan 3000 – Get a $3000 Loan Instantly
Loan to Pay Off Credit Cards – Consolidate Debt & Save Money
Mortgage 150k House – How Much House Can I Afford

Why Logging into Amwins Matters for Agents

Logging into the Amwins Agent Portal isn’t just about signing into another website. It’s about unlocking tools that help you stay on top of your work. For example:

  • You can get instant access to insurance quotes.
  • You can manage multiple clients’ policies at once.
  • You can check updates in real-time without calling support.

In short, the login is the gateway to efficiency. If you’re serious about providing the best service to your clients, this is where it starts.

Who Uses the Amwins Agent Portal

The portal isn’t limited to just one type of agent. Independent insurance agents, brokers, and even agencies that partner with Amwins use it daily. Basically, if you work with Amwins, the portal is made for you.

Importance of Amwins Agent Login for Insurance Agents

Now that you know what Amwins is, let’s circle back to the Amwins Agent Login and why it’s such a game-changer. As an insurance agent, my biggest challenges are time management and keeping clients happy. Luckily, the portal helps with both.

Access to Essential Tools and Resources

Once you log in, you get access to a dashboard filled with everything you need: quotes, policies, documents, and even training materials. Instead of juggling multiple systems or calling customer service, you can do it all in one place.

Saving Time and Improving Productivity

The biggest win for me is how much time you save. For instance, generating a quote used to take me hours of research and back-and-forth with carriers. With the Amwins Agent Portal, you can do it in minutes. That extra time means you can focus on actually talking to clients and growing your business.

Enhancing Client Relationships

Clients don’t want to wait. When someone asks me for an update or a new policy option, you can pull up the details instantly through the portal. This makes you look more professional and trustworthy.

How to Access the Amwins Agent Login Page

Now, let’s get into the practical part: actually finding and accessing the login page.

Step-by-Step Guide to Reaching the Login Portal

  1. Open your preferred browser (Chrome, Firefox, Safari).
  2. Type in the official Amwins website URL.
  3. Look for the “Agent Login” option, usually at the top right corner.
  4. Click it, and you’ll be redirected to the secure login page.

That’s it, you’re at the door.

Devices You Can Use for Logging In

The portal is pretty flexible. You can logged in using your laptop, desktop, and even your phone when you’re on the go. The site is responsive, meaning it adjusts depending on your device. But if you want the smoothest experience, I recommend using a computer.

Common Mistakes to Avoid While Logging In

  • Typing the wrong URL: Always make sure you’re on the official Amwins site.
  • Forgetting your credentials: Save them securely or use a password manager.
  • Browser issues: Some outdated browsers may cause glitches, so keep yours updated.

Step-by-Step Process to Log in Successfully

Once you’ve reached the portal, here’s what you need to do.

Entering Your Username and Password

On the login page, you’ll see two fields: one for your username and one for your password. Enter them carefully, remember that passwords are case-sensitive.

How to Handle First-Time Login

If it’s your first time logging in, you might need to set up your account. Usually, Amwins will send you an email with instructions. Follow the link, create a password, and confirm your details. After that, you’re good to go.

Security Measures to Keep Your Account Safe

Keep your login details safe. Use a strong password, enable two-factor authentication if it’s available, and never share your credentials with anyone. After all, this portal holds sensitive client information, and you don’t want that falling into the wrong hands.

Troubleshooting Amwins Agent Login Issues

What to Do If You Forget Your Password

This is the most common problem agents face. Don’t panic if you can’t remember your password, it happens to the best of us. On the login page, you’ll find a “Forgot Password” link. Just click it, enter your registered email, and follow the reset instructions.

One tip I recommend: use a password manager to store your details. It saves you from headaches later and keeps your credentials secure.

Fixing Common Browser-Related Issues

Sometimes, the problem isn’t your password, it’s your browser. I once spent half an hour trying to log in, only to realize that my cache and cookies were causing the issue. Clearing them out solved the problem instantly.

Other fixes you can try:

  • Switch to another browser (Chrome usually works best).
  • Disable any extensions that may block scripts.
  • Always keep your browser updated to the latest version.

Contacting Amwins Support for Help

If nothing works, don’t waste hours stressing. Amwins has a support team ready to help. You can usually find their contact details on the login page itself. When reaching out, make sure to have your agent ID and email handy, it’ll speed up the process.

Features Available After Amwins Agent Login

Now let’s talk about the exciting part: what you actually get once you’re inside the portal. When you log into yur account, it feels like stepping into your insurance “control room.”

Dashboard Overview

The dashboard is the first thing you see after logging in. It’s like a summary of everything important. You’ll find quick links to policies, recent updates, and any alerts that need your attention.

Policy Management Tools

One of the best features is policy management. From here, you can:

  • View active policies
  • Update client details
  • Download policy documents
  • Track renewals

It’s like having a digital filing cabinet, but way more efficient.

Reporting and Analytics

If you’re someone who likes to keep track of performance (like me), you’ll appreciate the reporting tools. You can use them to see which policies are selling best or which clients might need a follow-up. These insights help you plan your sales strategy better.

Security Features of Amwins Agent Login

When dealing with client data, security is non-negotiable.

Two-Factor Authentication

For added protection, Amwins offers two-factor authentication (2FA). This means even if someone guesses your password, they won’t be able to log in without the second verification step.

Data Protection Policies

Amwins follows strict compliance rules to keep client data secure. All information is encrypted, so you don’t have to worry about unauthorized access. As an agent, this gives me peace of mind when handling sensitive policies.

How Amwins Ensures Safe Client Data Handling

On top of encryption and authentication, Amwins also runs regular security audits. This ensures that any loopholes are fixed quickly.

Benefits of Using Amwins Agent Login for Daily Work

Quicker Access to Policies

Instead of calling customer service or waiting for emails, you can access client policies instantly. This saves not just minutes, but sometimes hours.

Streamlined Communication with the Company

Through the portal, you can send and receive messages securely. Whether it’s about claims, quotes, or updates, everything stays in one place. No more messy email chains!

Faster Claims Processing

This one is huge. Claims are usually stressful for clients, and the quicker you can process them, the better. With the Amwins Agent Portal, I can track claims in real time and update clients without delays. It makes me look efficient, and it builds trust with clients.

Amwins Agent Login on Mobile Devices

We live in a mobile-first world, and as an agent. Thankfully, Amwins has made sure the login works smoothly across devices.

Mobile Browser Login

The portal works perfectly fine on mobile browsers. You can use Safari on your iPhone, and the layout adjusts nicely. The features are slightly compact, but everything is accessible.

Is There an App for Amwins Agents?

As of now, Amwins doesn’t have a dedicated mobile app for agents. That said, the browser version works so well that you don’t really miss an app. Still, don’t be surprised if they launch one in the future.

FAQs about Amwins Agent Login

What is the Amwins Agent Login portal?

It’s the online platform that agents use to access policies, quotes, claims, and client information.

How do I reset my password for Amwins Agent Login?

Click the “Forgot Password” link on the login page, enter your email, and follow the reset instructions.

Can I use Amwins Agent Login on my phone?

Yes, you can log in through a mobile browser. There isn’t an app yet, but the browser version works well.

Why is my Amwins Agent Login not working?

This could be due to incorrect credentials, browser issues, or server updates. Try clearing your cache or contacting Amwins support.

What features can I access after Amwins Agent Login?

You’ll get access to your dashboard, policy management tools, client updates, claims tracking, and reporting features.

Conclusion

The Amwins Agent Login isn’t just another portal, it’s a vital tool for insurance agents. It helps me manage policies faster, communicate better, and serve clients more effectively.

The login saves hours each week and gives you the confidence to handle clients with ease. If you’re an agent working with Amwins and you haven’t taken full advantage of the portal yet, you’re definitely missing out.

It’s secure, easy to use, and designed with agents in mind. At the end of the day, it’s not just about logging in, it’s about unlocking a system that makes your work smoother and your clients happier.

Balance.vanillagift.com Activate – How to Activate My Vanilla Gift

0

When you get your Vanilla Gift Card, the first thing you need to figure out is how to use Balance.vanillagift.com Activate. At first glance, it might seem like just another website where you enter some numbers, but trust me, it’s much more important than that. This simple process ensures that your card is not only ready to use but also protected against fraud or misuse.

Balance.vanillagift.com Activate

Think of activation like turning the ignition key in your car, you can’t drive anywhere until you do it. Similarly, without activating your Vanilla Gift Card, you might find yourself stuck at the checkout counter, feeling a little embarrassed when your card doesn’t go through. Nobody wants that, right?

The process itself is pretty straightforward, but many people still make mistakes or skip essential steps. That’s why I want to walk you through it in plain, easy-to-understand language. By the time you finish reading this guide, you’ll know exactly what to do, why you should do it, and how to avoid the common pitfalls people face during activation.

How Much is Homeowners Insurance on a $150000 House
How Much Would a $1000 Payday Loan Cost
Mortgage Lenders have the Lowest Rates
Get a Loan- Find a Loan Lender
Housing Assistance Payments
Mortgage 30 Year Fixed Rate – Find the Best Rates & Info
Mortgage 0 Down – Buy a Home with No Down Payment
Loan Discharge – Understand Your Options & Eligibility
Loan Xpress Pay – Fast Online Personal Loans
Loan 3000 – Get a $3000 Loan Instantly
Loan to Pay Off Credit Cards – Consolidate Debt & Save Money
Mortgage 150k House – How Much House Can I Afford

Why You Need to Activate Your Vanilla Gift Card

So, why go through the trouble of activating your card? Why not just swipe it and get going? Well, activation serves multiple purposes, and I’ll be honest, it’s not just a formality.

1. Security First:

When you activate your Vanilla Gift Card, you’re essentially confirming that you’re the rightful owner. Without activation, the card could be vulnerable to fraud. Imagine someone else somehow gets hold of your card details, without activation, it’s easier for them to misuse it. Activation adds that extra lock and key.

2. Preventing Embarrassment at Checkout:

You don’t want to stand in line at a store, ready to pay, only to have the cashier tell you the card isn’t working. That’s awkward and frustrating. Activation ensures your card is “live” and ready for use.

3. Online Purchases:

Here’s the thing, most online stores won’t even let you use the card unless it’s properly activated. Think of activation as the green light that makes your card compatible with online payment systems.

4. Fraud Protection:

Some Vanilla Gift Cards require you to set up additional security measures during activation, such as verifying your ZIP code. This step helps prevent unauthorized use, especially for online shopping.

In short, activation is not just about getting the card ready. It’s about safeguarding your money, ensuring smooth transactions, and avoiding unnecessary frustration.

Step-by-Step Guide to Balance.vanillagift.com Activate

Alright, let’s get into the meat of it, the actual activation process. Don’t worry, I’ll break it down step by step so you don’t get lost.

Step 1: Visit the Official Website

The first thing you need to do is go to Balance.vanillagift.com. Be careful here, there are plenty of fake sites that try to mimic the real one. Always double-check the web address before entering any card details.

Step 2: Enter Your Card Information

You’ll need the 16-digit card number, the expiration date, and the 3-digit CVV code (the security code on the back of your card). Make sure you enter everything exactly as it appears on the card.

Step 3: Verify Your Identity

Depending on the type of Vanilla Gift Card you have, you might be asked to provide your ZIP code or other information for verification. This step adds an extra layer of protection, especially for online transactions.

Step 4: Confirm Activation

Once you’ve filled in all the required details, hit the activation button. The website will process your request, and in most cases, your card will be ready to use instantly.

Step 5: Keep a Record

After activation, I always recommend jotting down the card number and keeping the receipt or confirmation somewhere safe. If you lose the physical card, this information can help customer support assist you faster.

Alternative Ways to Activate a Vanilla Gift Card

Now, what if you’re not someone who loves dealing with websites? Or maybe you’re having trouble accessing Balance.vanillagift.com? Don’t worry, you’ve got other options.

1. Phone Activation:

There’s usually a toll-free number printed on the back of your Vanilla Gift Card. You can call that number, follow the automated prompts, and activate your card in just a few minutes.

2. In-Store Assistance:

If you bought your Vanilla Gift Card from a retail store, some places allow activation at the counter. All you have to do is ask the cashier or customer service staff, and they’ll guide you through it.

3. Mobile App (if available):

In some regions, Vanilla may offer an app for card management. Through it, you can activate, check your balance, and even track your spending.

These alternatives are especially helpful if you’re not comfortable entering card details online.

Checking Your Vanilla Gift Card Balance After Activation

Once you activate your Vanilla Gift Card, the very next thing you do is check your balance. Why? Because knowing how much money is left on the card is just as important as activating it. Imagine standing at the checkout line, thinking you’ve got $50 on the card, only to find out there’s just $5 left. That’s not only embarrassing but also inconvenient.

The easiest way to check your balance is through Balance.vanillagift.com. Just like activation, it requires your card number, expiration date, and CVV code. Once you enter those details, the site shows you exactly how much money is available on your card. It’s instant and super simple.

But if you’re not near a computer or don’t want to use the website, you’ve got other ways to check:

  • Phone method: Call the customer service number on the back of your card. You’ll go through a quick automated process, and the system will tell you your balance.
  • Registering for online account management: Some Vanilla Gift Cards allow you to create an account. This lets you not only check your balance but also track past transactions.

Always check your balance before making a purchase. It saves you from those awkward moments when your card gets declined simply because you didn’t have enough funds.

Using Your Vanilla Gift Card After Activation

Now that your card is activated and you know your balance, it’s time for the fun part, spending it! But before you rush to use it, let’s talk about how to make the most out of your Vanilla Gift Card.

1. Shopping Online

Using your Vanilla Gift Card online is almost the same as using a debit or credit card. You just enter the 16-digit number, expiration date, and CVV at checkout. However, you might also be asked to enter a ZIP code. This is why it’s smart to register your card online, it prevents errors and makes online shopping smoother.

2. Using It in Stores

When shopping in physical stores, you can swipe or insert your Vanilla Gift Card just like any other card. If the store requires a PIN, you may be asked to set one up during activation or the first time you use it. Some transactions will go through without a PIN, especially if it’s processed as “credit.”

3. Splitting Payments

Here’s a tip that’s saved me more than once, if your card doesn’t have enough money to cover a full purchase, you can ask the cashier to split the payment. For example, if you’ve got $20 left on your card but your bill is $35, you can pay $20 with the card and the remaining $15 with another payment method. Not every store allows this, but many do.

4. Keeping Track of Small Balances

Sometimes you’ll end up with small leftover amounts like $2.50 or $3.20. Instead of letting those go to waste, use them for online purchases where I can enter the exact amount or combine them with another payment option. Even small amounts can come in handy for app subscriptions, e-books, or a coffee purchase online.

Common Problems and Solutions with Vanilla Gift Card Activation

Invalid Card Number Error

Sometimes you’ll enter the card number, and the system will say it’s invalid. This usually means you typed something wrong. Double-check every digit. If it still doesn’t work, the card might not have been properly activated at the store where you bought it. In that case, call customer service.

Declined Transactions After Activation

So you’ve activated your card, but when you try to use it, it gets declined. This could happen if you haven’t registered your ZIP code for online purchases, or if your balance is lower than the purchase amount. Always check both before trying again.

Expired or Inactive Card

Vanilla Gift Cards usually come with expiration dates. If you try to activate a card that’s already expired, it simply won’t work. In this situation, contact Vanilla’s customer service to see if they can replace it.

Website Errors

Sometimes the website itself can be down or overloaded. If Balance.vanillagift.com isn’t working, try again after a while, or use the phone activation method.

Fraud Alerts

If you enter wrong details multiple times, the system might temporarily lock your card for security reasons. Don’t worry; you can resolve this by calling customer service and verifying your identity.

The key is to stay patient and not assume your money is gone, it’s usually just a technical hiccup.

Tips to Keep Your Vanilla Gift Card Safe

1. Treat It Like Cash

If you lose your Vanilla Gift Card and someone else finds it, they can use it, especially if it’s not registered under your name. That’s why I always keep mine in a safe place, just like I would with cash.

2. Register Your Card

When you activate your card, take the extra step to register it with your name and ZIP code on the website. This makes online shopping easier and adds another layer of protection if your card is lost or stolen.

3. Be Wary of Scams

Sadly, gift card scams are everywhere. If someone calls or emails asking you to pay them with a Vanilla Gift Card, that’s a huge red flag. No legitimate company will ever ask you to settle payments that way.

4. Keep Track of Your Balance

Always know how much is left on your card. I make it a habit to check my balance before making big purchases so I don’t end up short.

5. Report Lost or Stolen Cards Immediately

If your card goes missing, call Vanilla customer service right away. If you’ve kept your receipt and card number written down somewhere safe, they can sometimes replace your card with the remaining balance.

By being careful and staying alert, you can use your Vanilla Gift Card stress-free and make the most of it without worrying about security issues.

Vanilla Gift Card Fees and Expiration Rules

1. Purchase Fees

When you buy a Vanilla Gift Card, there’s usually a one-time purchase fee. It depends on the value of the card. For example, a $25 card might come with a $2.95 fee, while a $100 card might have a $5.95 fee. It’s not hidden; it’s right there at checkout. But still, it’s worth keeping in mind because the money you spend upfront is slightly more than the balance loaded on the card.

2. Monthly Maintenance Fees

Here’s the good news: most Vanilla Gift Cards don’t charge monthly maintenance fees, unlike some prepaid cards. But it’s always smart to read the terms printed on the card packaging or check the official website. Sometimes, depending on the type of card, fees may kick in after a certain period of inactivity.

3. Expiration Dates

This part often confuses people. The plastic card itself may have an expiration date printed on it, but the funds don’t actually expire. What this means is that if your card “expires,” you can contact customer service to get a replacement card with the same remaining balance. So your money is still safe—it just requires a little extra effort to access.

4. Replacement Fees

If your card gets lost or stolen, Vanilla might charge a replacement fee. This is another reason why I always keep my receipt and card details written down. It makes the replacement process smoother.

In short, Vanilla Gift Cards are pretty straightforward, but you’ve got to know the rules so you don’t lose money unnecessarily. A little awareness goes a long way in protecting your funds.

How to Use Vanilla Gift Cards Internationally

1. Currency Conversion Fees

If you use your card in another country, the amount you spend will be converted into U.S. dollars. But keep in mind, there might be a currency conversion fee. This fee is usually a small percentage of your transaction. It’s not huge, but if you’re making big purchases abroad, it can add up.

2. Where They’re Accepted

Vanilla Gift Cards are generally accepted anywhere Visa or Mastercard is used. So technically, you can swipe it at most international stores and websites. However, some merchants outside the U.S. might decline prepaid cards due to local restrictions. That’s why it’s always a good idea to have a backup payment method.

3. Online International Purchases

If you’re shopping on international websites, you might run into issues if the site doesn’t support U.S.-based cards. Sometimes entering your U.S. ZIP code during checkout helps, but other times it just won’t work.

4. Travel Tip

If you’re planning to travel abroad and want to use your Vanilla Gift Card, check your balance before leaving and maybe even call customer service to confirm international usage. This way, you won’t face surprises while trying to pay overseas.

So yes, Vanilla Gift Cards can work internationally, but always be prepared for extra fees and occasional limitations.

FAQs About Balance.vanillagift.com Activate

How long does activation take?

In most cases, activation is instant. Once you complete the steps on Balance.vanillagift.com or by phone, your card should be ready to use right away.

Can I activate my card without internet?

Yes! You can call the toll-free number on the back of your card and activate it through the automated phone system.

What if I lost my Vanilla Gift Card before activation?

If you haven’t activated your card yet and you lose it, recovery might be tricky unless you’ve saved the receipt. Always keep your receipt until the card is successfully activated and used.

Why is my Vanilla Gift Card declined after activation?

There are a few reasons: insufficient balance, failure to register your ZIP code for online purchases, or temporary holds placed by certain merchants. Double-check your balance and registration before trying again.

Conclusion

Learning how to use Balance.vanillagift.com Activate is the key to getting the most out of your Vanilla Gift Card. From the moment you receive the card, activation ensures it’s secure, ready to use, and protected from fraud. Whether you’re shopping online, in stores, or even abroad, a properly activated card gives you peace of mind and flexibility.

Yes, there are a few downsides, like limited reloading and occasional fees, but the advantages far outweigh them. Personally, I find Vanilla Gift Cards to be one of the easiest, most practical ways to shop and gift.

TVA Credit Union Login – How to Login Knoxville TVA

0

The TVA Credit Union Login has become one of the most convenient tools in financial life. Think about it, no more rushing to the branch before closing time, no more standing in long queues, and no more waiting for business hours just to check your balance or pay a bill. Everything you need is at your fingertips, right on your phone or computer.

TVA Credit Union Login

Digital banking has truly changed the way we handle money, and TVA Credit Union is a prime example of how this shift benefits everyday people like you. By simply logging in, you can move money between accounts, make payments, or even apply for a loan while sitting in your pajamas at home. That’s the kind of convenience we’ve all grown to appreciate.

How Much is Homeowners Insurance on a $150000 House
How Much Would a $1000 Payday Loan Cost
Mortgage Lenders have the Lowest Rates
Get a Loan- Find a Loan Lender
Housing Assistance Payments
Mortgage 30 Year Fixed Rate – Find the Best Rates & Info
Mortgage 0 Down – Buy a Home with No Down Payment
Loan Discharge – Understand Your Options & Eligibility
Loan Xpress Pay – Fast Online Personal Loans
Loan 3000 – Get a $3000 Loan Instantly
Loan to Pay Off Credit Cards – Consolidate Debt & Save Money
Mortgage 150k House – How Much House Can I Afford

Benefits of Using TVA Credit Union Login

Now, you might be wondering, “Why should I bother using the TVA Credit Union Login instead of just sticking with old-school banking?” Well, let me tell you, it’s like comparing a horse-and-buggy ride to a modern car. Both will eventually get you where you need to go, but one is much faster, easier, and designed for today’s lifestyle.

Here are some of the top benefits:

  • 24/7 Access: No matter if it’s 2 AM or a Sunday afternoon, you can log in anytime to check your balance or transfer money. Gone are the days of waiting until the bank opens.
  • Safe and Secure: TVA Credit Union has strong security systems in place, including encryption and fraud monitoring, so you don’t have to worry about your information falling into the wrong hands.
  • Convenient Payments: Whether you need to pay your credit card bill, set up automatic loan payments, or handle utilities, it’s all right there after login.
  • Mobile Flexibility: you don’t even need a computer anymore. The mobile app allows you to manage everything from your phone, which is a lifesaver when traveling.
  • Financial Tools: Budgeting and spending analysis tools are built into the platform, helping you keep track of where your money goes.

The truth is, using the TVA Credit Union Login saves time, reduces stress, and gives you more control over your financial life. Once you start, you’ll wonder why you didn’t switch earlier.

Step-by-Step Guide to TVA Credit Union Login

Logging into TVA Credit Union is not complicated, but if you’re doing it for the first time, it’s nice to have a clear roadmap.

  1. Go to the Official Website: First, open your browser and head to the TVA Credit Union homepage. You’ll see the login section right there on the front page.
  2. Enter Your Credentials: Type in your username and password. Make sure you enter them correctly, one small typo can lock you out temporarily.
  3. Click Login: Once the details are in, click the login button, and you’ll be directed to your account dashboard.
  4. Verify Security (if needed): Sometimes, you might get a security question or a code sent to your phone for extra protection.

Setting Up TVA Credit Union Online Banking for the First Time

If you’re brand new and haven’t yet set up online banking, don’t worry. Here is how to sign up for an account

  1. Register Online: On the TVA Credit Union website, there’s an option to enroll in online banking. Click that, and you’ll be guided through the setup process.
  2. Verify Your Identity: You’ll need to provide some personal details, like your Social Security number, account number, and maybe a few security questions. This step ensures no one else can sign up in your name.
  3. Create a Username and Password: Choose something unique and strong. Avoid birthdays or simple words that hackers could guess easily.
  4. Set Up Security Features: This includes choosing challenge questions or activating two-factor authentication.
  5. Activate Online Banking: Once you’re done, you can log in immediately and start exploring your new digital account.

If you’ve been on the fence about signing up, I’d highly recommend taking this step, you’ll thank yourself later.

TVA Credit Union Mobile App Login

Here’s how you can get started with the app:

  1. Download the App: It’s available on both the Apple App Store and Google Play Store. Just search for “TVA Credit Union” and download it.
  2. Open and Log In: Once installed, open the app. Enter the same username and password you use for online banking.
  3. Enable Biometric Login (optional): If your phone supports it, you can use Face ID or fingerprint recognition. This makes logging in way faster and just as secure.
  4. Explore the Dashboard: After logging in, you’ll see account balances, recent transactions, and shortcuts to things like bill pay and transfers.

I personally love the mobile check deposit feature. Instead of driving to the branch to deposit a check, you just snap a photo of it in the app, and the funds go straight into my account. That’s a huge time saver.

The app also allows you to:

  • Pay my credit card bill on the go.
  • Get instant alerts if there’s unusual activity.
  • Schedule recurring transfers between my accounts.

Honestly, if you’re not using the mobile app yet, you’re missing out on a lot of convenience. It’s like carrying your personal bank branch in your pocket.

Resetting Your TVA Credit Union Login Credentials

You sit down to log in, type in your password, and suddenly… blank. It’s on the tip of your tongue, but it just won’t come to you. The good news is, resetting your TVA Credit Union Login credentials is simple.

If you’ve forgotten your username:

  1. Go to the login page and click “Forgot Username.”
  2. Enter your account details (like member number and email address).
  3. Follow the prompts to retrieve your username securely.

If you’ve forgotten your password:

  1. Click “Forgot Password” under the login fields.
  2. Provide your username and possibly answer security questions.
  3. You’ll usually get a temporary code via email or text.
  4. Enter the code, then create a brand-new password.

Tips for avoiding future lockouts:

  • Use a password manager to keep track of your logins.
  • Don’t use the same password for your credit union as you do for your email or social media accounts.
  • Update your password every few months for added security.

If you happen to get locked out because of too many failed attempts, you’ll just need to call customer service. They’ll unlock your account after verifying your identity. It’s a minor hassle, but it keeps your money safe.

Security Features of TVA Credit Union Login

Here are the big ones you should know about:

  • Two-Factor Authentication (2FA): This means even if someone somehow guessed your password, they couldn’t log in without also having the code sent to your phone or email.
  • Encryption: All data transferred between your device and TVA Credit Union is encrypted, making it extremely hard for hackers to intercept.
  • Fraud Monitoring: The system actively looks for suspicious activity, like strange logins or odd transactions. If something looks off, they’ll alert you right away.
  • Automatic Logout: If you’re inactive for a while, the system will automatically log you out to prevent anyone else from accessing your account.

With these protections in place, you can feel confident using your TVA Credit Union Login daily without worry. It’s like having a digital security guard watching over your account 24/7.

Common Issues with TVA Credit Union Login

  • Website Downtime: Every now and then, the TVA Credit Union site might be down for maintenance. If this happens, you usually just wait a little while and try again. They normally post notices ahead of time if scheduled maintenance is coming.
  • Incorrect Credentials: The most common issue, honestly. Double-check spelling, capitalization, and make sure Caps Lock isn’t on.
  • Browser Compatibility: Sometimes the site doesn’t play nice with older browsers.
  • Locked Accounts: After too many wrong attempts, the system locks you out. The solution? Call customer support to unlock it.
  • Mobile App Bugs: Occasionally, the app may crash or freeze. Closing and reopening usually fixes it. If not, reinstalling works like a charm.

These issues happen to everyone, and TVA Credit Union has solid support options to help you out.

Managing Your Account After TVA Credit Union Login

  • Check Balances: A quick glance shows you how much you have in checking, savings, and any other linked accounts.
  • Review Transactions: you can always look over recent activity to make sure there are no surprise charges.
  • Pay Bills: TVA Credit Union has an easy bill pay feature that lets you schedule payments for utilities, rent, or subscriptions.
  • Transfer Money: Whether you’re moving money between accounts or sending funds to another member, it’s just a few clicks.
  • Set Alerts: you get a text if your account balance drops below a certain amount or when a payment goes through.

Having all of this in one place makes managing my money stress-free. Instead of juggling paper statements, waiting in line, or worrying about late payments, you can handle everything in under five minutes a day. That’s the kind of efficiency we all need in our busy lives.

Loan and Credit Card Management via TVA Credit Union Login

Here’s how to use the login for your loans and credit cards:

  • Making Payments: Whether it’s an auto loan or a credit card bill, you can pay it instantly through the online portal. No stamps, no waiting.
  • Scheduling Auto-Pay: To avoid ever missing a payment, you set up automatic payments. That way, your loans and cards are paid on time every month without you lifting a finger.
  • Tracking Loan History: You can see exactly how much you’ve paid, what’s left, and even download statements if you need them for your records.
  • Applying for New Loans: The login isn’t just for managing existing accounts, you can also start a new application. When you needed a personal loan for home improvements, you applied right from your dashboard.

For credit cards, the login lets you monitor purchases in real-time. That’s been incredibly useful when you want to double-check where your money is going. You also get alerts if a large or suspicious charge appears, which helps you stay ahead of potential fraud.

TVA Credit Union Login and Financial Tools

  • Budgeting Tools: you can set monthly budgets for categories like groceries, entertainment, or gas. The system tracks your spending and shows you when you’re close to your limit.
  • Spending Analysis: The login provides easy-to-read charts that break down where your money is going. Seeing it visually makes it hit harder, like realizing you spent too much eating out last month.
  • Alerts and Notifications: You can set up email and text alerts for low balances, large withdrawals, and upcoming due dates. It’s like having a personal financial assistant reminding you to stay on track.
  • Savings Goals: You can create digital “buckets” for specific goals, like saving for a vacation or building an emergency fund. Watching those grow is motivating.

These tools go beyond just checking balances, they help you plan for the future. In fact, they your money by showing you areas where you overspending. If you’re someone who struggles with budgeting, logging in and using these features could be a real game changer.

Tips for a Smooth TVA Credit Union Login Experience

  • Keep Your Browser Updated: Old browsers can cause glitches. I’ve noticed that Chrome and Safari work best with the login system.
  • Use a Password Manager: Instead of trying to remember a dozen different passwords, you can use a manager that securely stores them for you. It auto-fills my login details, so you never get locked out.
  • Change Passwords Regularly: Every few months, you can update your password. It keeps you account secure and prevents hackers from guessing.
  • Avoid Public Wi-Fi: When you need to log in away from home, you can use your phone’s data instead of public networks. Coffee shop Wi-Fi might be convenient, but it’s not safe for banking.
  • Enable Biometric Login: On the mobile app, you can use fingerprint login. It’s faster than typing a password and adds an extra layer of security.
  • Clear Cache and Cookies: If the website is acting weird, clearing the cache usually fixes it.

Following these steps has made logging in quick, smooth, and safe every time. Trust me, a few simple habits go a long way in avoiding unnecessary headaches.

FAQs

How do I use ktvaecu ® online banking?

To use ktvaecu ® online banking, simply enroll through the TVA Credit Union website, create your login credentials, and sign in. Once logged in, you can check balances, transfer money, pay bills, and even deposit checks from your computer or phone.

How do I pay my ktvaecu ® loan or credit card?

You can pay directly through the online portal by logging in, selecting your loan or credit card, and scheduling a payment. You can also set up auto-pay for convenience.

Does tvacreditunion offer a full disclosure?

Yes, tvacreditunion provides full disclosure of fees, terms, and account details. This information is available on their website and through your login dashboard.

Does ktvaecu charge a payment fee?

Most standard loan and credit card payments through the TVA Credit Union Login are free. However, certain expedited or third-party payments may carry a small fee.

How do I contact ktvaecu card support?

You can reach ktvaecu card support by calling the customer service number listed on the TVA Credit Union website or on the back of your card. Support is also available via secure messages once you log in.

Conclusion

At the end of the day, the TVA Credit Union Login is more than just a portal, it’s a financial lifeline. From checking balances and paying bills to applying for loans and setting budgets, everything you need to manage your money is just a few clicks away.

It secure, easy to use, and surprisingly empowering. Instead of stressing over due dates, worrying about fraud, or feeling tied to branch hours, you can handle everything on your own schedule.